How To Install Lightroom Presets for Desktop
Disclaimer: Hey there, friend! This article includes affiliate links & I would LOVE if you decided to use them. Affiliate links + referrals programs help creators and educators like me to fund the free content that we provide on our blogs. Thank you for your endless support!
Adobe Lightroom is the most widely known editing software for photographers in the world today. This advanced editing suite offers a wide range of tools to help you get as much detail as possible from your photos. In Lightroom, you can apply “Presets” to photos, which are essentially filters that you can apply to achieve a certain look. Once installed, presets can simplify your editing process and free up the amount of time you spend in post-production. If you don’t have Lightroom installed, you can purchase the Adobe Creative Cloud Photography plan on Amazon. This includes a 1 year subscription to both Adobe Lightroom and Adobe Photoshop, along with 20 GB of storage.
There are a few different methods you can choose to install Lightroom presets, and the option you choose will vary based on which version of Lightroom you have installed. Below, I’ve listed step-by-step instructions for each version of Lightroom. These steps will walk you through How to Install Lightroom Presets to Adobe Lightroom in just a few minutes!
Please note: this article covers how to install Lightroom Desktop presets. If you need help installing Lightroom Mobile presets, please contact me and I would be happy to send you a quick guide. I’ve also included a form at the bottom of this article which you can fill out to receive 8 free Lightroom presets.
Feel free to skip to any specific section using the links below. :)
Table of Contents
Option 1: How to install Lightroom Presets for Lightroom Classic CC (Mac & PC)
Below are step-by-step installation instructions for Lightroom Classic CC. Keep in mind that Lightroom presets will come in a compressed ZIP file, so you will first need to unzip and extract them.
1. Open Lightroom.
2. If you are using a Mac, open Preferences in Lightroom. If you are using Windows, select Edit, then Preferences.
3. Select the Presets tab in the Preferences box.
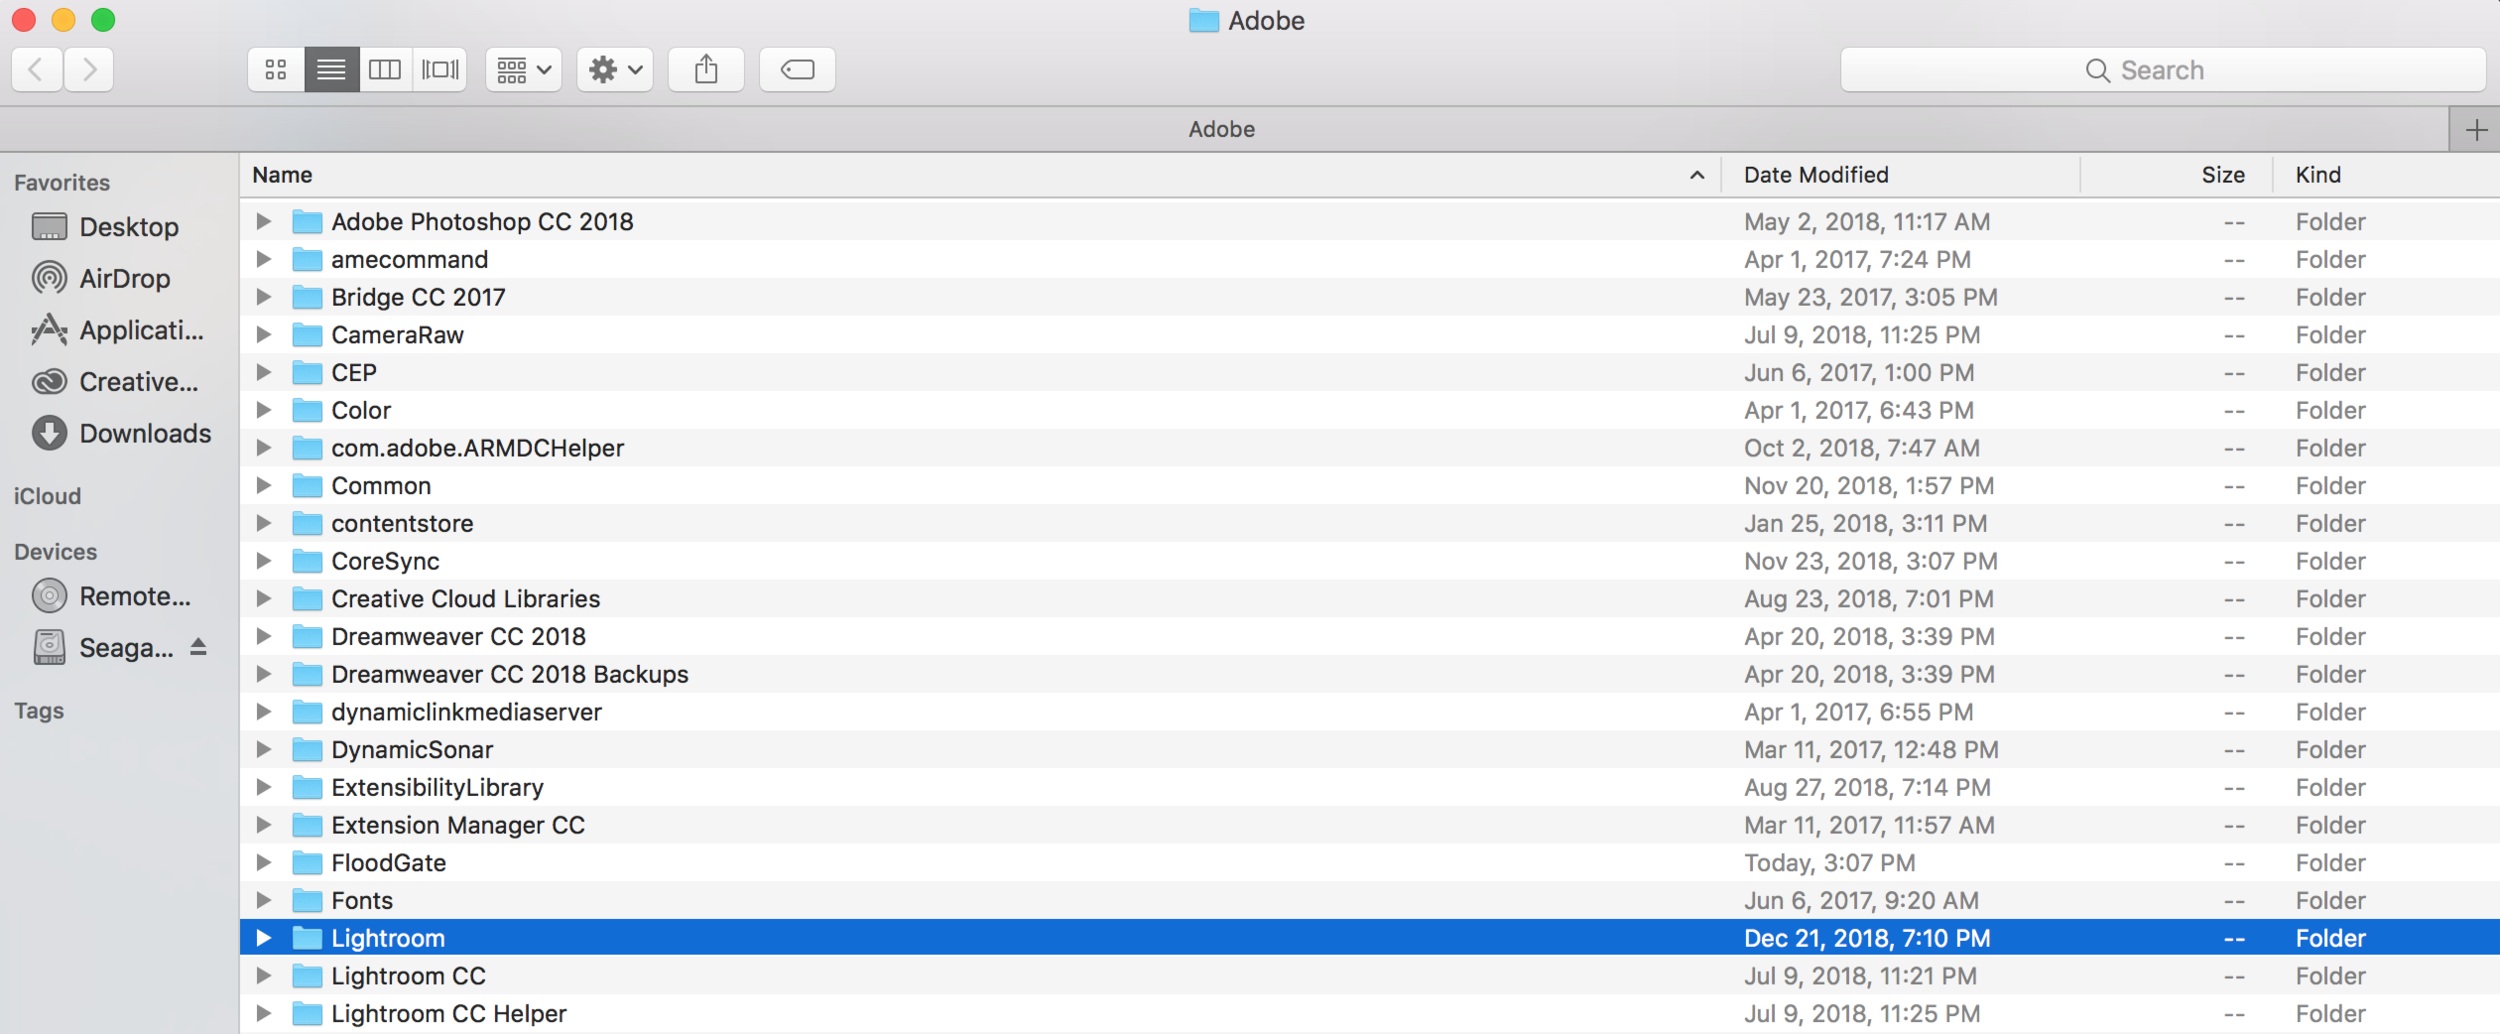
4. Select ‘Show Lightroom Presets Folder…’ and then open the Lightroom folder.
5. Open the ‘Develop Presets’ folder. You can then easily copy and paste or drag your presets into this folder.
6. Close Lightroom and then re-open. Once you restart Lightroom, your presets will display in the Develop Module on the left-hand side of your screen (under the Presets section).
You will now be able to quickly and easily access your Lightroom presets and use them to enhance your photos.
Option 2: How to install Lightroom Presets for Lightroom Classic CC Versions 4, 5, 6, and 7 (Mac & PC)
1. Open Lightroom and head to the Develop Module.
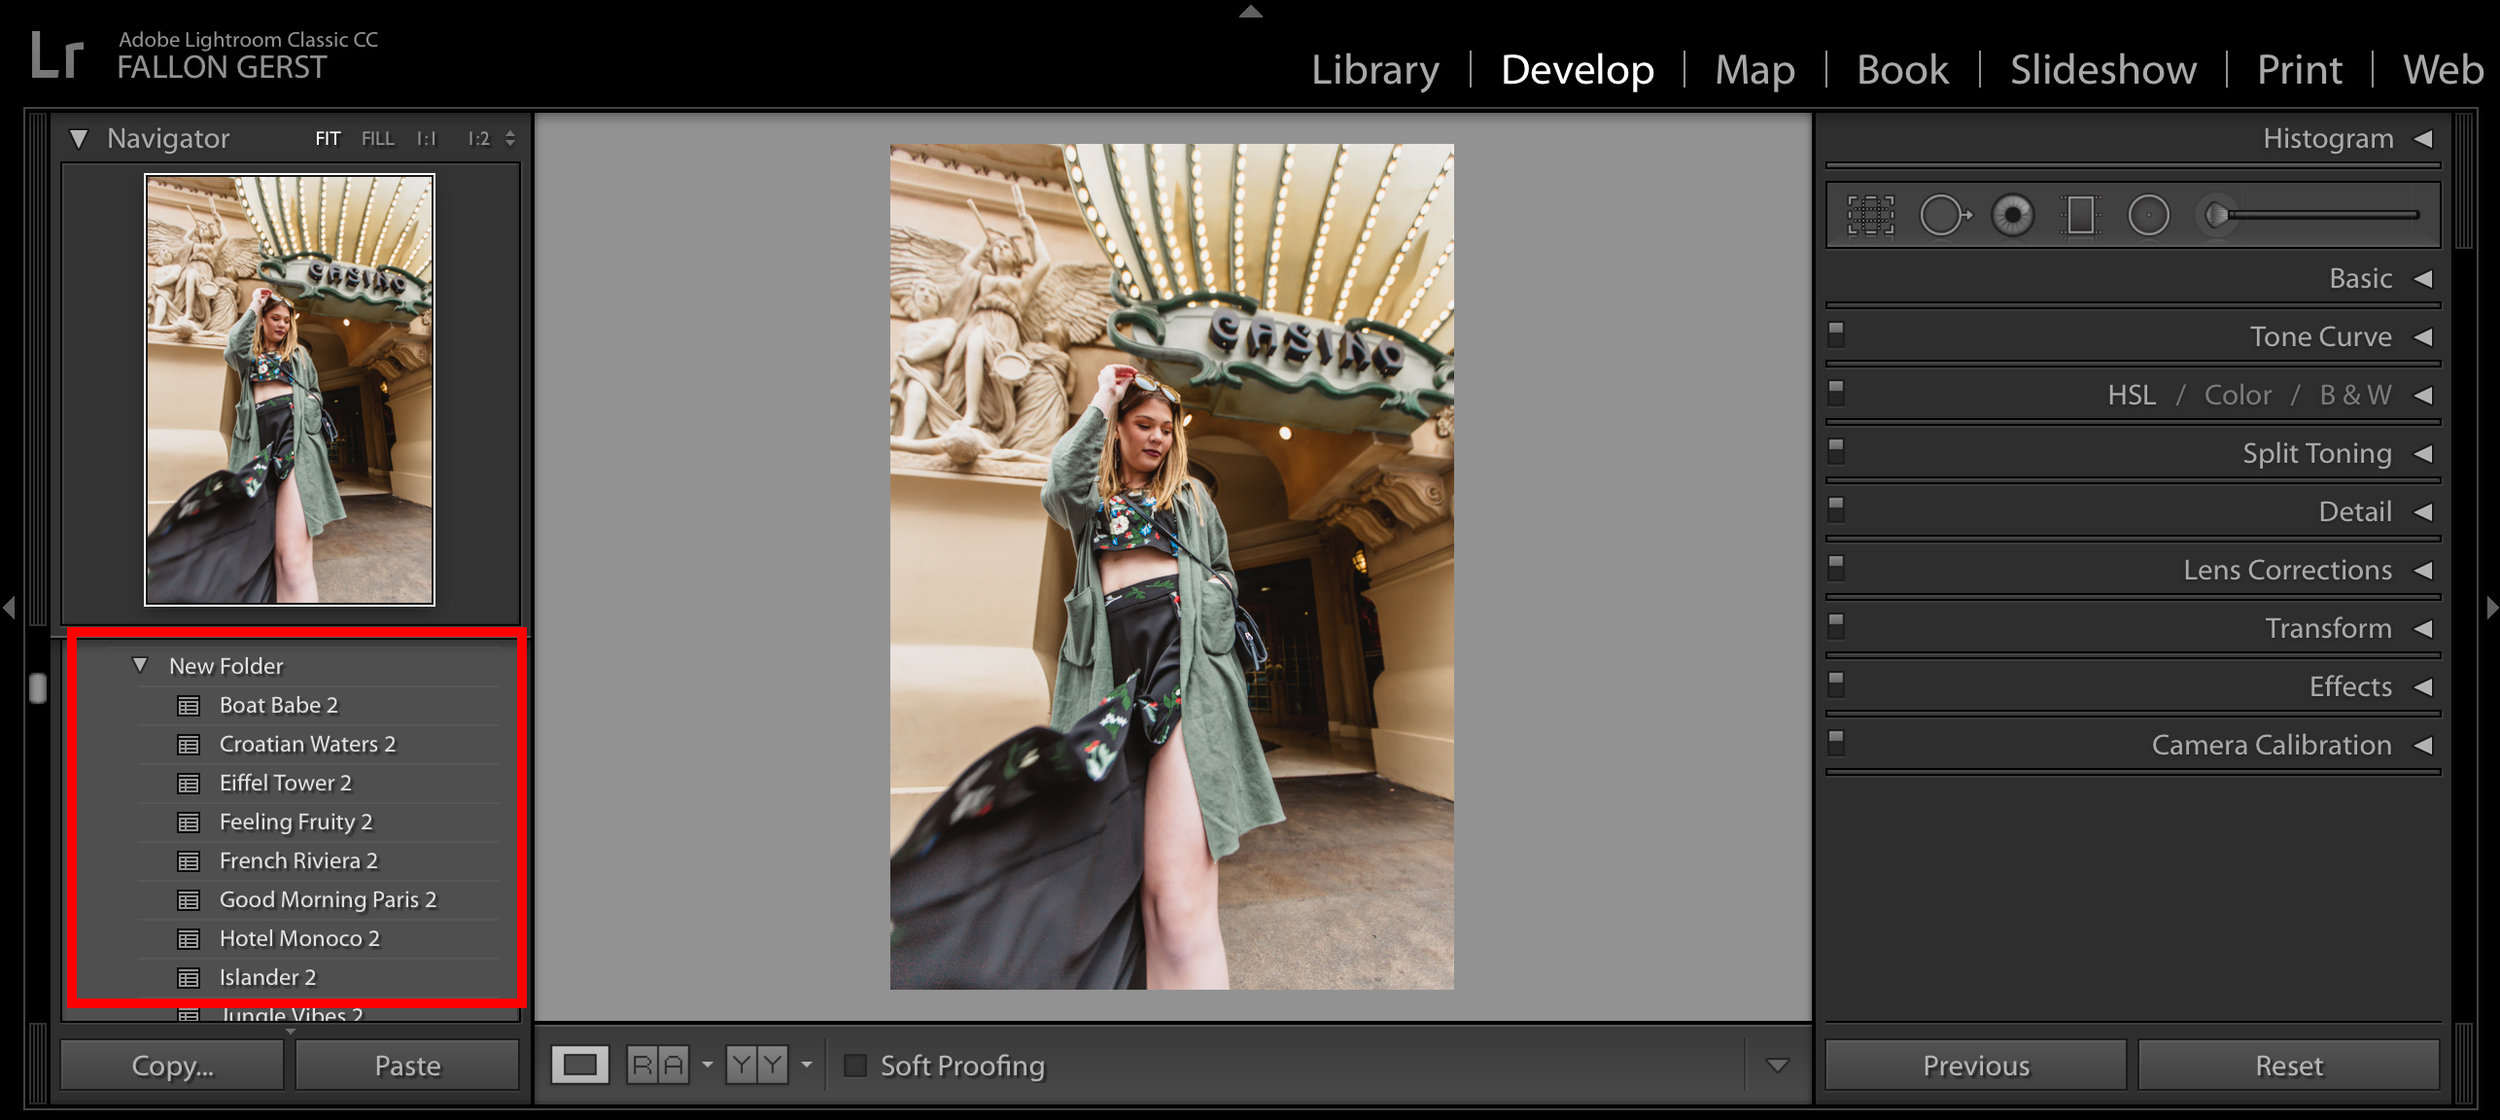
2. Hover over the Presets section and Ctrl right-click to create a New Folder.
3. Ctrl right-click on the “New Folder” (which you can rename later) to import the unzipped presets into Lightroom.
4. Go to the area where you saved the Lightroom presets folder (this would usually be your “Downloads” or “Desktop” folders). Make sure the folder is unzipped, then select all of the .lrtemplate files and select “Import”.
5. You will now be able to use your presets for Lightroom CC!
Option 3: How to install Lightroom Presets for Lightroom CC (Mac & PC)
Please note: This set of instructions will cover how to install Lightroom CC, meaning that you do not use any version of Lightroom Classic CC.
1. Open your Lightroom CC software and go to the Editing section (indicated by three horizontal lines).
2. Open the Presets section. Select the Presets bar at the bottom of the Editing section.
3. Select the three dots and choose “Open Presets Folder”.
4. Copy and paste your downloaded and unzipped presets into the “Develop Presets” folder.
5. Close and reopen your Lightroom CC application. Once restarted, you can apply your presets!
Final Thoughts on Lightroom Presets
It’s probably no secret that I am a huge advocate of Lightroom presets! Once installed, presets can simplify your editing process and free up the amount of time spent in post-production.
However, it’s important to note the following: While Lightroom presets are a great starting point, they will almost never be a “one-click and done” process. Instead, use your presets as a starting point for your photo, then fine tune the settings for each individual image. Because every image is different, you will simply not be able to use a “one size fits all” approach to Lightroom presets. More often than not, the white balance or exposure of the photo will need to be adjusted after applying a preset. Fortunately, this can be accomplished easily using the sliders in the Develop Module. You will need to play around with the tools in Lightroom and find a happy medium for your photo edit!
Download Free Lightroom Presets
Receive 8 free Lightroom presets (.lrtemplate files); simply drop your email below and your free presets will be on their way to your inbox!
I hope this guide on How to Install Lightroom Presets for Desktop has been helpful for you! If you have any questions at all about Adobe Lightroom presets or the installation process, feel free to drop a comment below and I will get back to you as quickly as possible!
Hi there! I’m Fallon. A Florida native who, after receiving my masters degree in the U.K., decided to nix the 9-5 path in search of something more. Now, I run my graphic and web design business straight from my laptop, all while traveling the world. I’ve now traveled to over 25 countries and have knocked some pretty big adventures off my bucket list… and I’m just getting started. Follow along my journey as I present tips, guides and resources on solo female travel, photography, videography, entrepreneurship & the crazy lifestyle of a digital nomad.


