How to add presets to Lightroom Mobile — Tutorial + 3 FREE presets
Below, I’ve listed step-by-step instructions that will walk you through How to add presets to Lightroom Mobile in just a few minutes!
I’ve also provided access to 3 of my best-selling Lightroom Mobile Presets for absolutely FREE! Cheers. :)
Buuut if you want to skip the freebies and go straight to my premium presets, feel free to check out the goodies in my Lightroom Preset Etsy Shop!
Feel free to skip to any specific section using the links below. :)
Table of Contents
Please note: this article covers how to install Lightroom Mobile presets. If you need help installing Lightroom Desktop presets, feel free to check out this article!
1. How to add presets to Lightroom Mobile 2019 (Video)
I finally created a detailed video tutorial on how to add presets to Lightroom CC Mobile (iPhone)! Make sure to snag my free presets (below) and then follow along my YouTube video to get started with your presets today!
P.S. Make sure to subscribe to my channel for future Lightroom tutorials... along with tips for navigating life as a creative business owner ;)
2. Download Lightroom CC Mobile App & Dropbox App
Okay so before we begin, you’ll need to make sure you have both the free Lightroom CC Mobile app and the free Dropbox app installed on your phone. These are available for both iPhone and Android users.
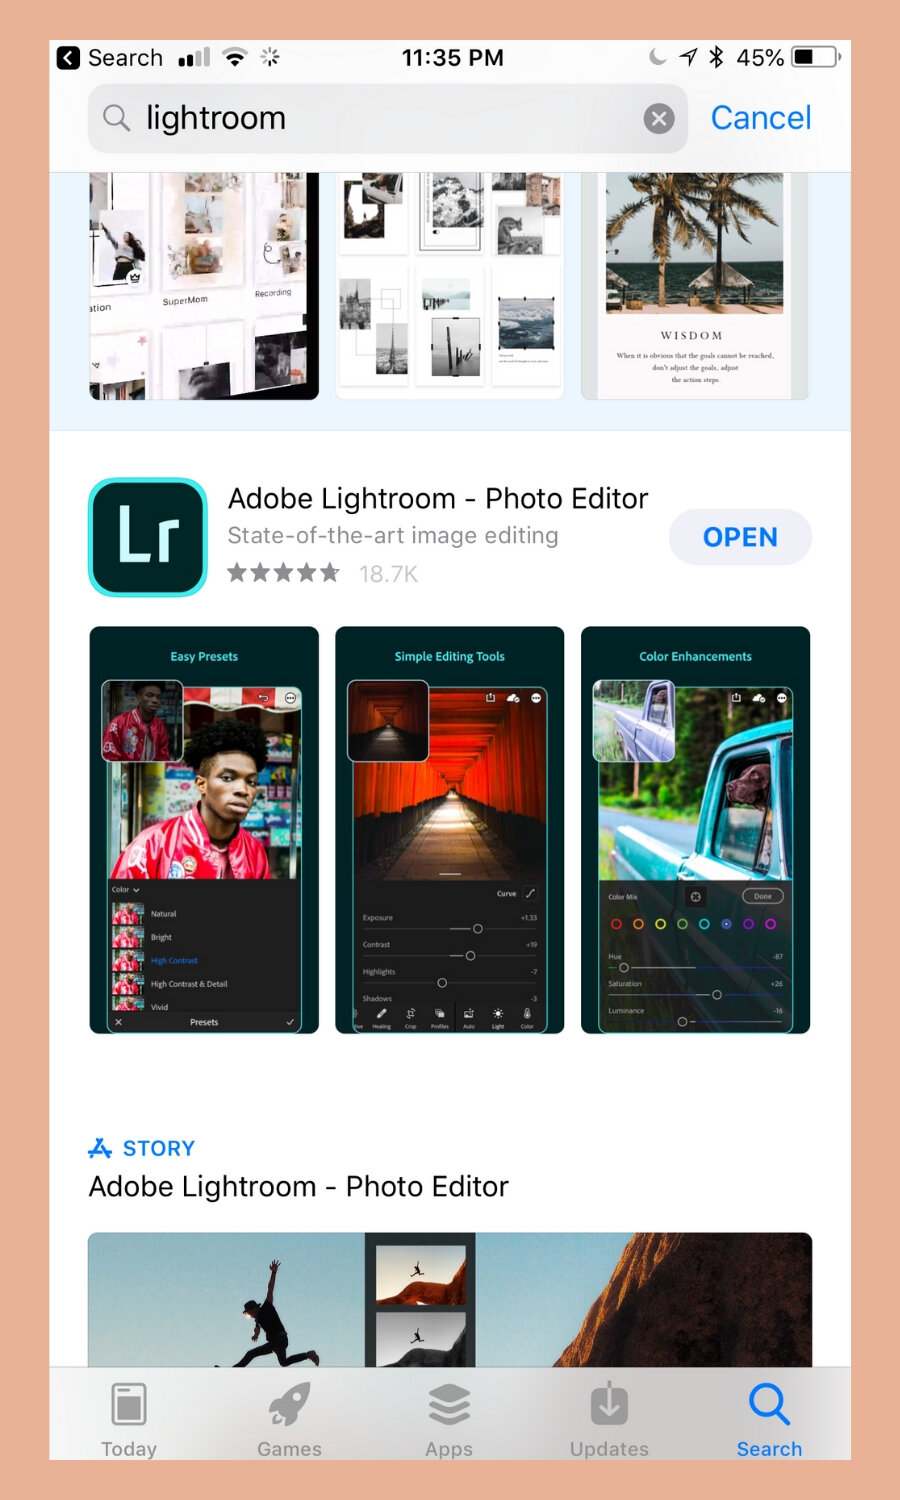
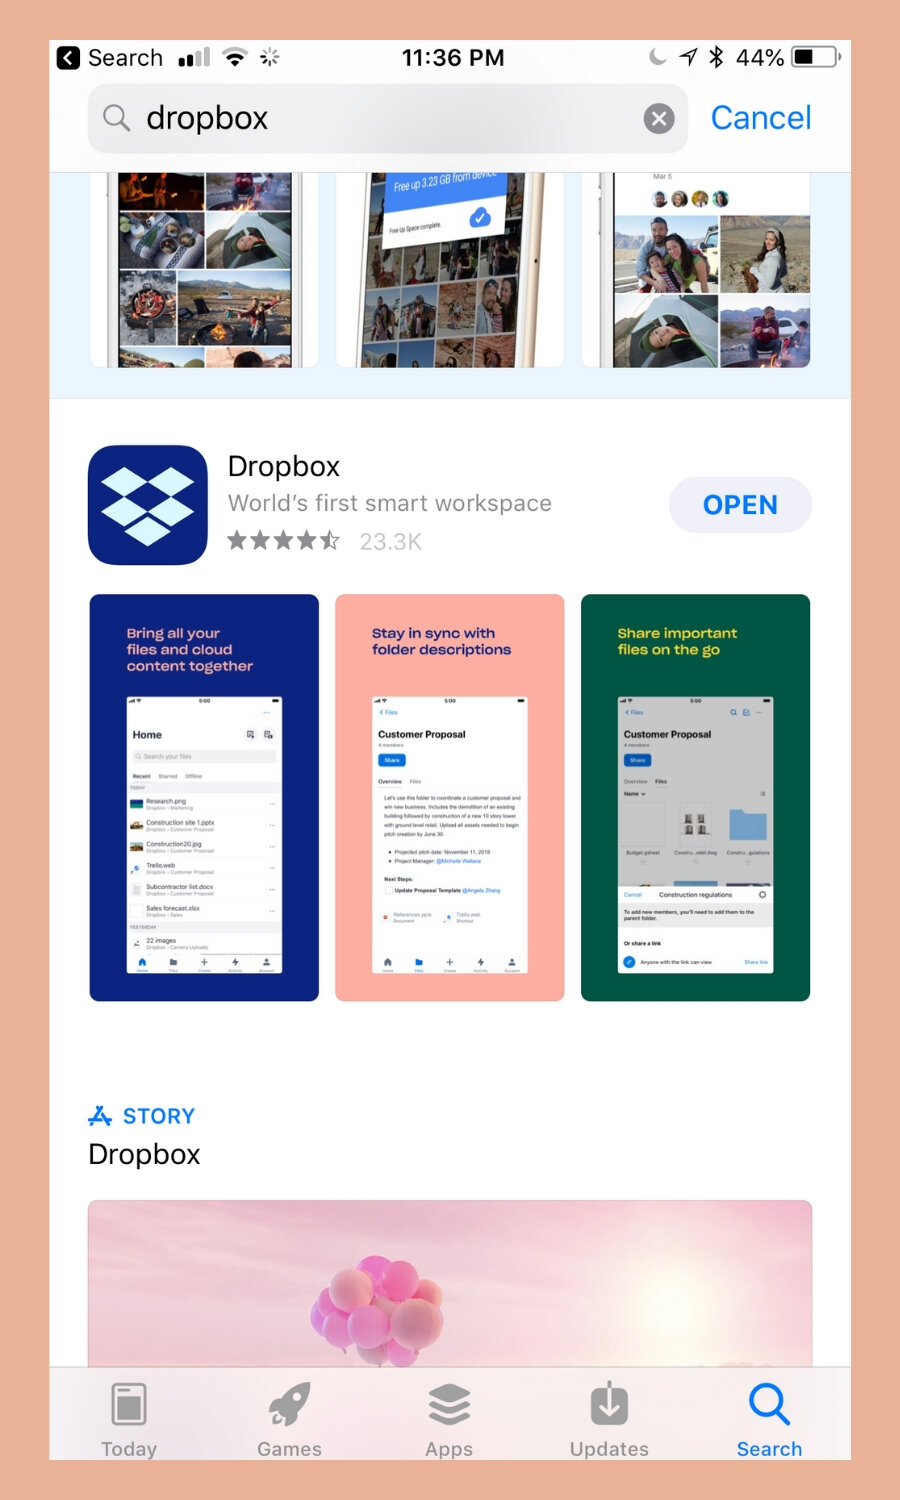
Here’s the download links in case you need them:
You’ll also need to make sure you’ve created a free account in Lightroom before you can start using the app (its super quick & simple to setup so don’t stress!).
3. Download Free Lightroom Mobile Presets
Before you can add presets to Lightroom mobile.. you’ll first kind of need access to some. ;)
Download my FREE Lightroom Mobile Preset Guide — this guide will contain the Dropbox link to 3 of my best-selling, completely free Lightroom Mobile Presets (in DNG format).
These are about to change your photo editing game— you’re welcome. ;)
Get your FREE Lightroom Mobile CC presets by adding your email below:
4. Click PDF link to Open Presets in Dropbox
Once you’ve downloaded my FREE Lightroom Installation PDF (see above), you’ll need to go to the FIRST page.
You’ll need to select “Download your presets here” and you’ll be directed to the Dropbox App. If you’re not immediately re-directed, follow these steps:
Select “View In App” at the top of your screen
Click open
This will redirect you to the free Dropbox app
Go ahead and select DNG files
Just a quick note: The preset pack I’m using for the screenshots below is my Influencer Mobile Collection which contains 25 DNG mobile presets. My free mobile set only contains 3 presets, so the actual presets shown below are gonna look slightly different. But the setup process will be exactly the same!
5. Save DNG Presets to Camera Roll
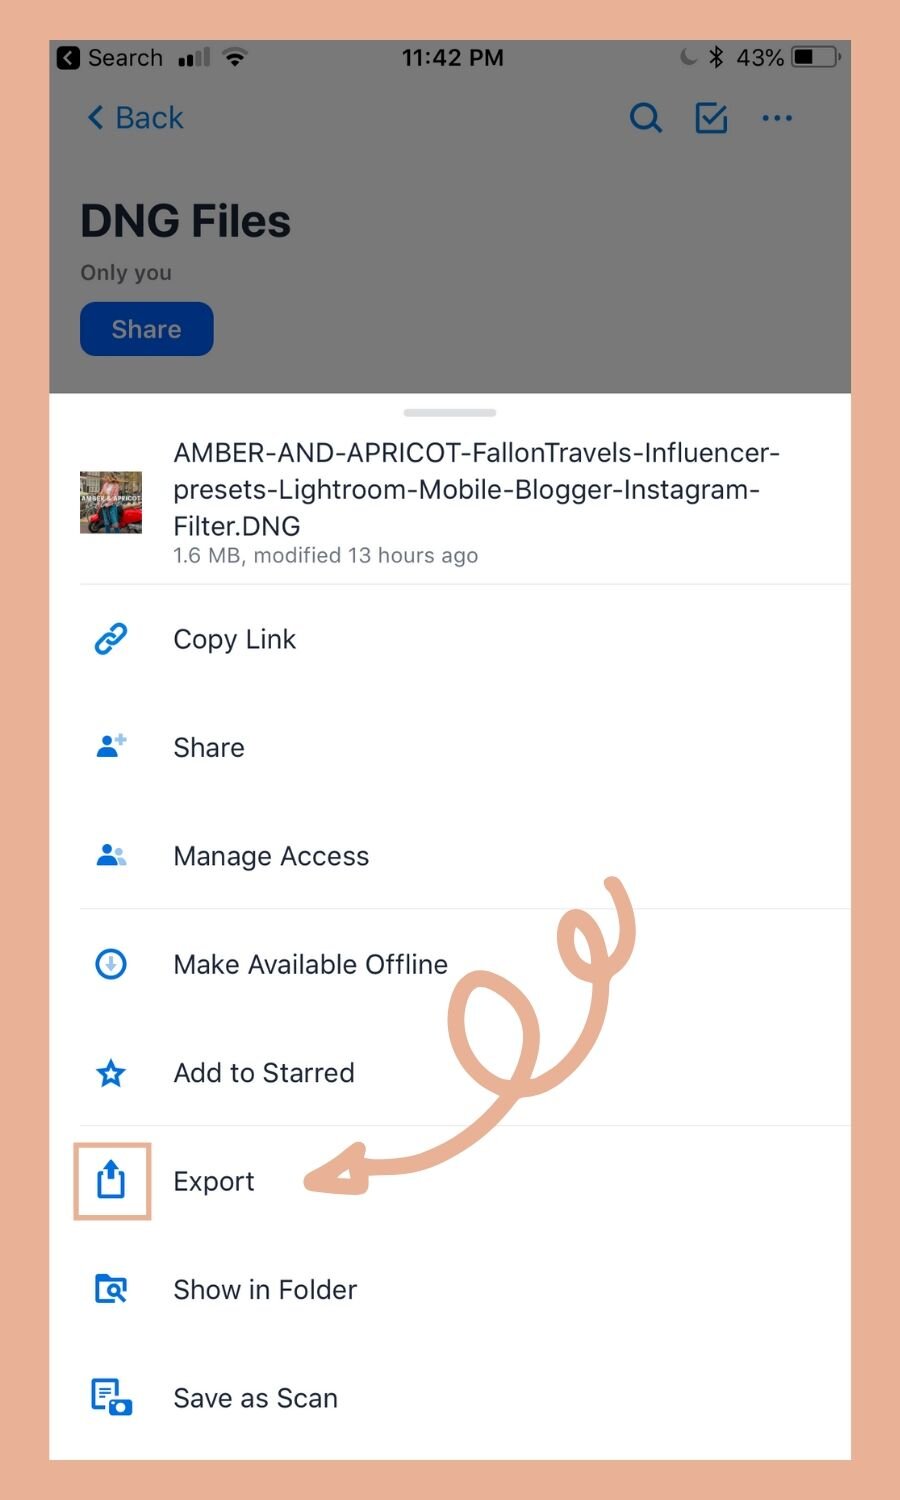
On the right of each DNG preset you're gonna see three dots.
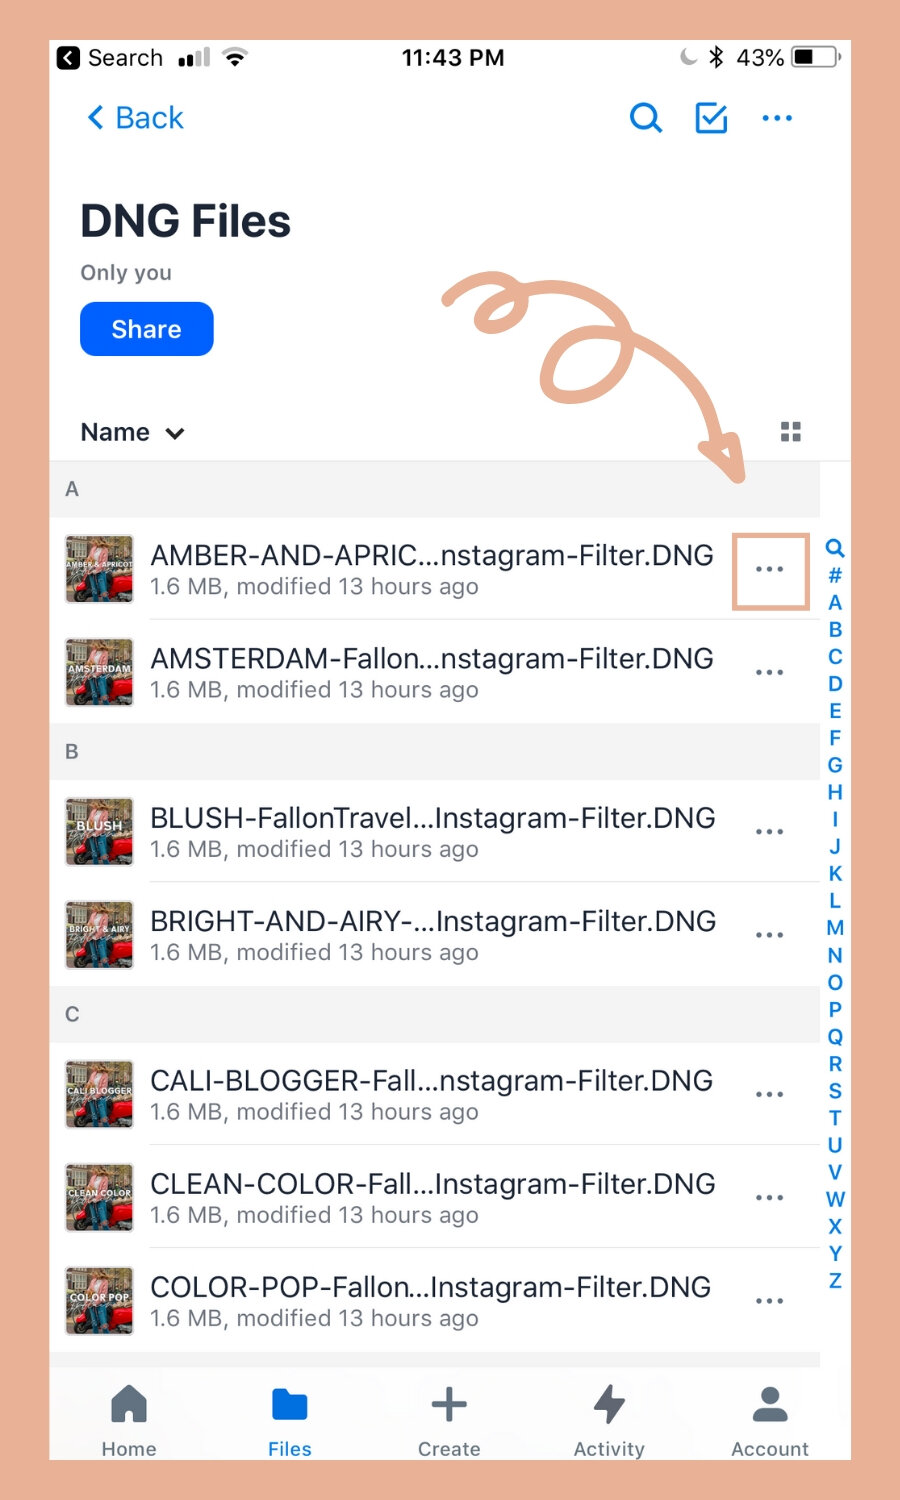
Click on any one of the presets and then select Export.
Select the button that says Save Image.
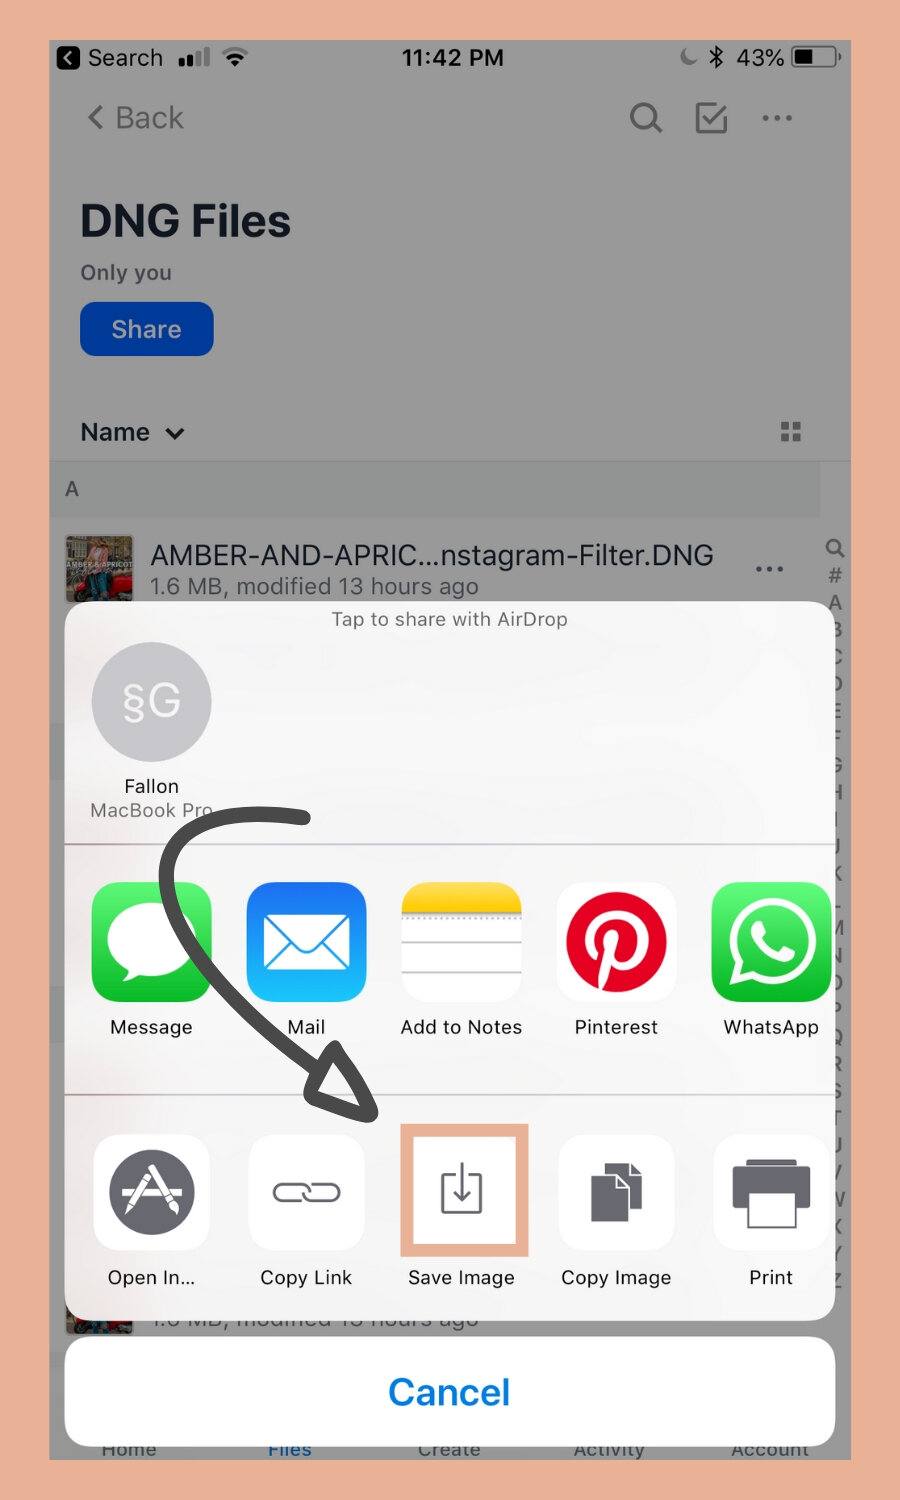
Make sure that you have each DNG file saved to your camera roll and then head on over to the Lightroom mobile app once you have them all saved.
6. Import Mobile Presets to Lightroom
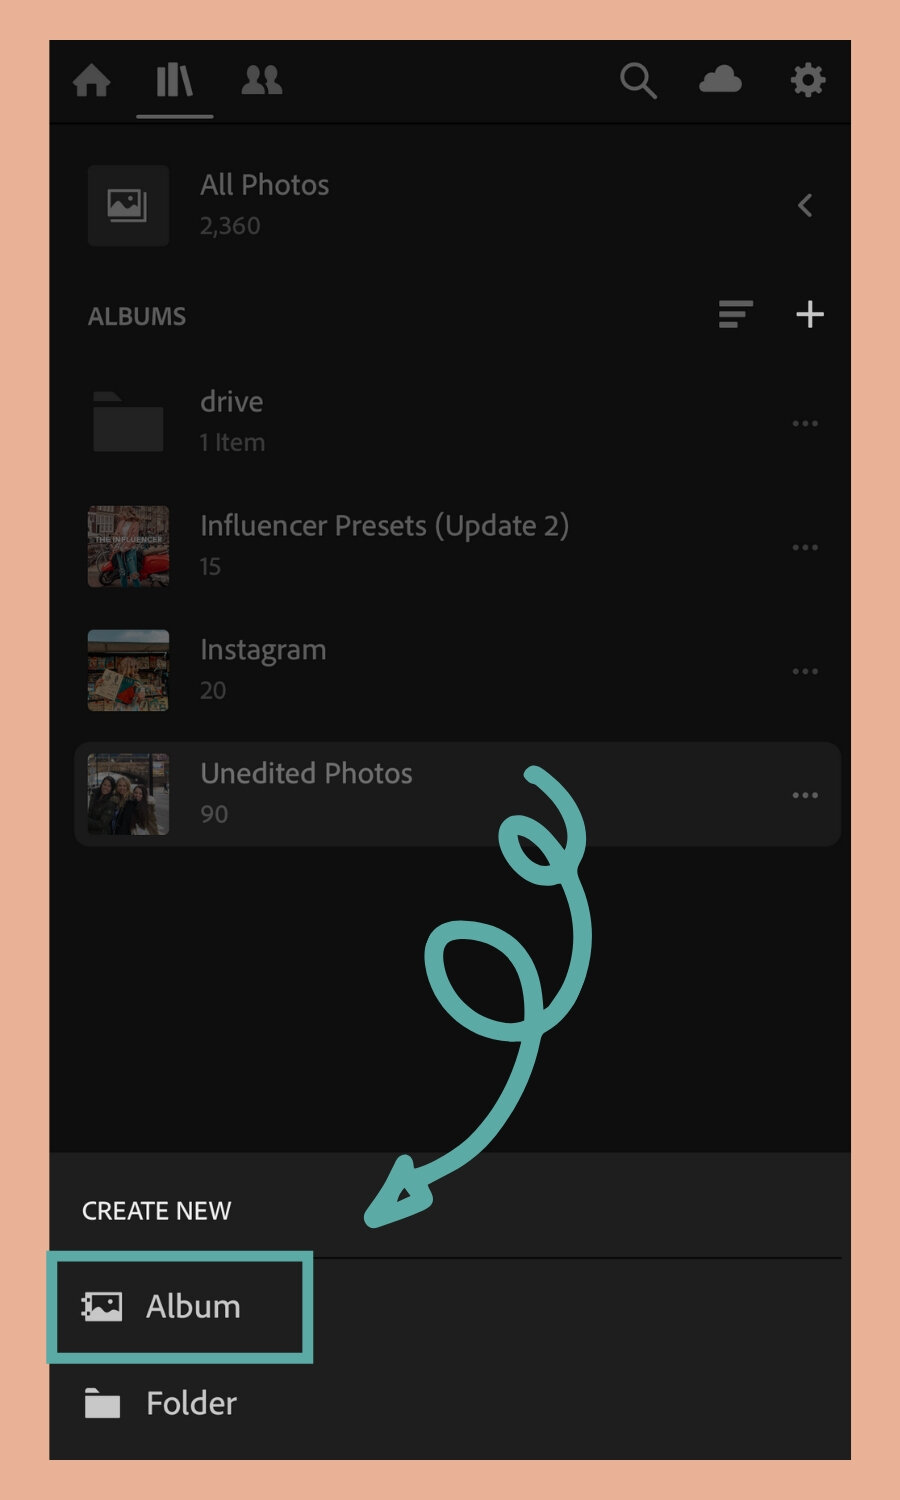
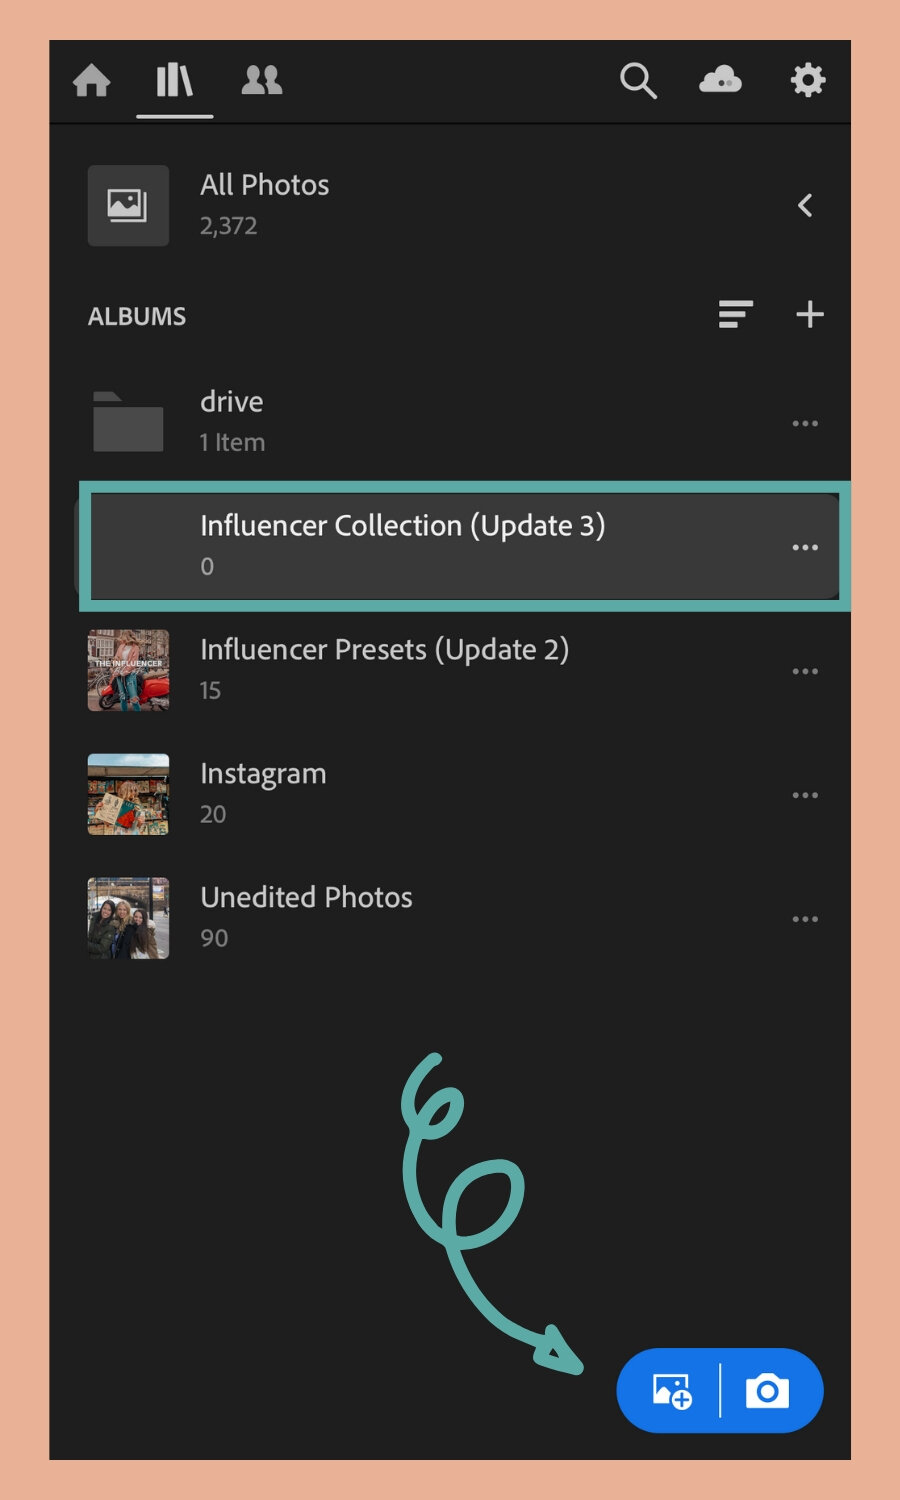
Once you're in the Lightroom mobile app you'll see an album section.
Click the plus icon to the right of albums

You’ll see a popup at the bottom of your screen that says Create New with Album and Folder as the options listed.
Choose “Album”.
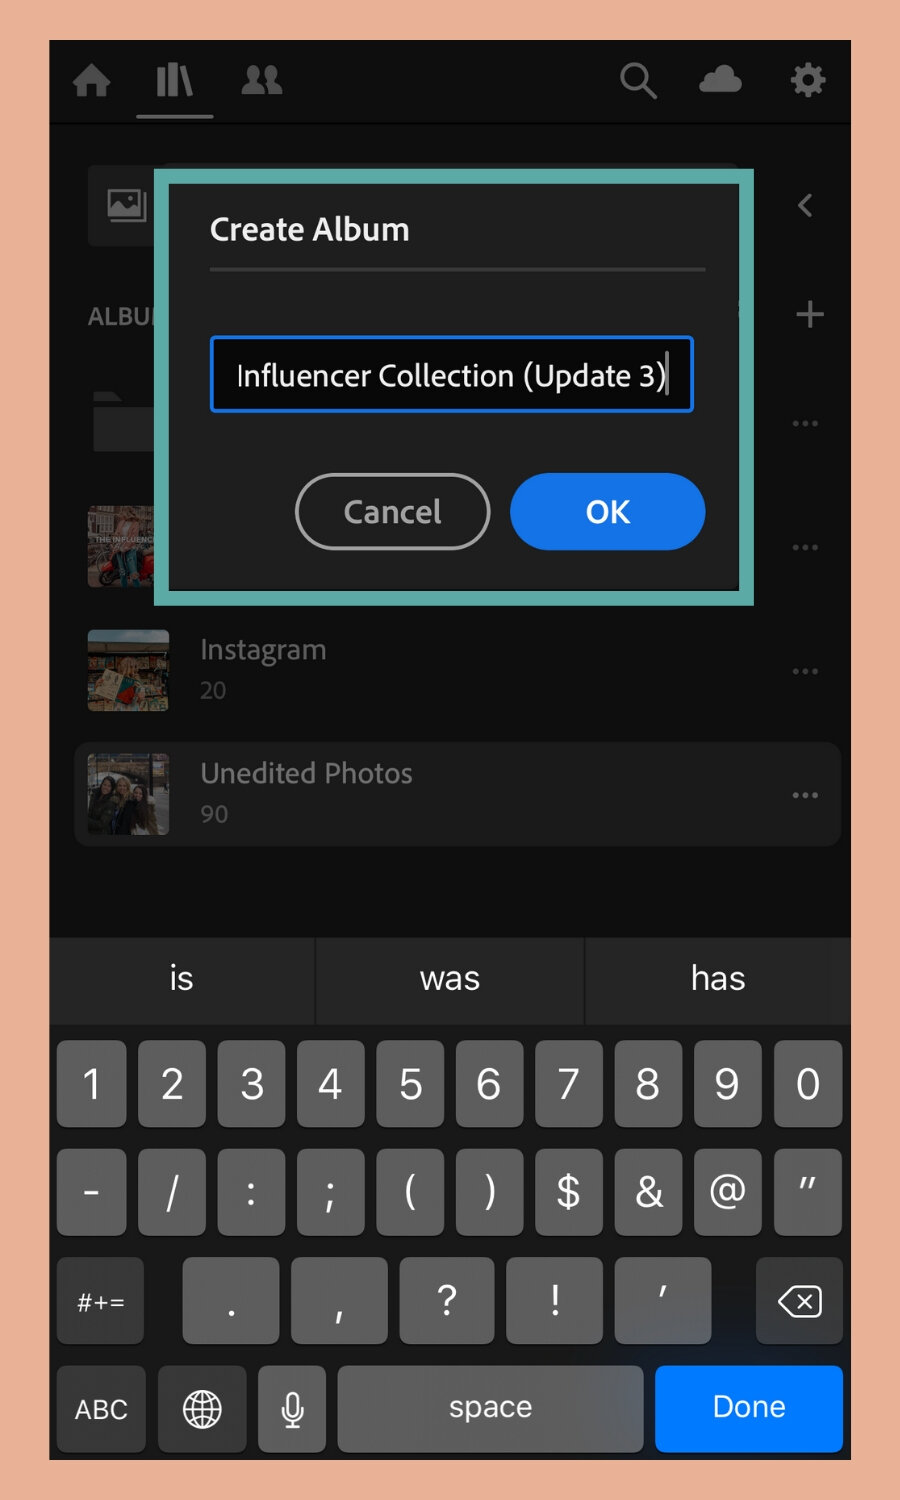
You’ll see a new form field pop up on your screen that says Create Album. Type any name that you’ll easily remember for your presets!
Click OK.
Select the album you just created and you'll see two blue buttons at the bottom right hand corner of your screen.
Click the one to the left.
You’ll see an “Add Photos” section appear at the bottom of your screen with From Camera Roll, From All Photos and From Files as the options listed.
Choose “From Camera Roll”.

Click the Add Photos button at the bottom of your screen.

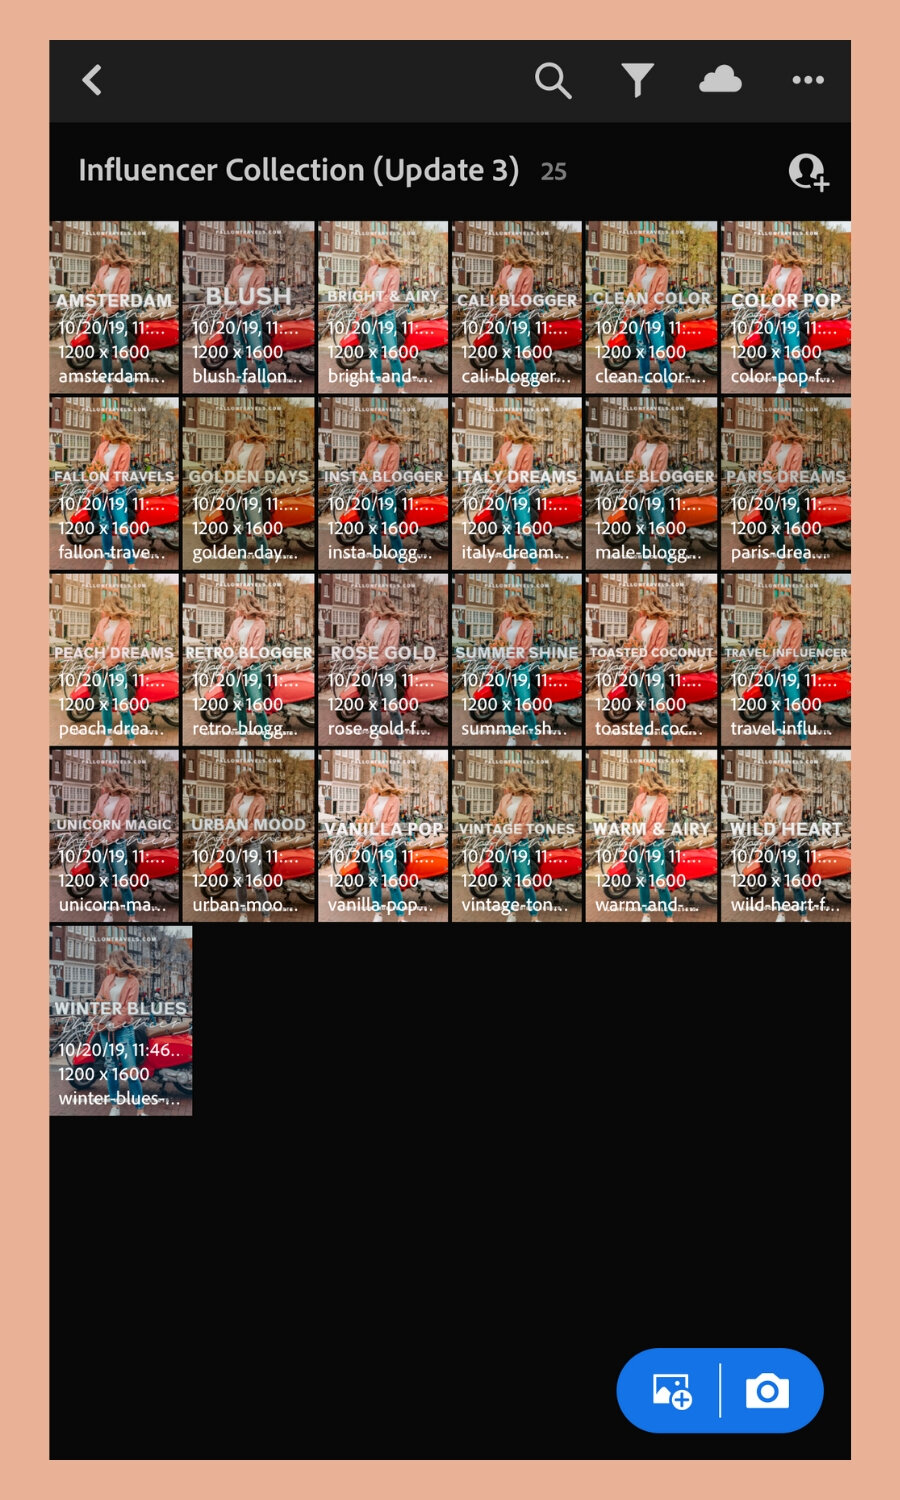
Now these will import into the album.
7. Copy & Paste DNG Preset Settings
So you have a couple of options here. The first one is to copy and paste the settings onto your photo. If you don’t want to copy & paste the settings each time, then skip to the “Save Presets to Lightroom Mobile” section.
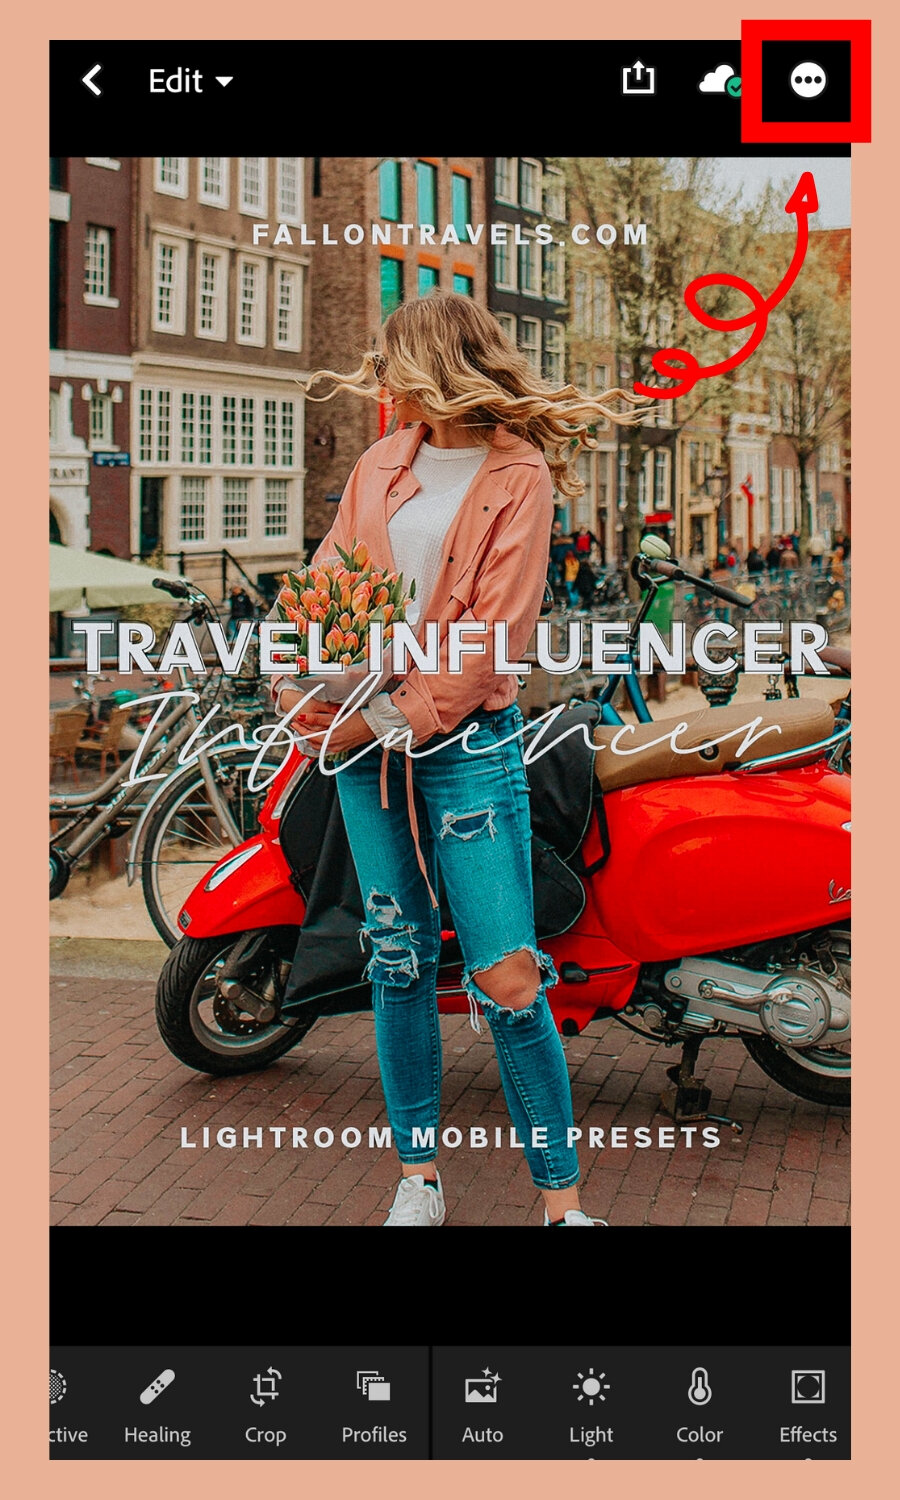
The first thing you’ll need to do is select any DNG file from the preset album.
Click the circle button in the top right hand corner with three dots.
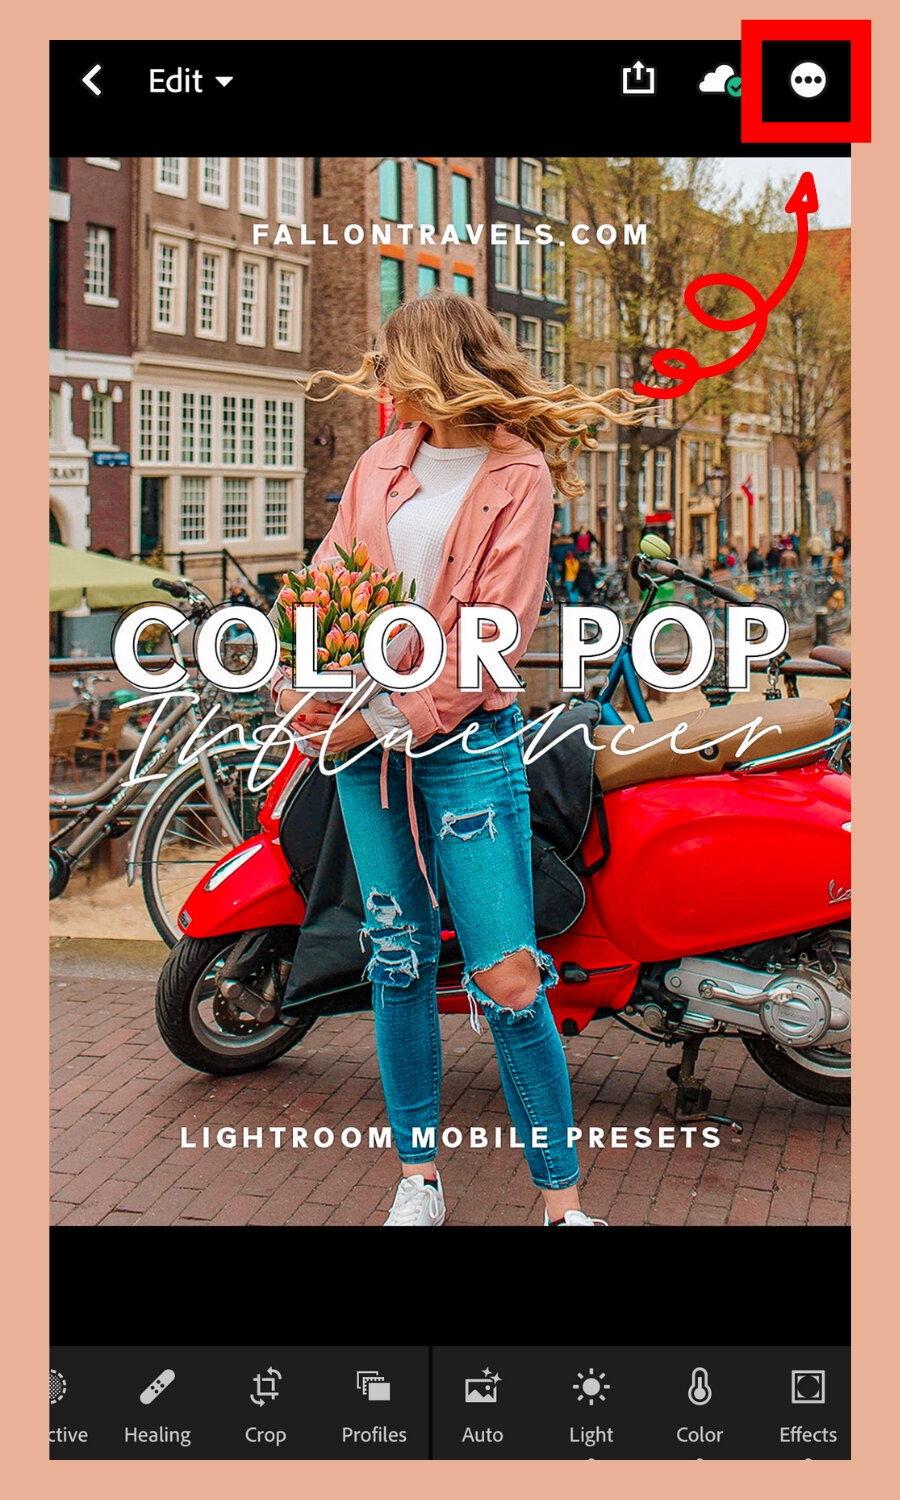
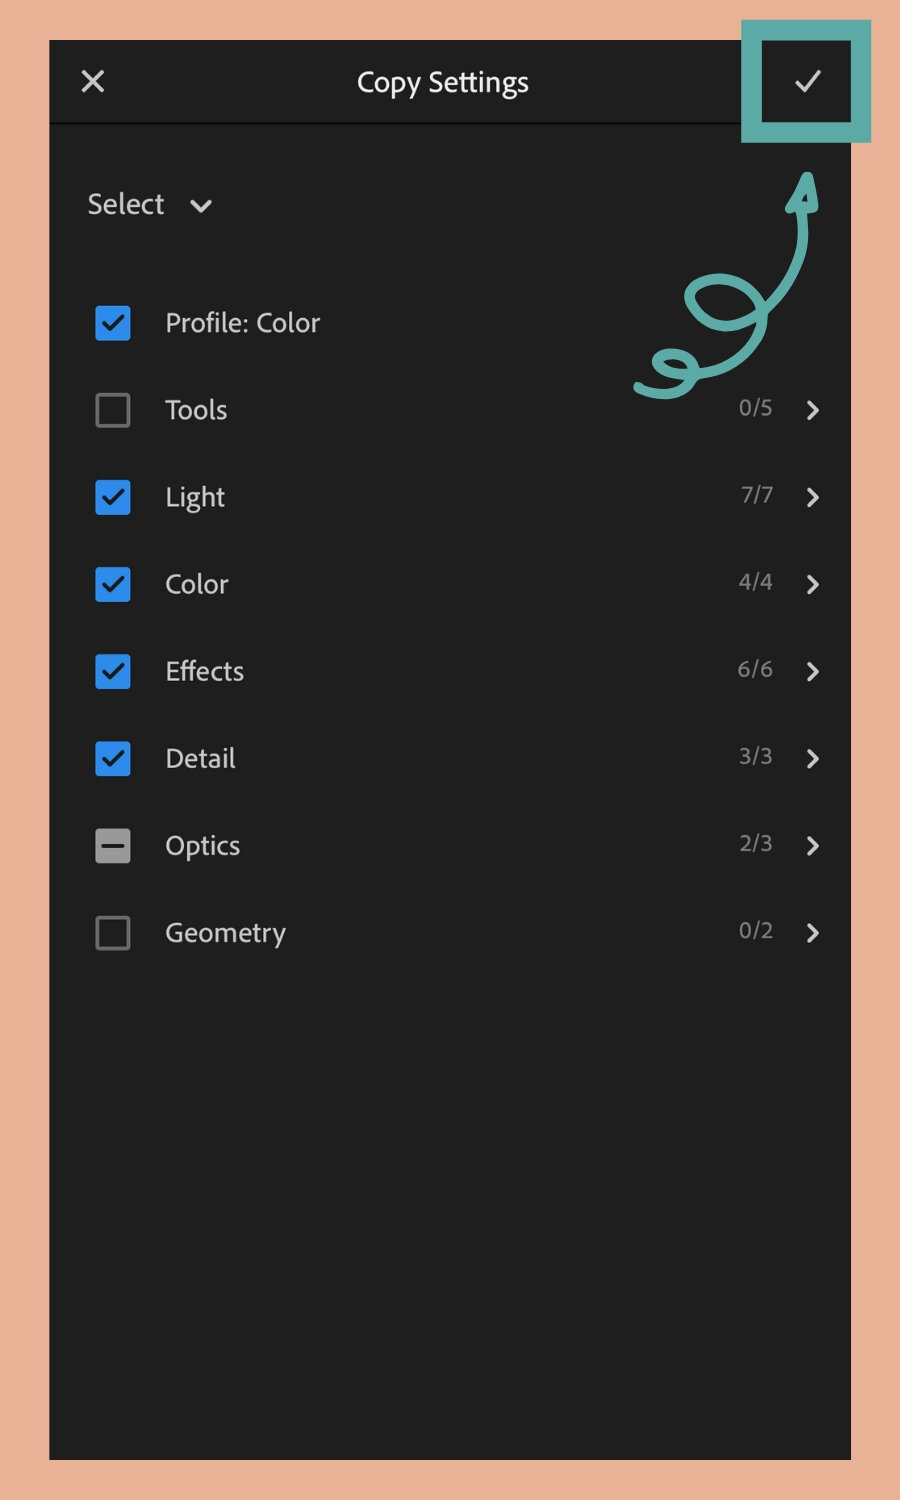
Select the button that says “Copy Settings”.

Click the checkmark in the top right-hand corner.
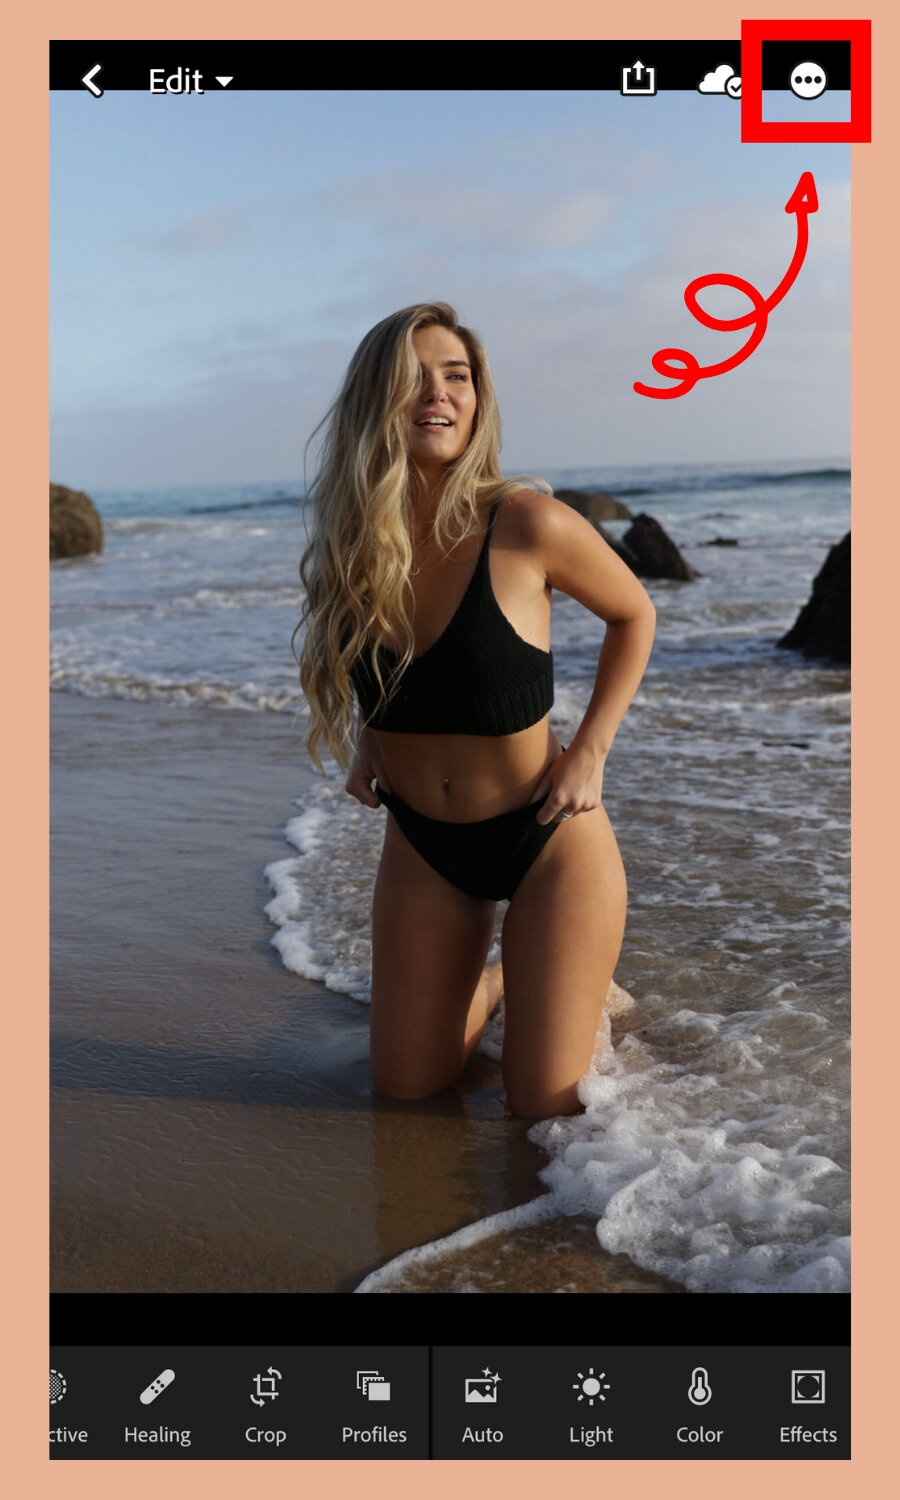
Go over to any photo that you’d like to edit with the preset (this is one of my customers, Bailey. Isn’t she such a cutie?!).
Click the same circle button in the top right-hand corner.
You’ll see the same dropdown from earlier. This time, you’ll select, “Paste Settings”.
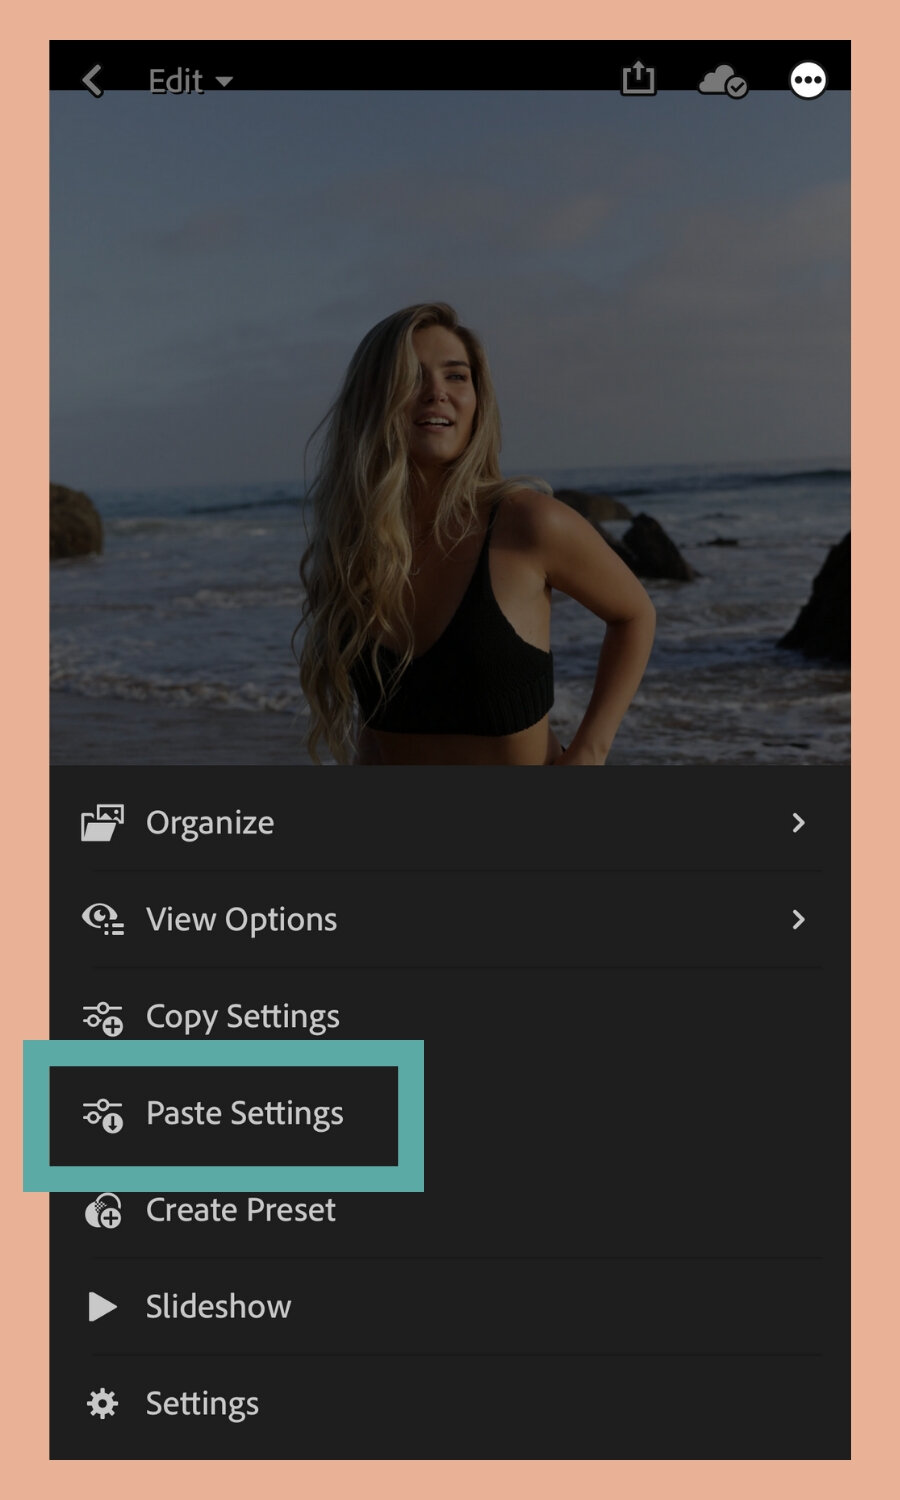
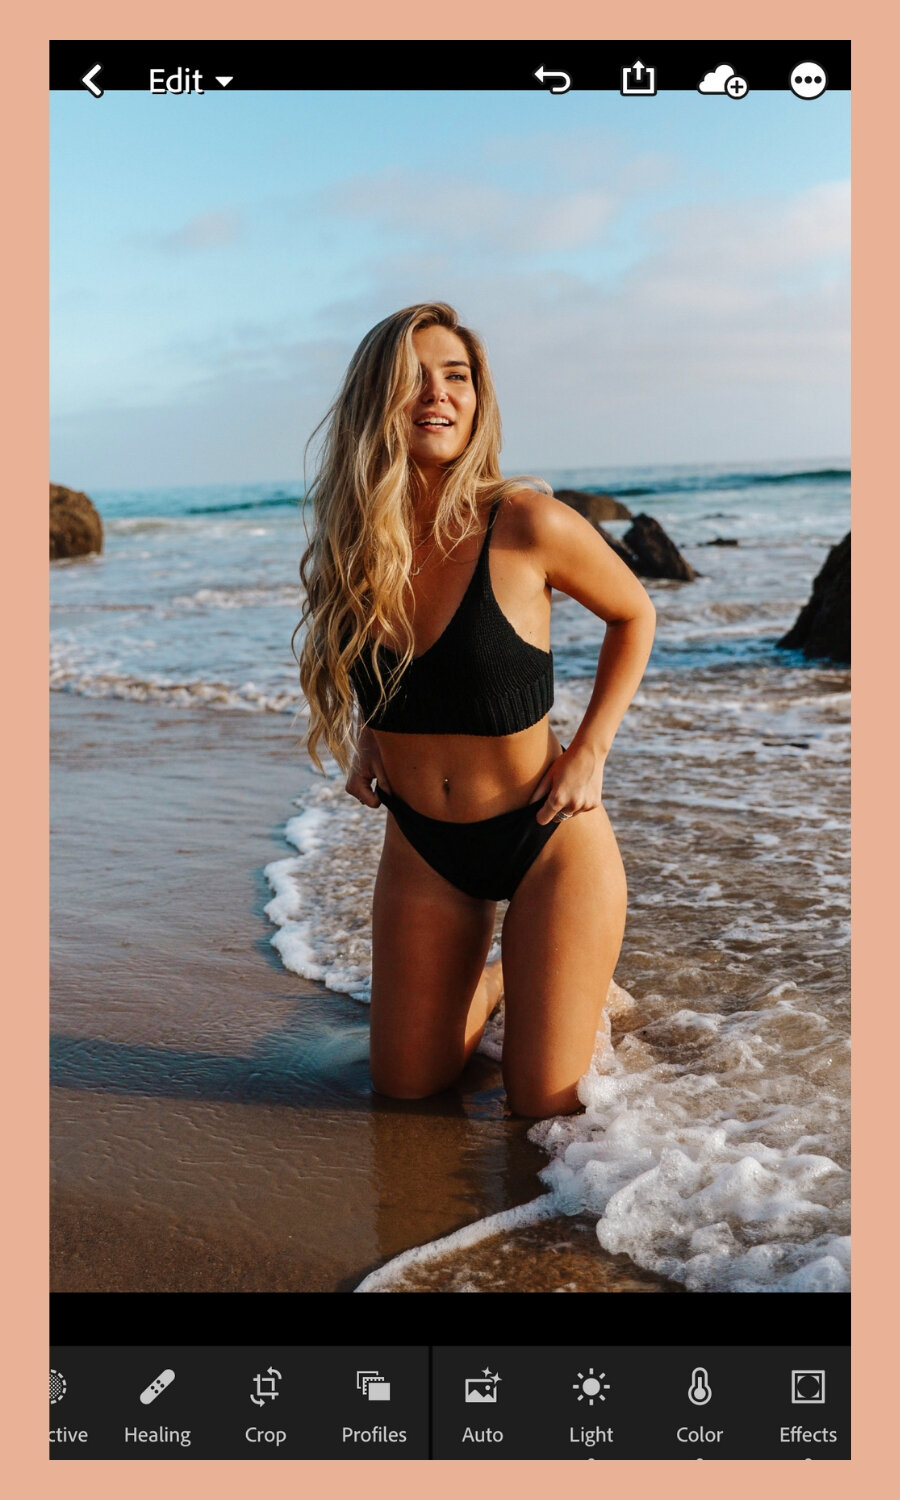
The preset adjustments will be applied to your image! :)
8. Save Preset in Lightroom Mobile
The second option is to create and save the preset in a new preset album. The option to save presets used to only be available to those with a paid Lightroom subscription but now it's available for the free version as well! :)
If you don't see the option, try updating Lightroom mobile or deleting and reinstalling the app.
So you’ll first want to go to the preset album we created earlier. Then select any preset that you want to use to edit your image.
Select the same circle button with three dots in the top right-hand corner.
But this time you'll select the option that says “Create Preset”.

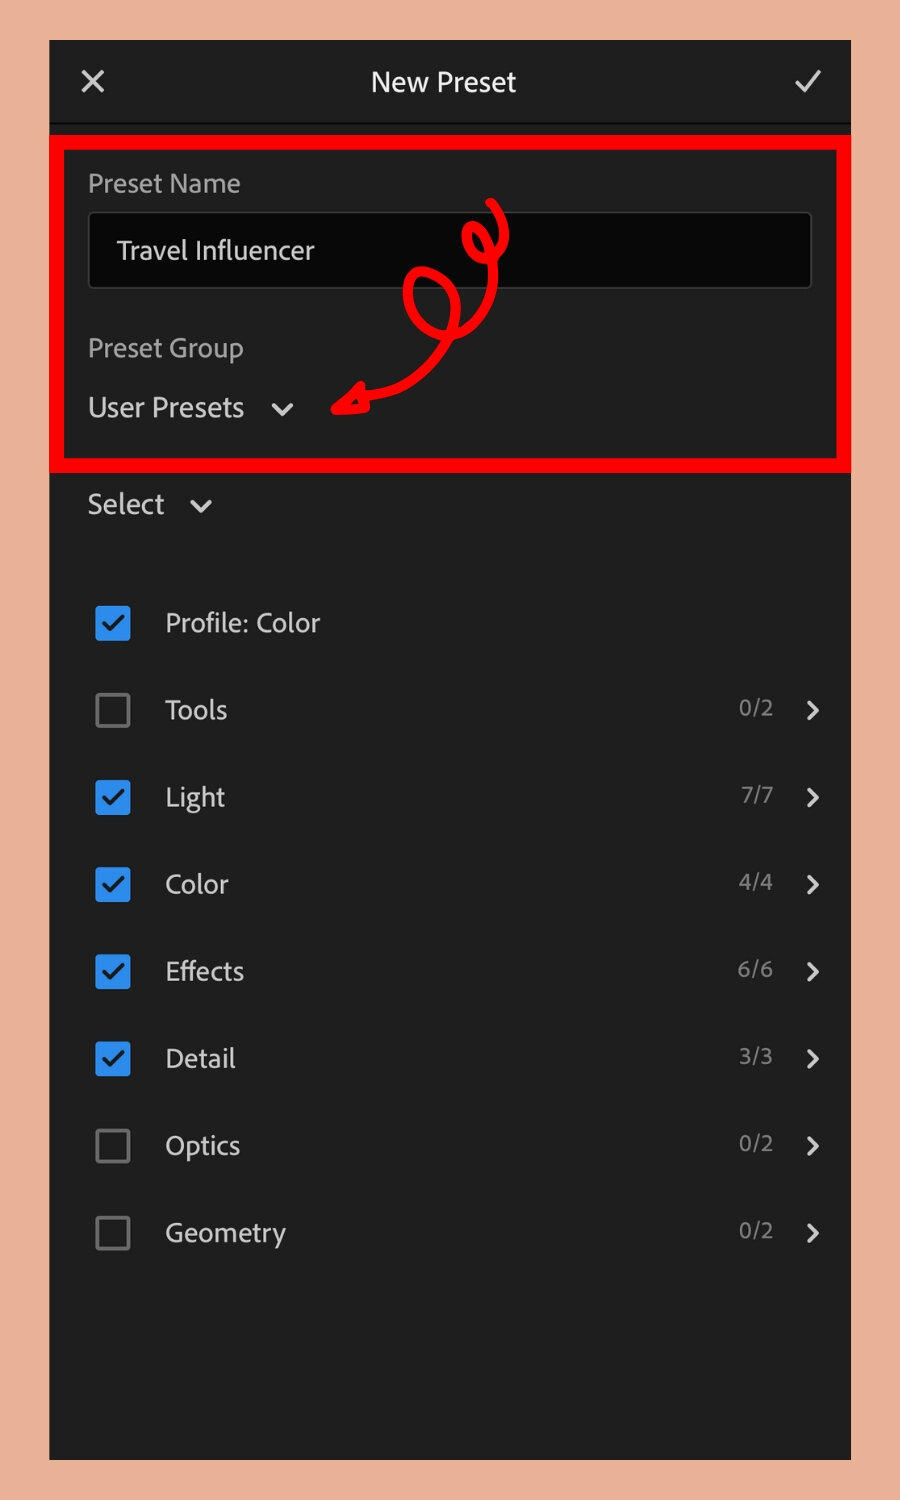
First type in a name for your preset.
You can then select a preset group that will hold all of your mobile presets. User presets will be selected as the default option. But if you want to create a new custom group, click the little dropdown option under Preset Group.
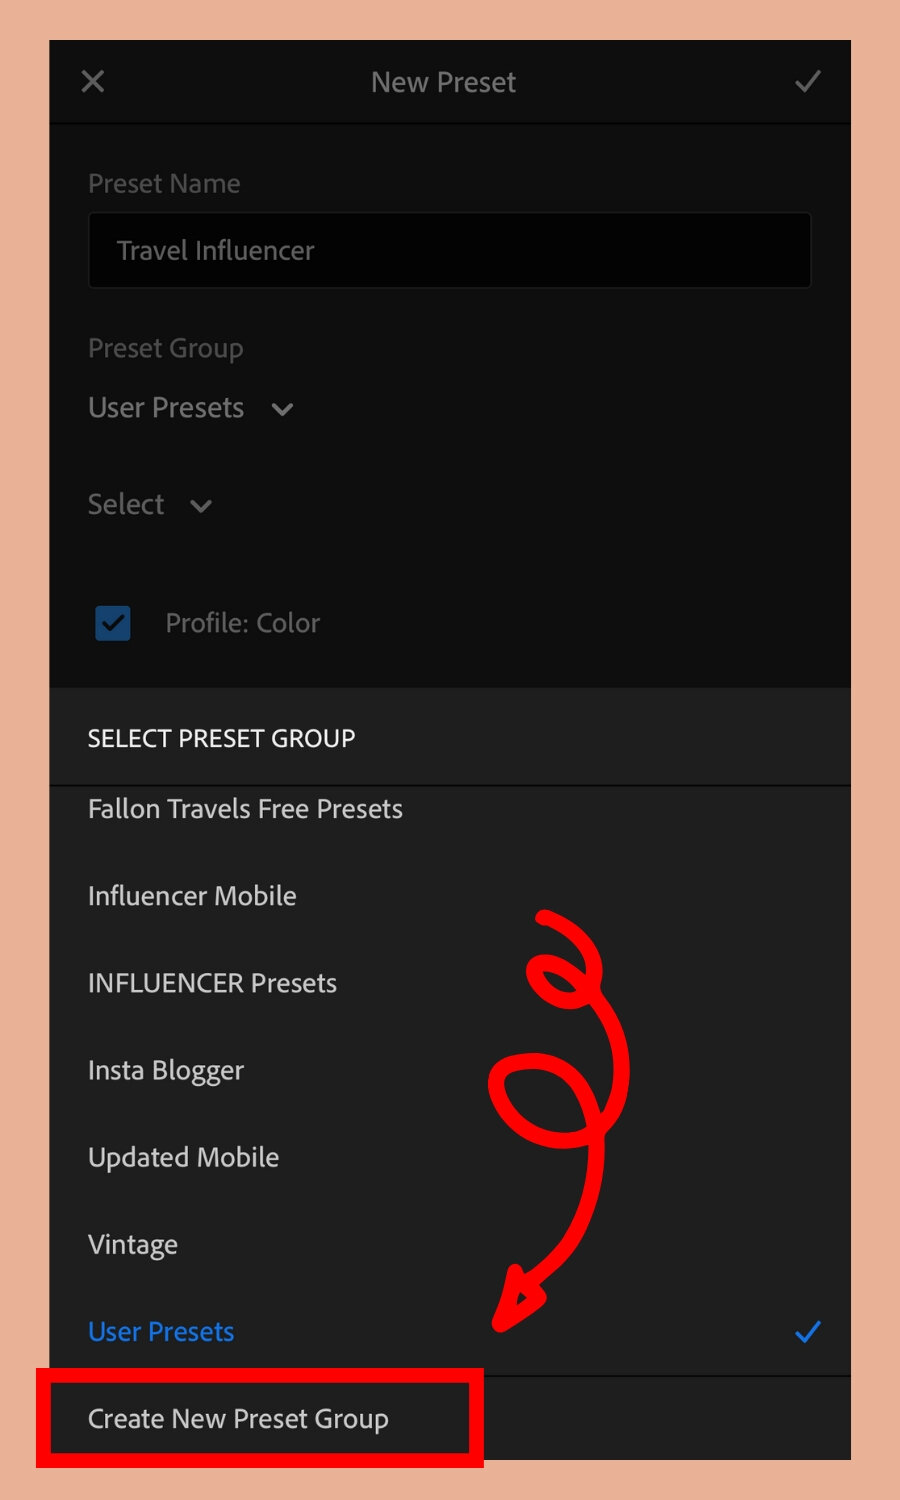
Select “Create New Preset Group”.
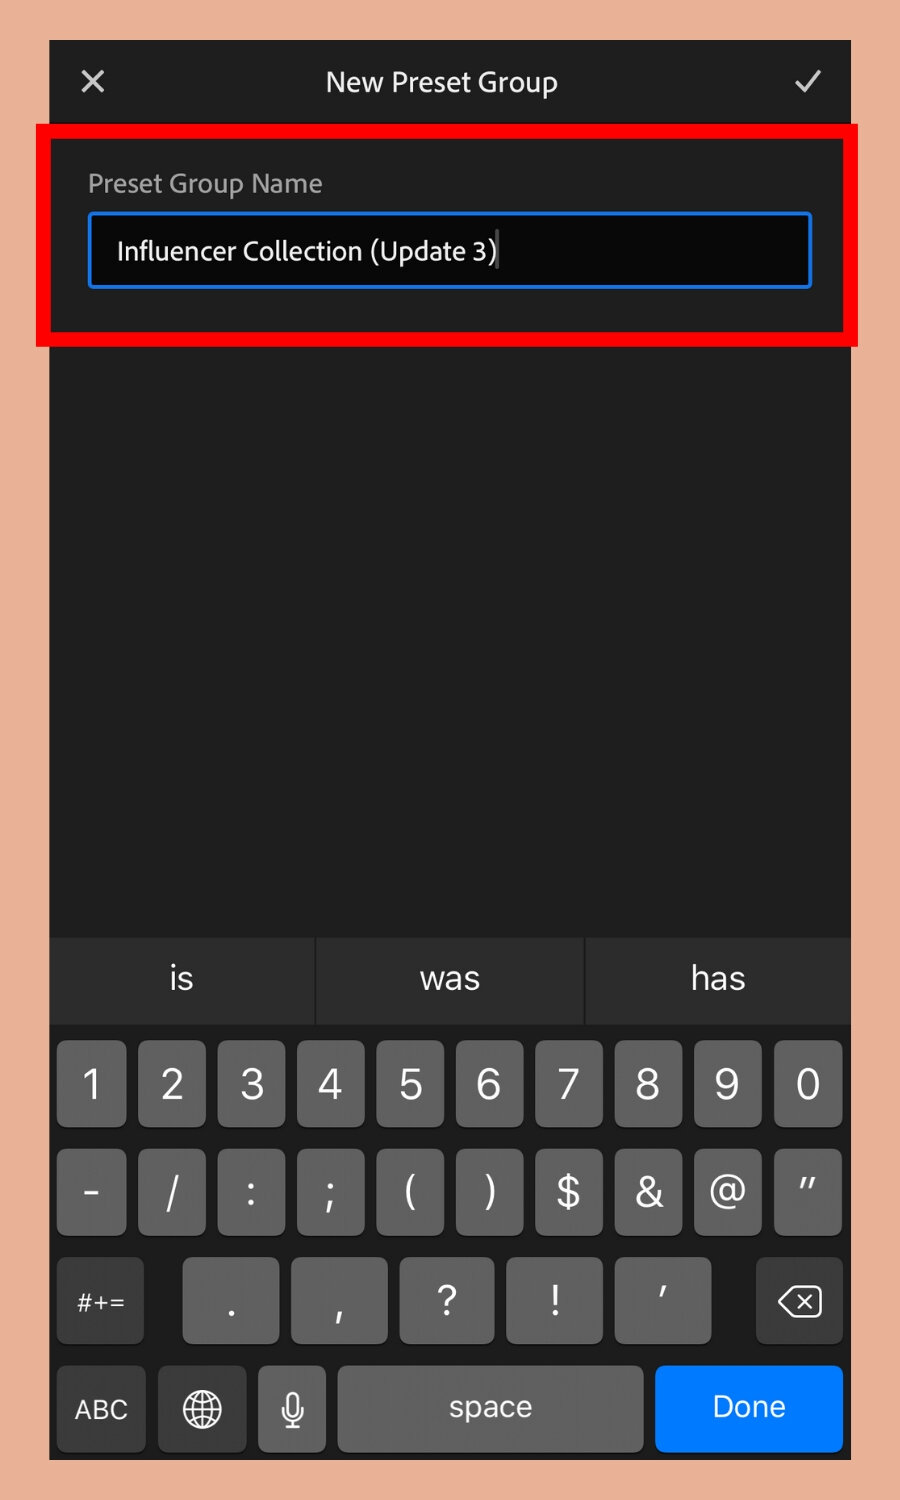
Type in a name for the preset group that you’ll easily remember, then select the checkmark once you’re finished.
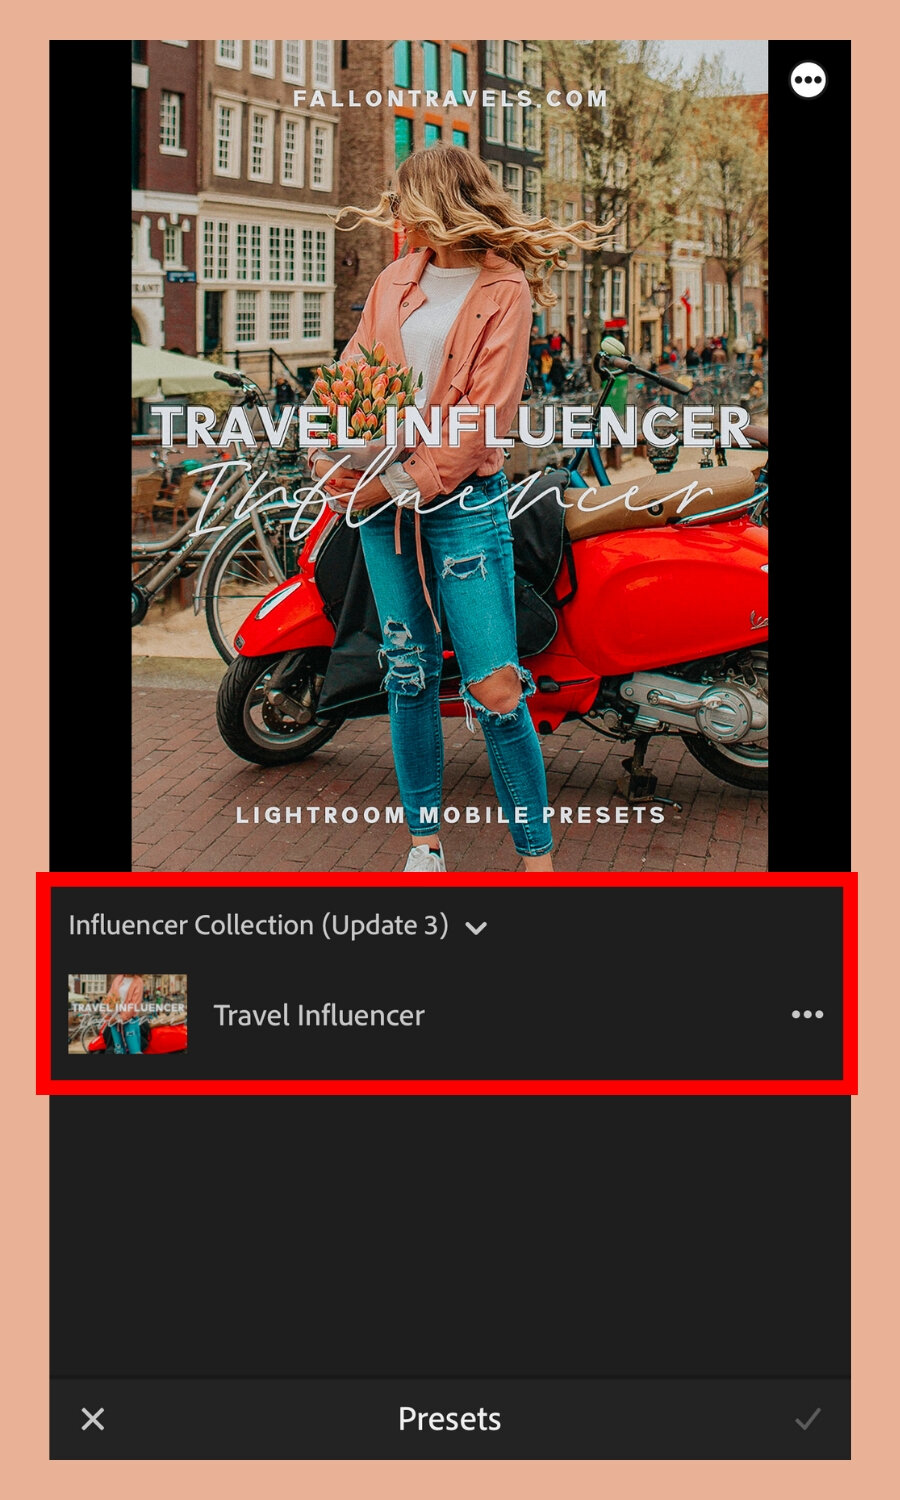
Your preset will now be saved to a custom preset group!
You’ll wanna go back and do this for each one of the DNG presets until you have all of them saved to the same preset group.
9. Apply Mobile Preset to Photo
Make sure you have each of the DNG files saved to the preset group you just created.
You can now choose the photo you’d like to edit with your preset.
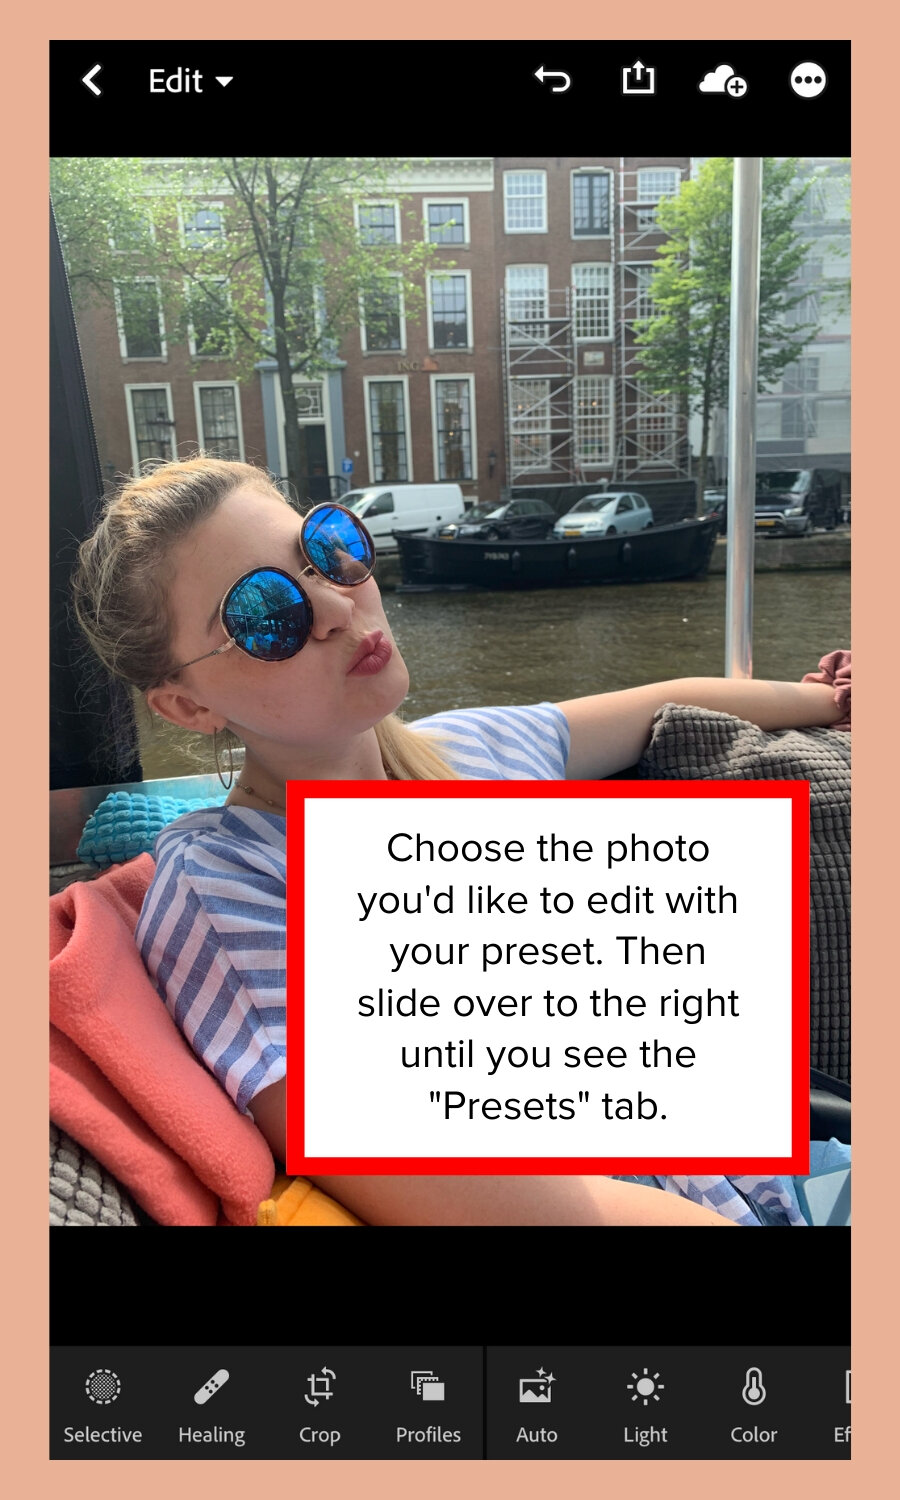
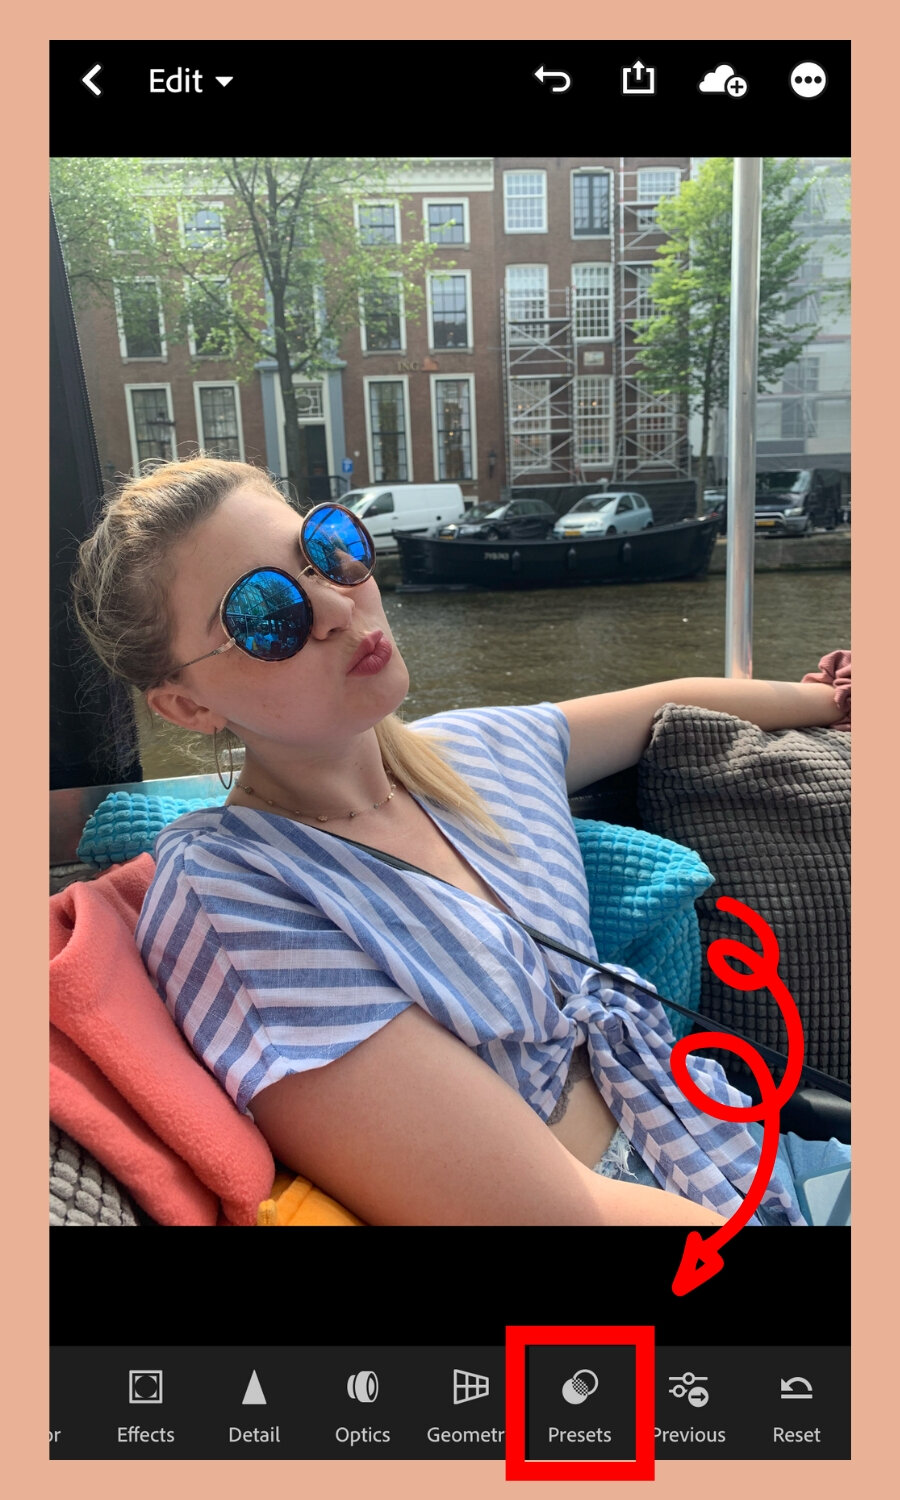
Slide over to the right until you see the “Presets” tab.
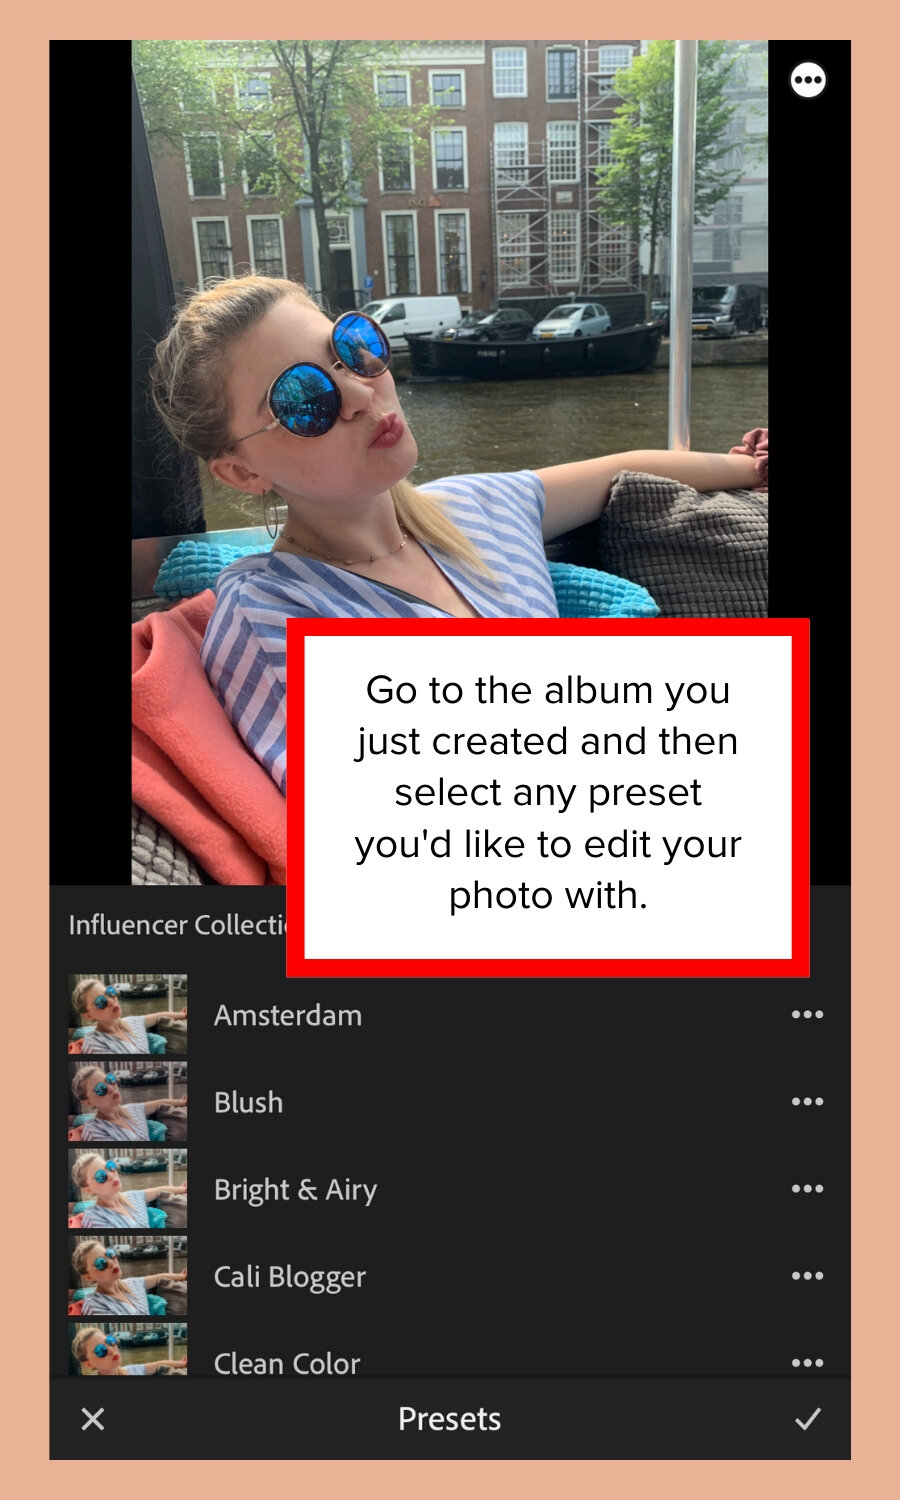
Go to the preset album you just created and then click on whatever preset you’d like to edit your photos with!
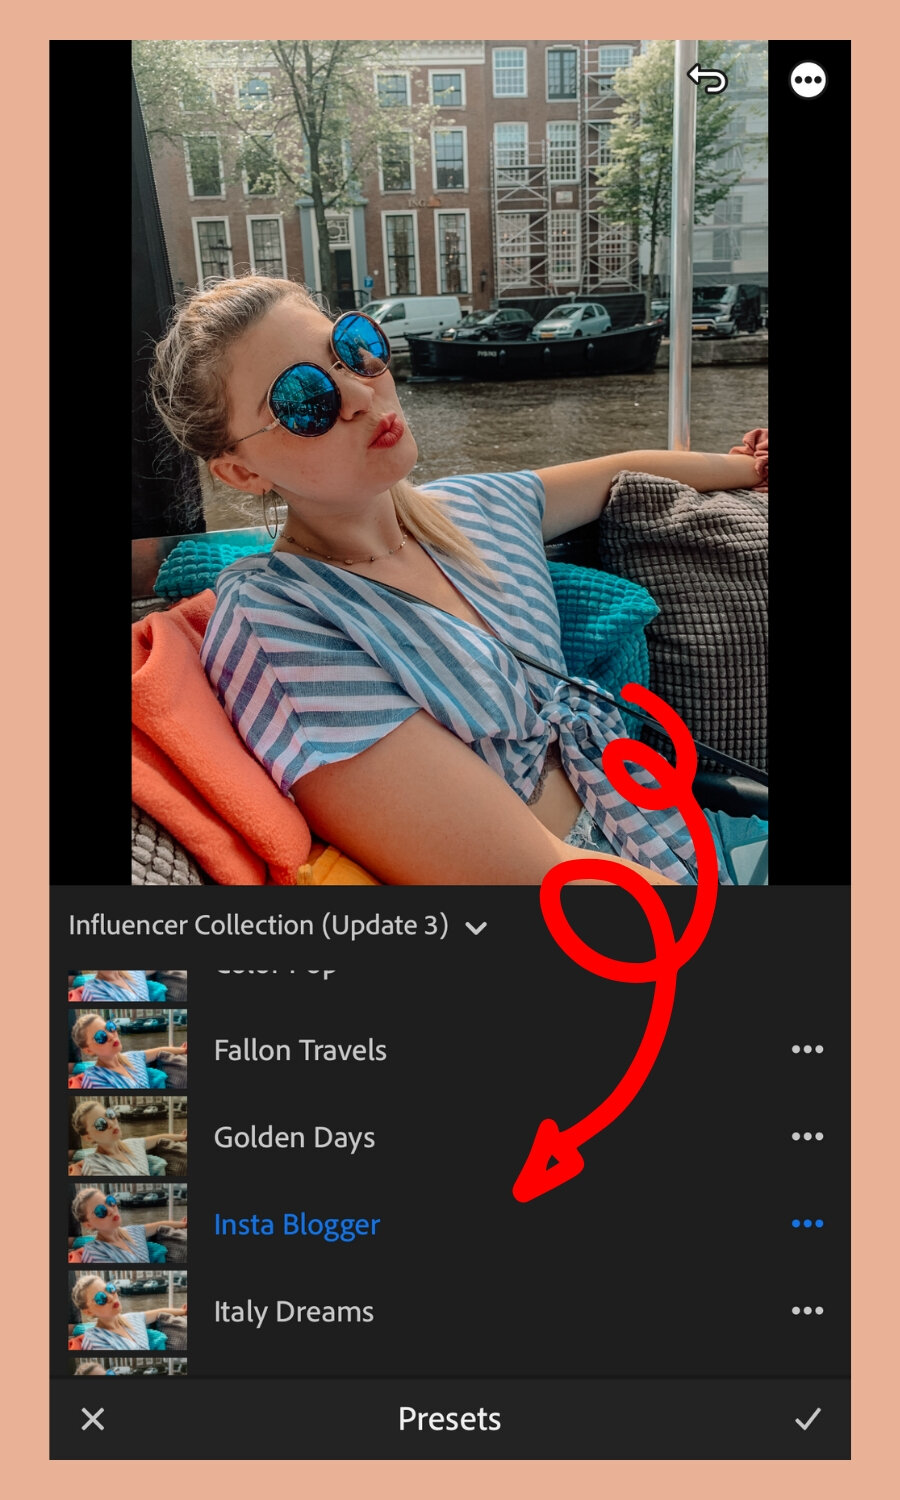
Select that “one-click” mobile preset and your photo should now be lookin’ super fab for Instagram. ;)
But if its not… check out the next section for info on Lightroom editing adjustments!
10. Lightroom Mobile Editing Tutorial PDF
Now it's important to note that while the DNG presets will technically be available in one-click, you will most likely need to make some editing adjustments to the presets.
I’ve created a Lightroom Mobile editing guide that you can now download for FREE! Add your email below to snag your PDF. ;)
If you have any questions at all about Adobe Lightroom Mobile presets or the installation process, feel free to drop a comment below and I will get back to you as quickly as possible!
If you enjoyed this, share the love👇🏼