How To Make a GIF in Photoshop — The Ultimate Guide (+ other alternatives to Photoshop)
Disclaimer: Hey there, friend! This article includes affiliate links & I would LOVE if you decided to use them. Affiliate links + referrals programs help creators and educators like me to fund the free content that we provide on our blogs. Thank you for your endless support!
The Graphics Interchange Format, or GIF, has truly changed the online world as we know it today. Not only do these fun little snippets offer us nonstop entertainment, but they are actually pretty small in file size- making them ideal for content marketing purposes!
Animated GIFs are a great way to stand out in a crowded space with unique video content, which in turn gives your brand a much higher chance of being remembered. Additionally, GIFs are great at explaining what we sometimes can’t seem to put into words.
There are a seemingly endless number of ways to make an animated GIF, including both paid and free software options. This ultimate GIF guide will show you how to make a GIF — and how to use them for your own content marketing strategy.
Feel free to skip to any specific section using the links below!
Table of Contents
How to make a GIF in Photoshop from still images:
There are a number of different techniques you could use to create an animated GIF. In this section, however, I’m going to show you how you can make a GIF in Photoshop using a series of still images. It’s important to note, though— if you do want to use Photoshop to make your GIF, you’re going to need an Adobe Creative Cloud subscription. It’s only $10 a month for the Creative Cloud Photography plan which gives you access to both Photoshop and Lightroom.
One way that you could use this method is by creating a time-lapse animation using a series of photos from your DSLR camera, or your mobile device (i.e. images taken on burst mode from your iPhone). You could also create a unique, animated effect for one of your photos. For example, let’s say that you wanted to add some hand-drawn, animated elements to one of your images (i.e. twinkling stars in a photo of the night sky). You would first strategize how you want your GIF animation to play out. You’d then take your image into Photoshop and create separate layers for each instance you want your GIF to move (i.e every time your stars twinkle). You would then add in your graphic elements accordingly, export each image, and this will give you the series of images you need to make your GIF.
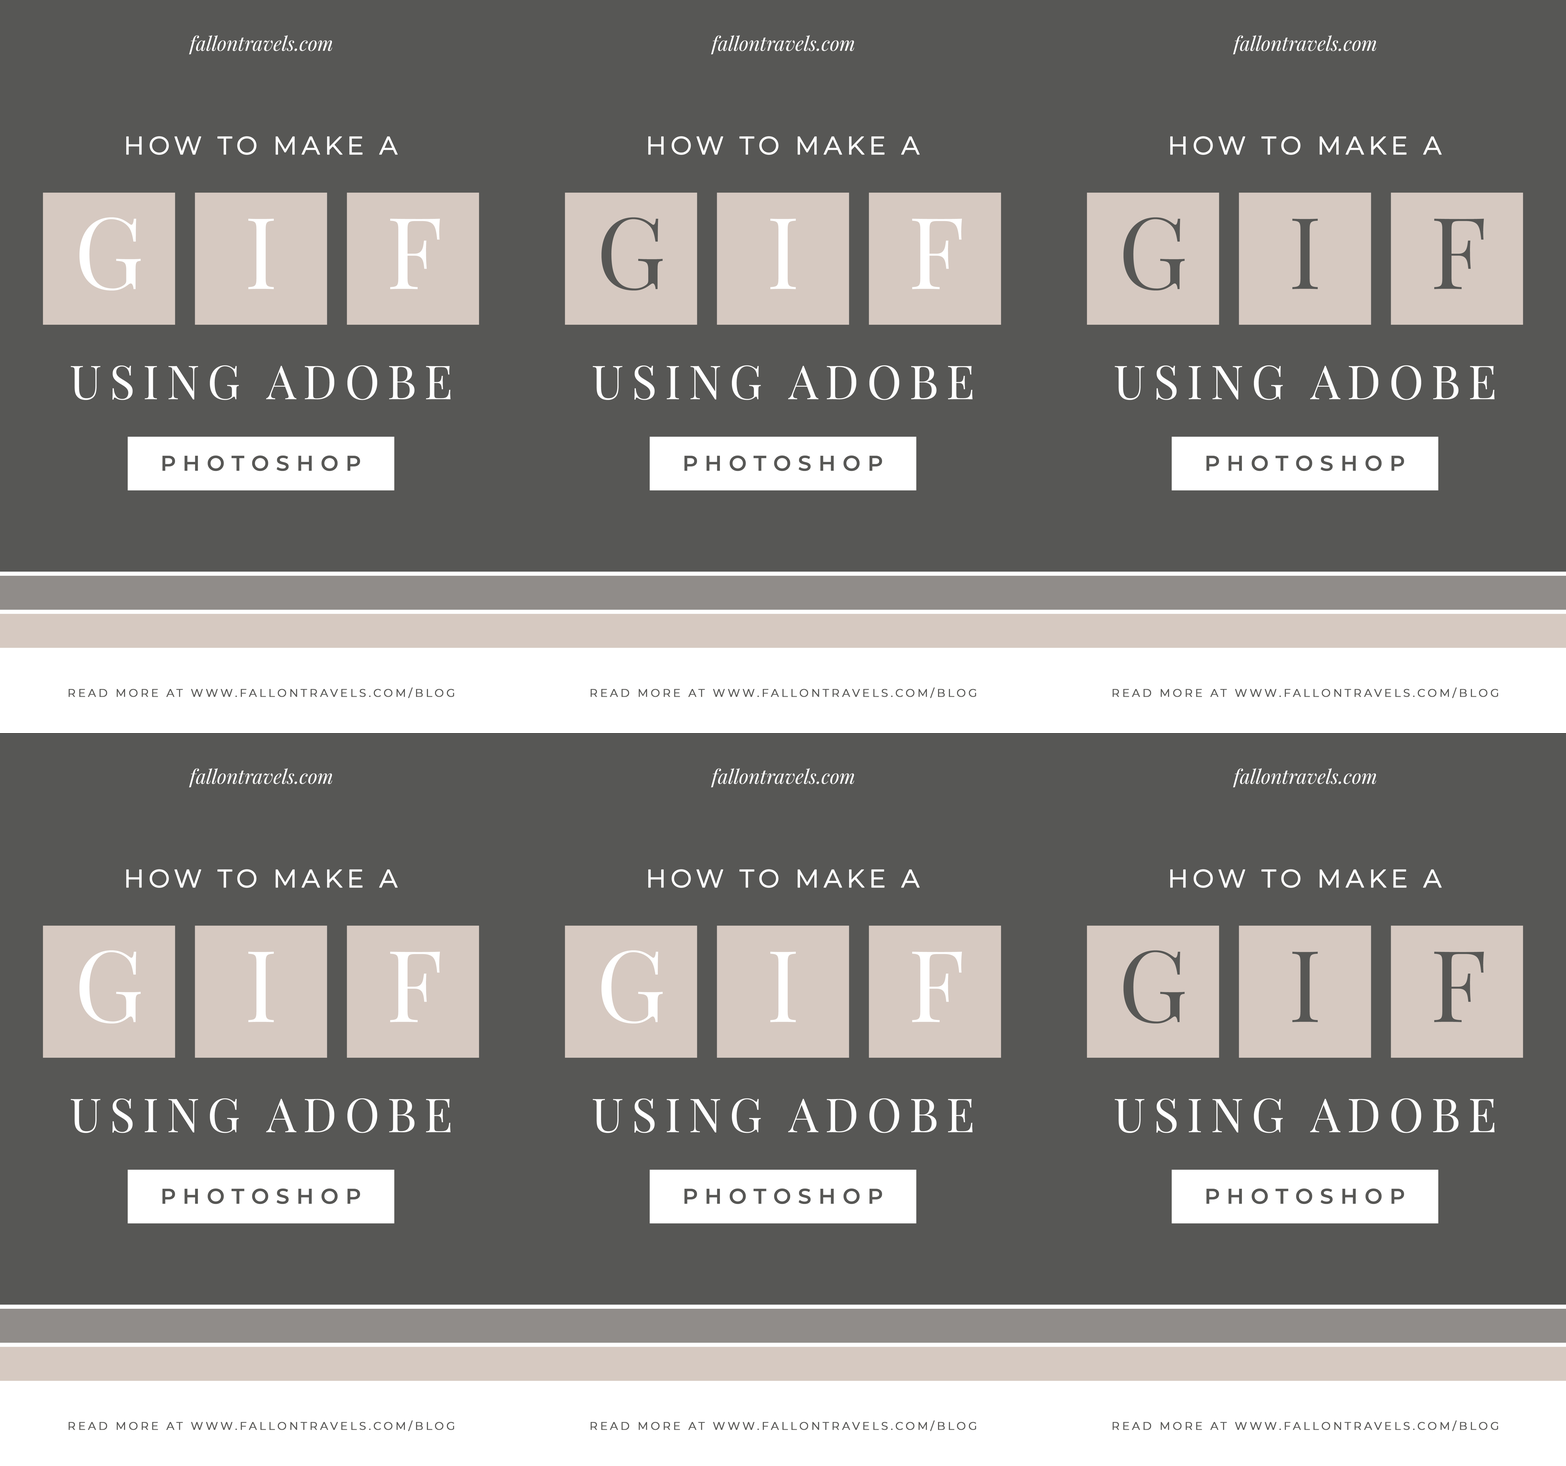
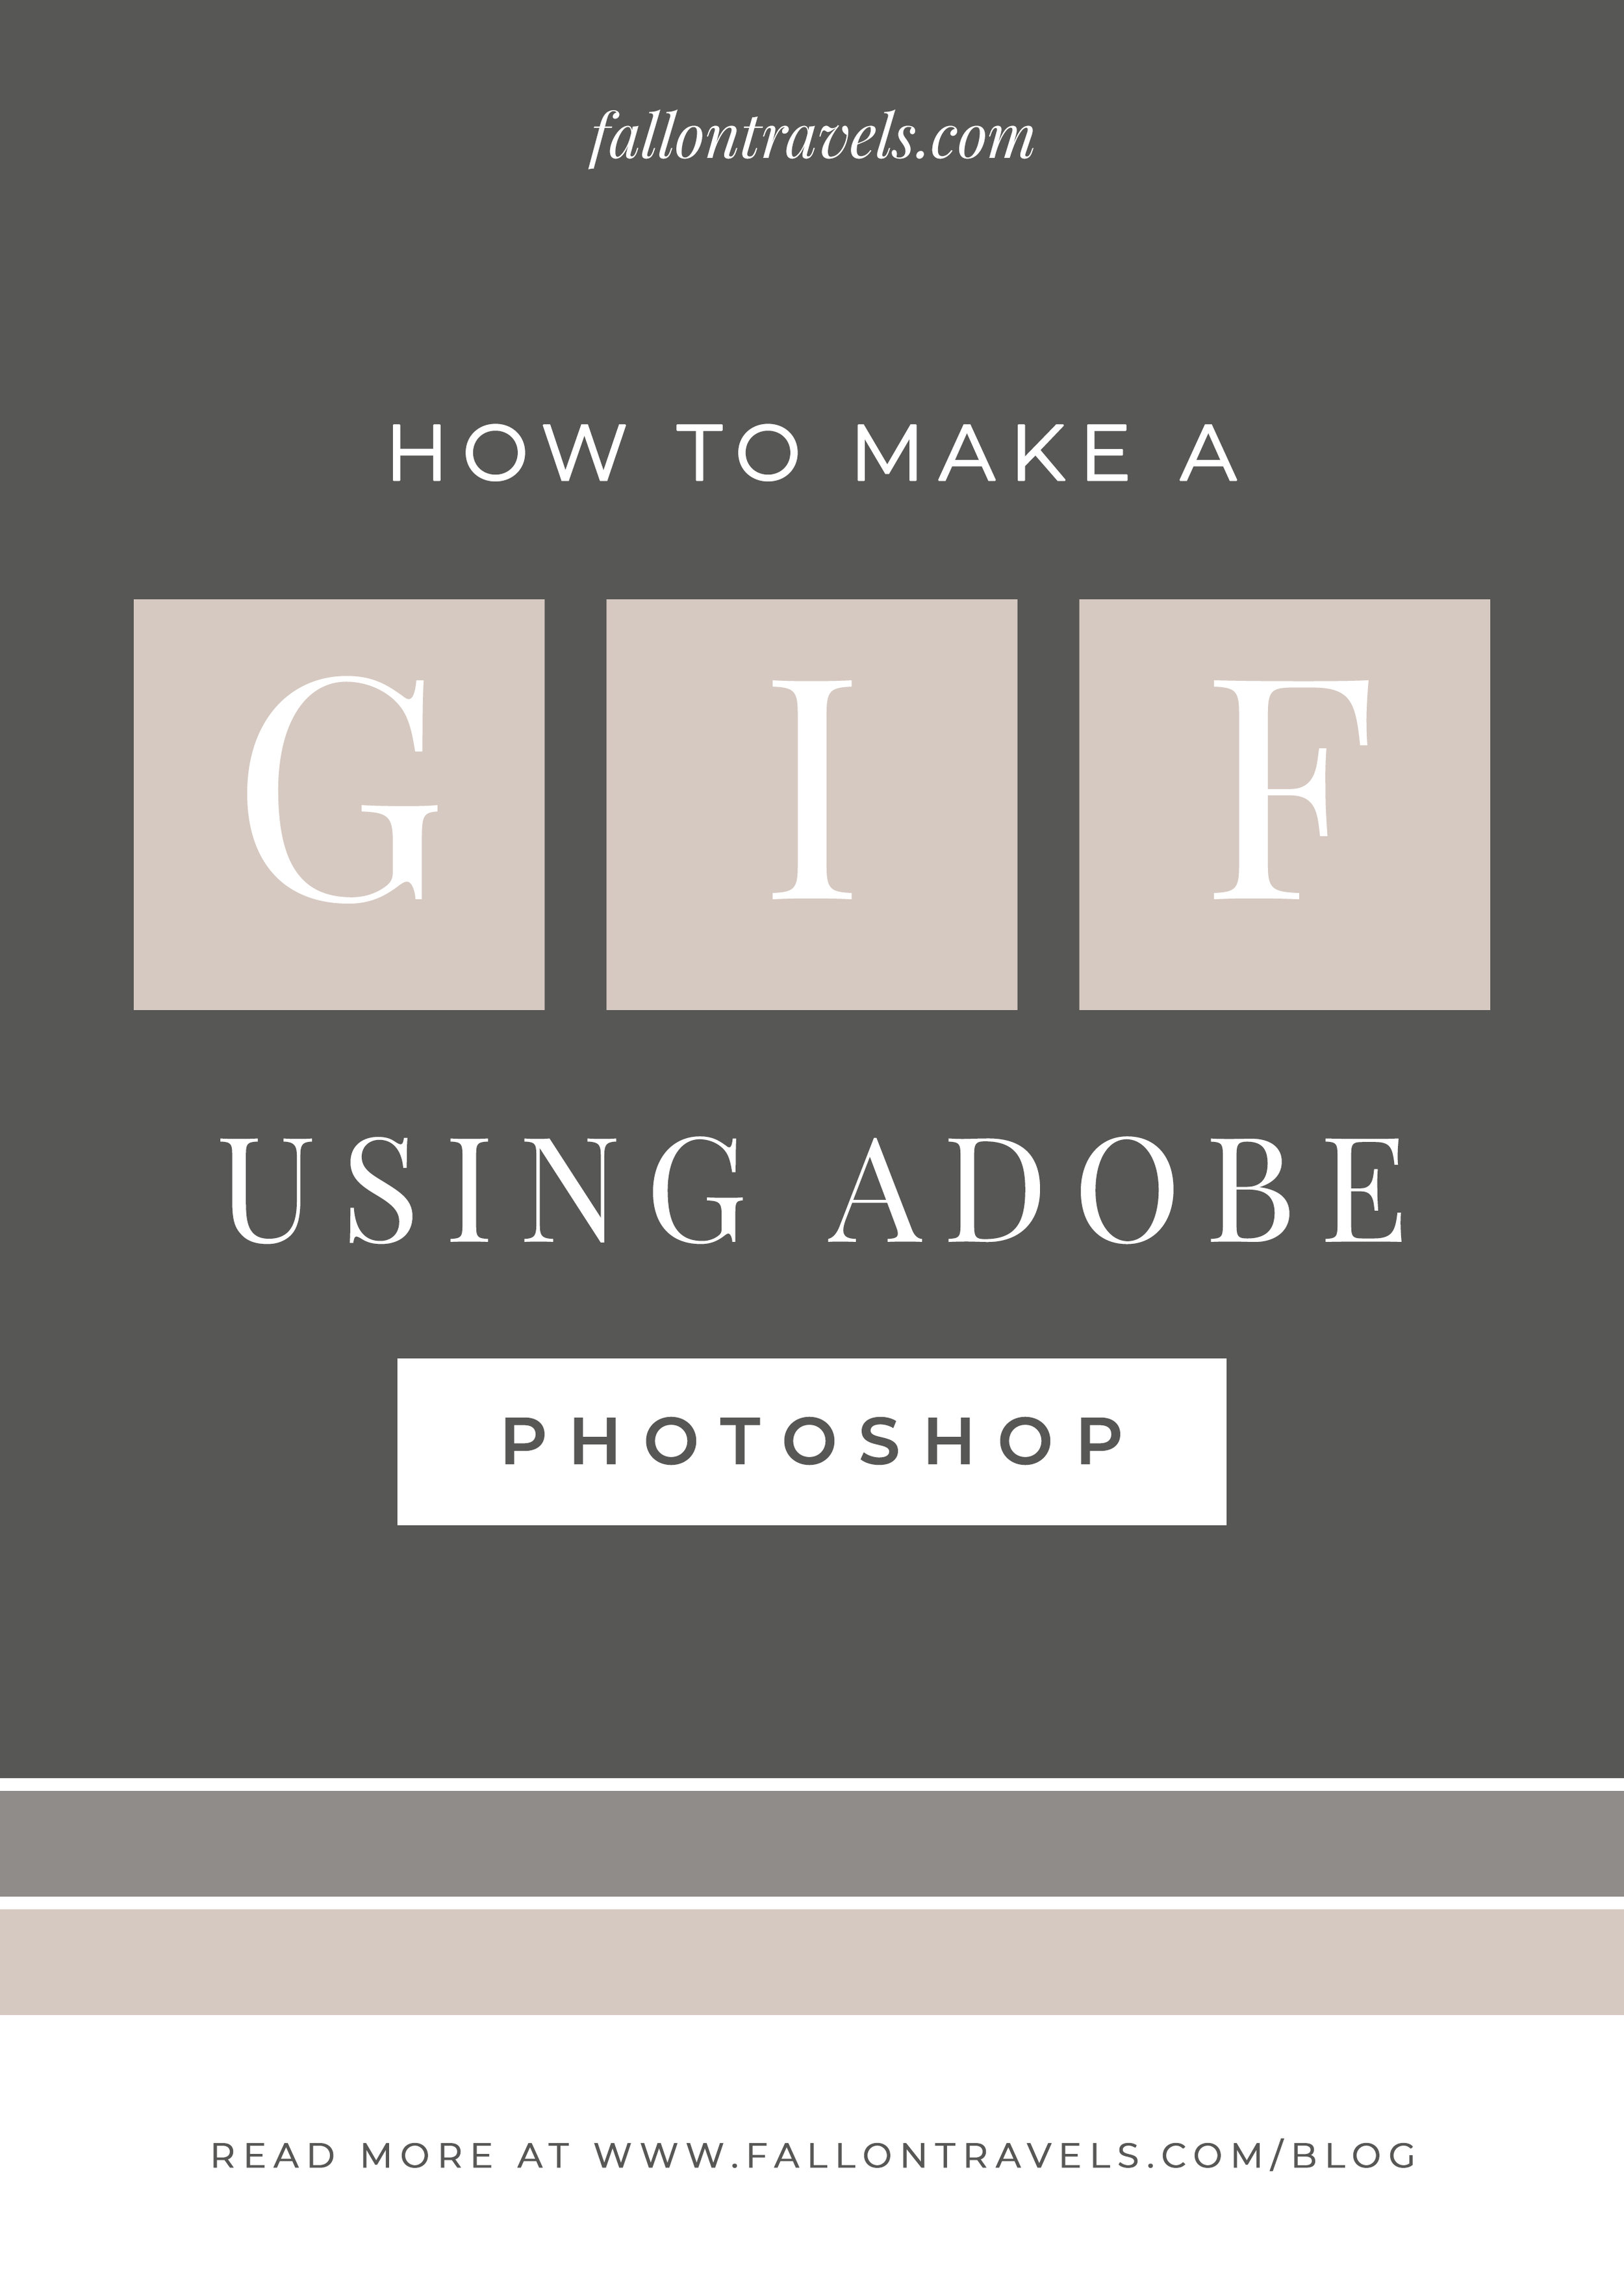
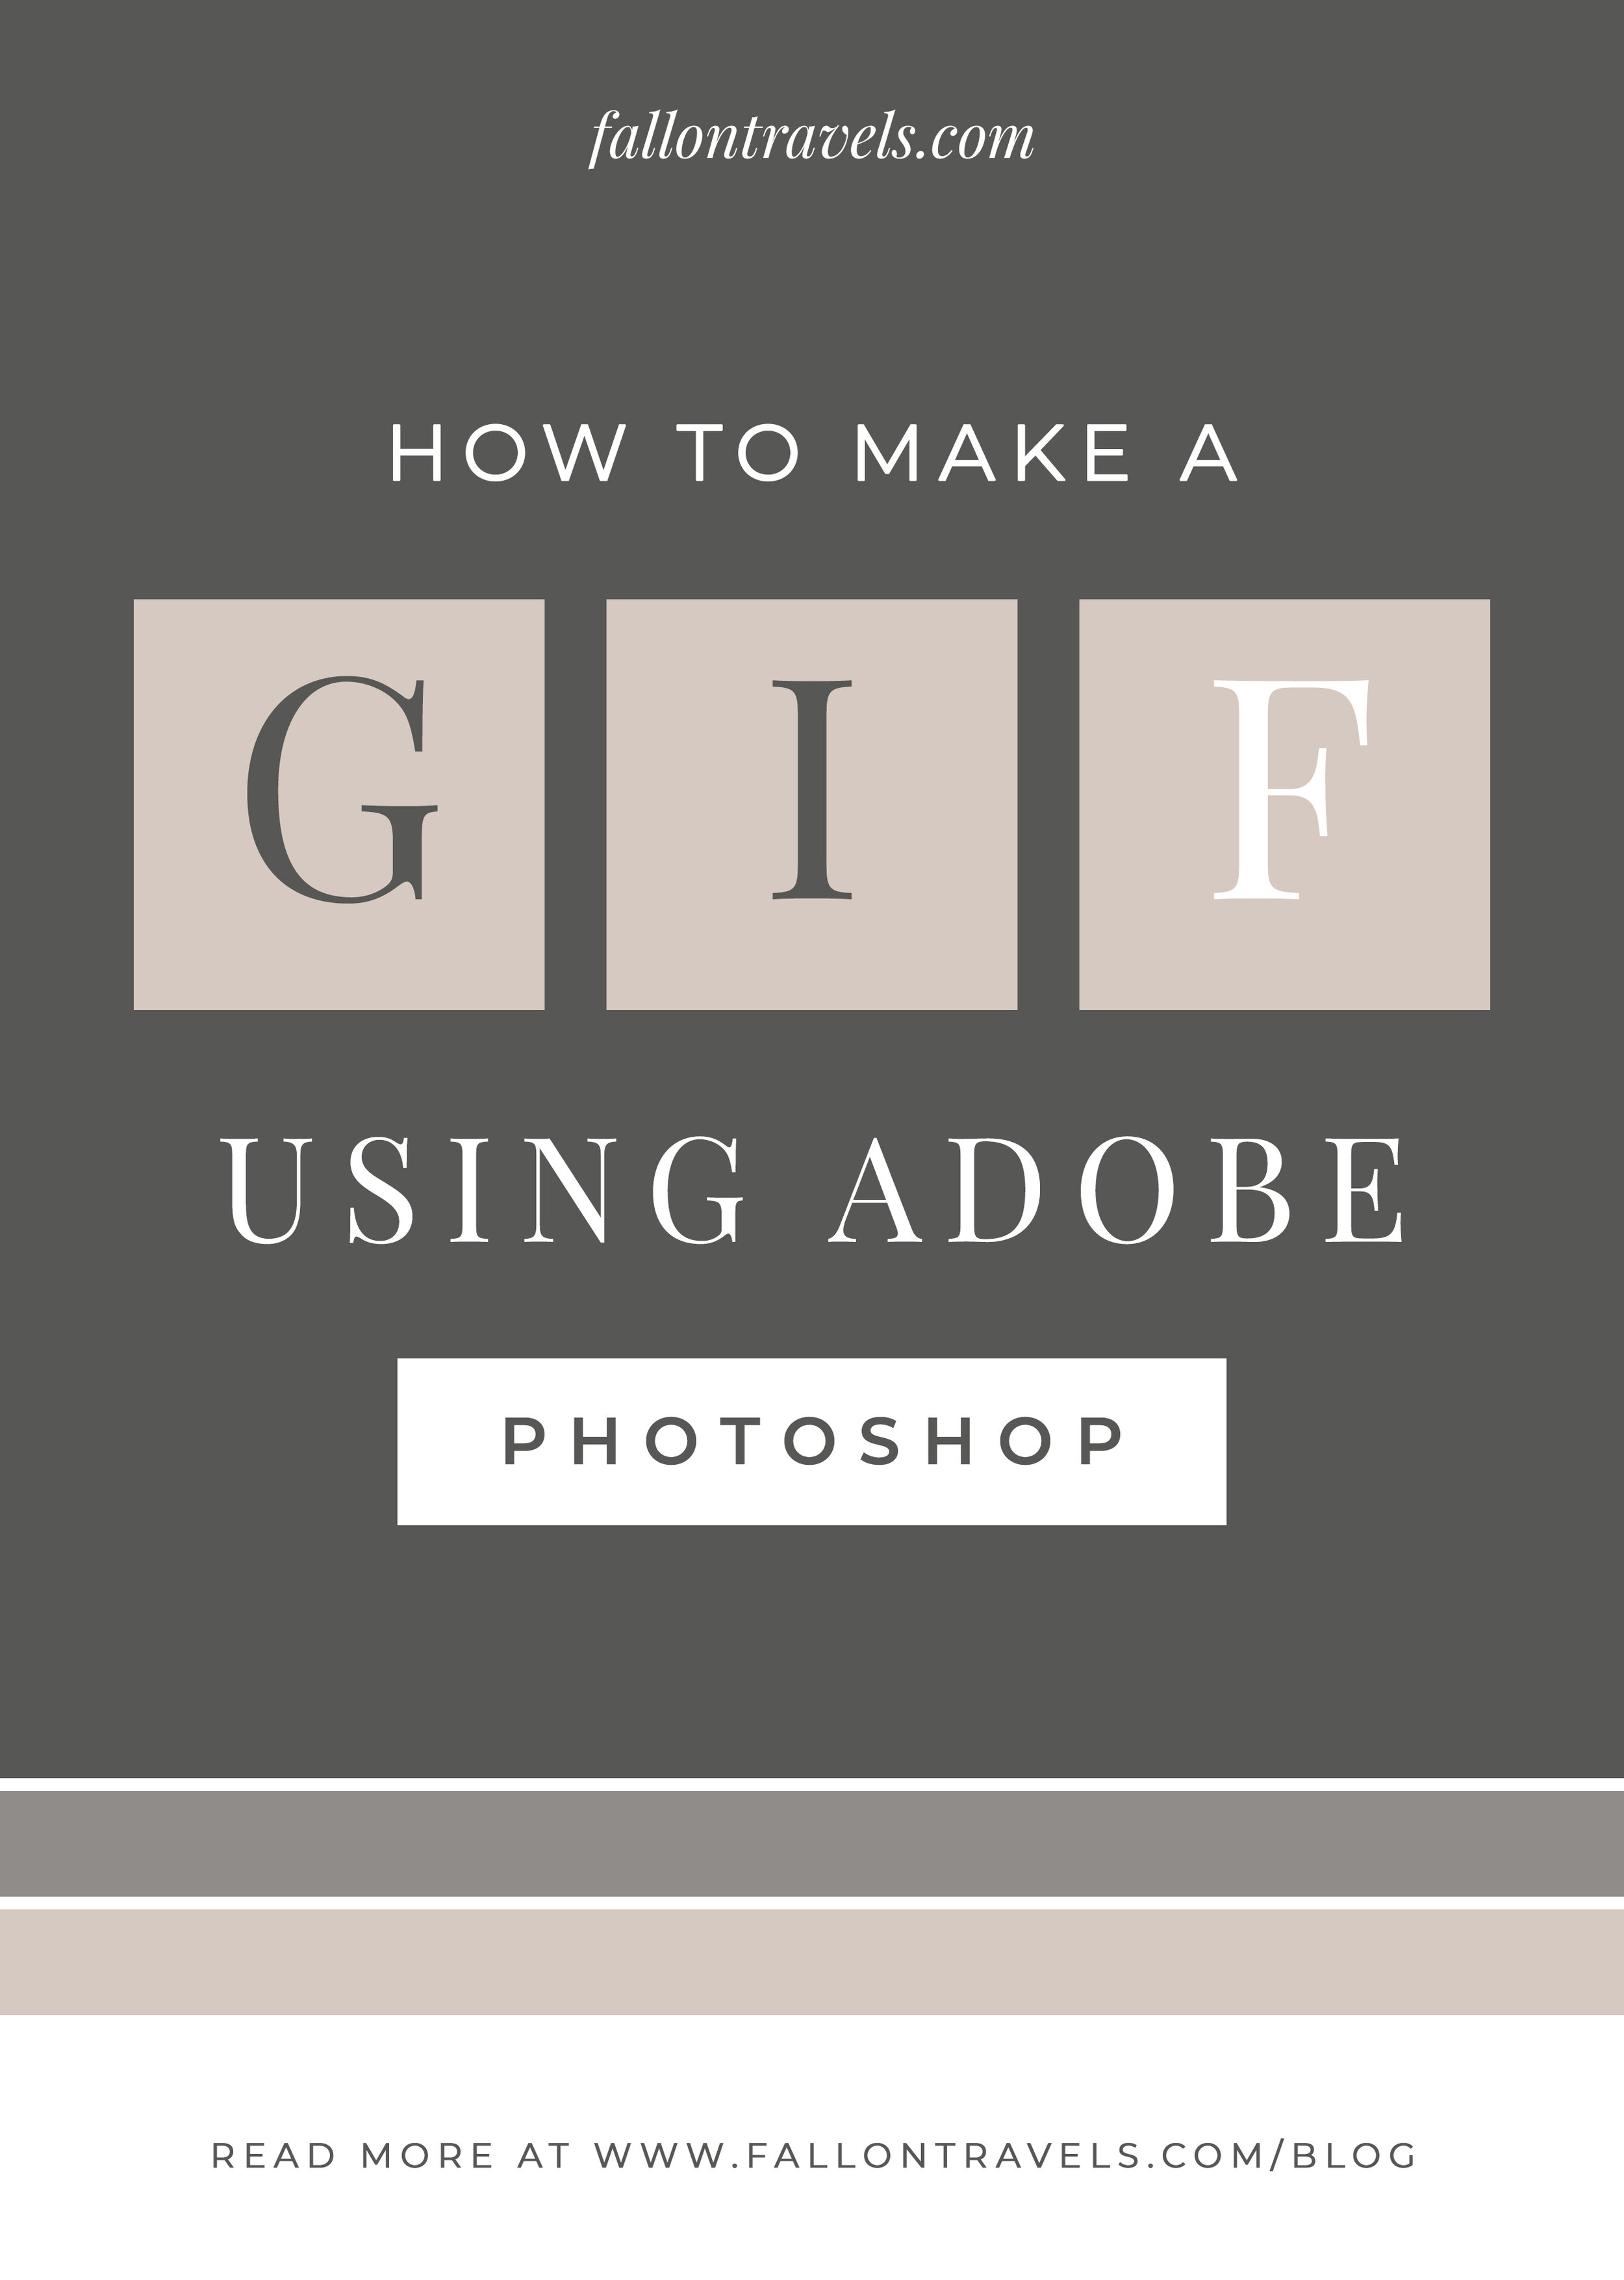
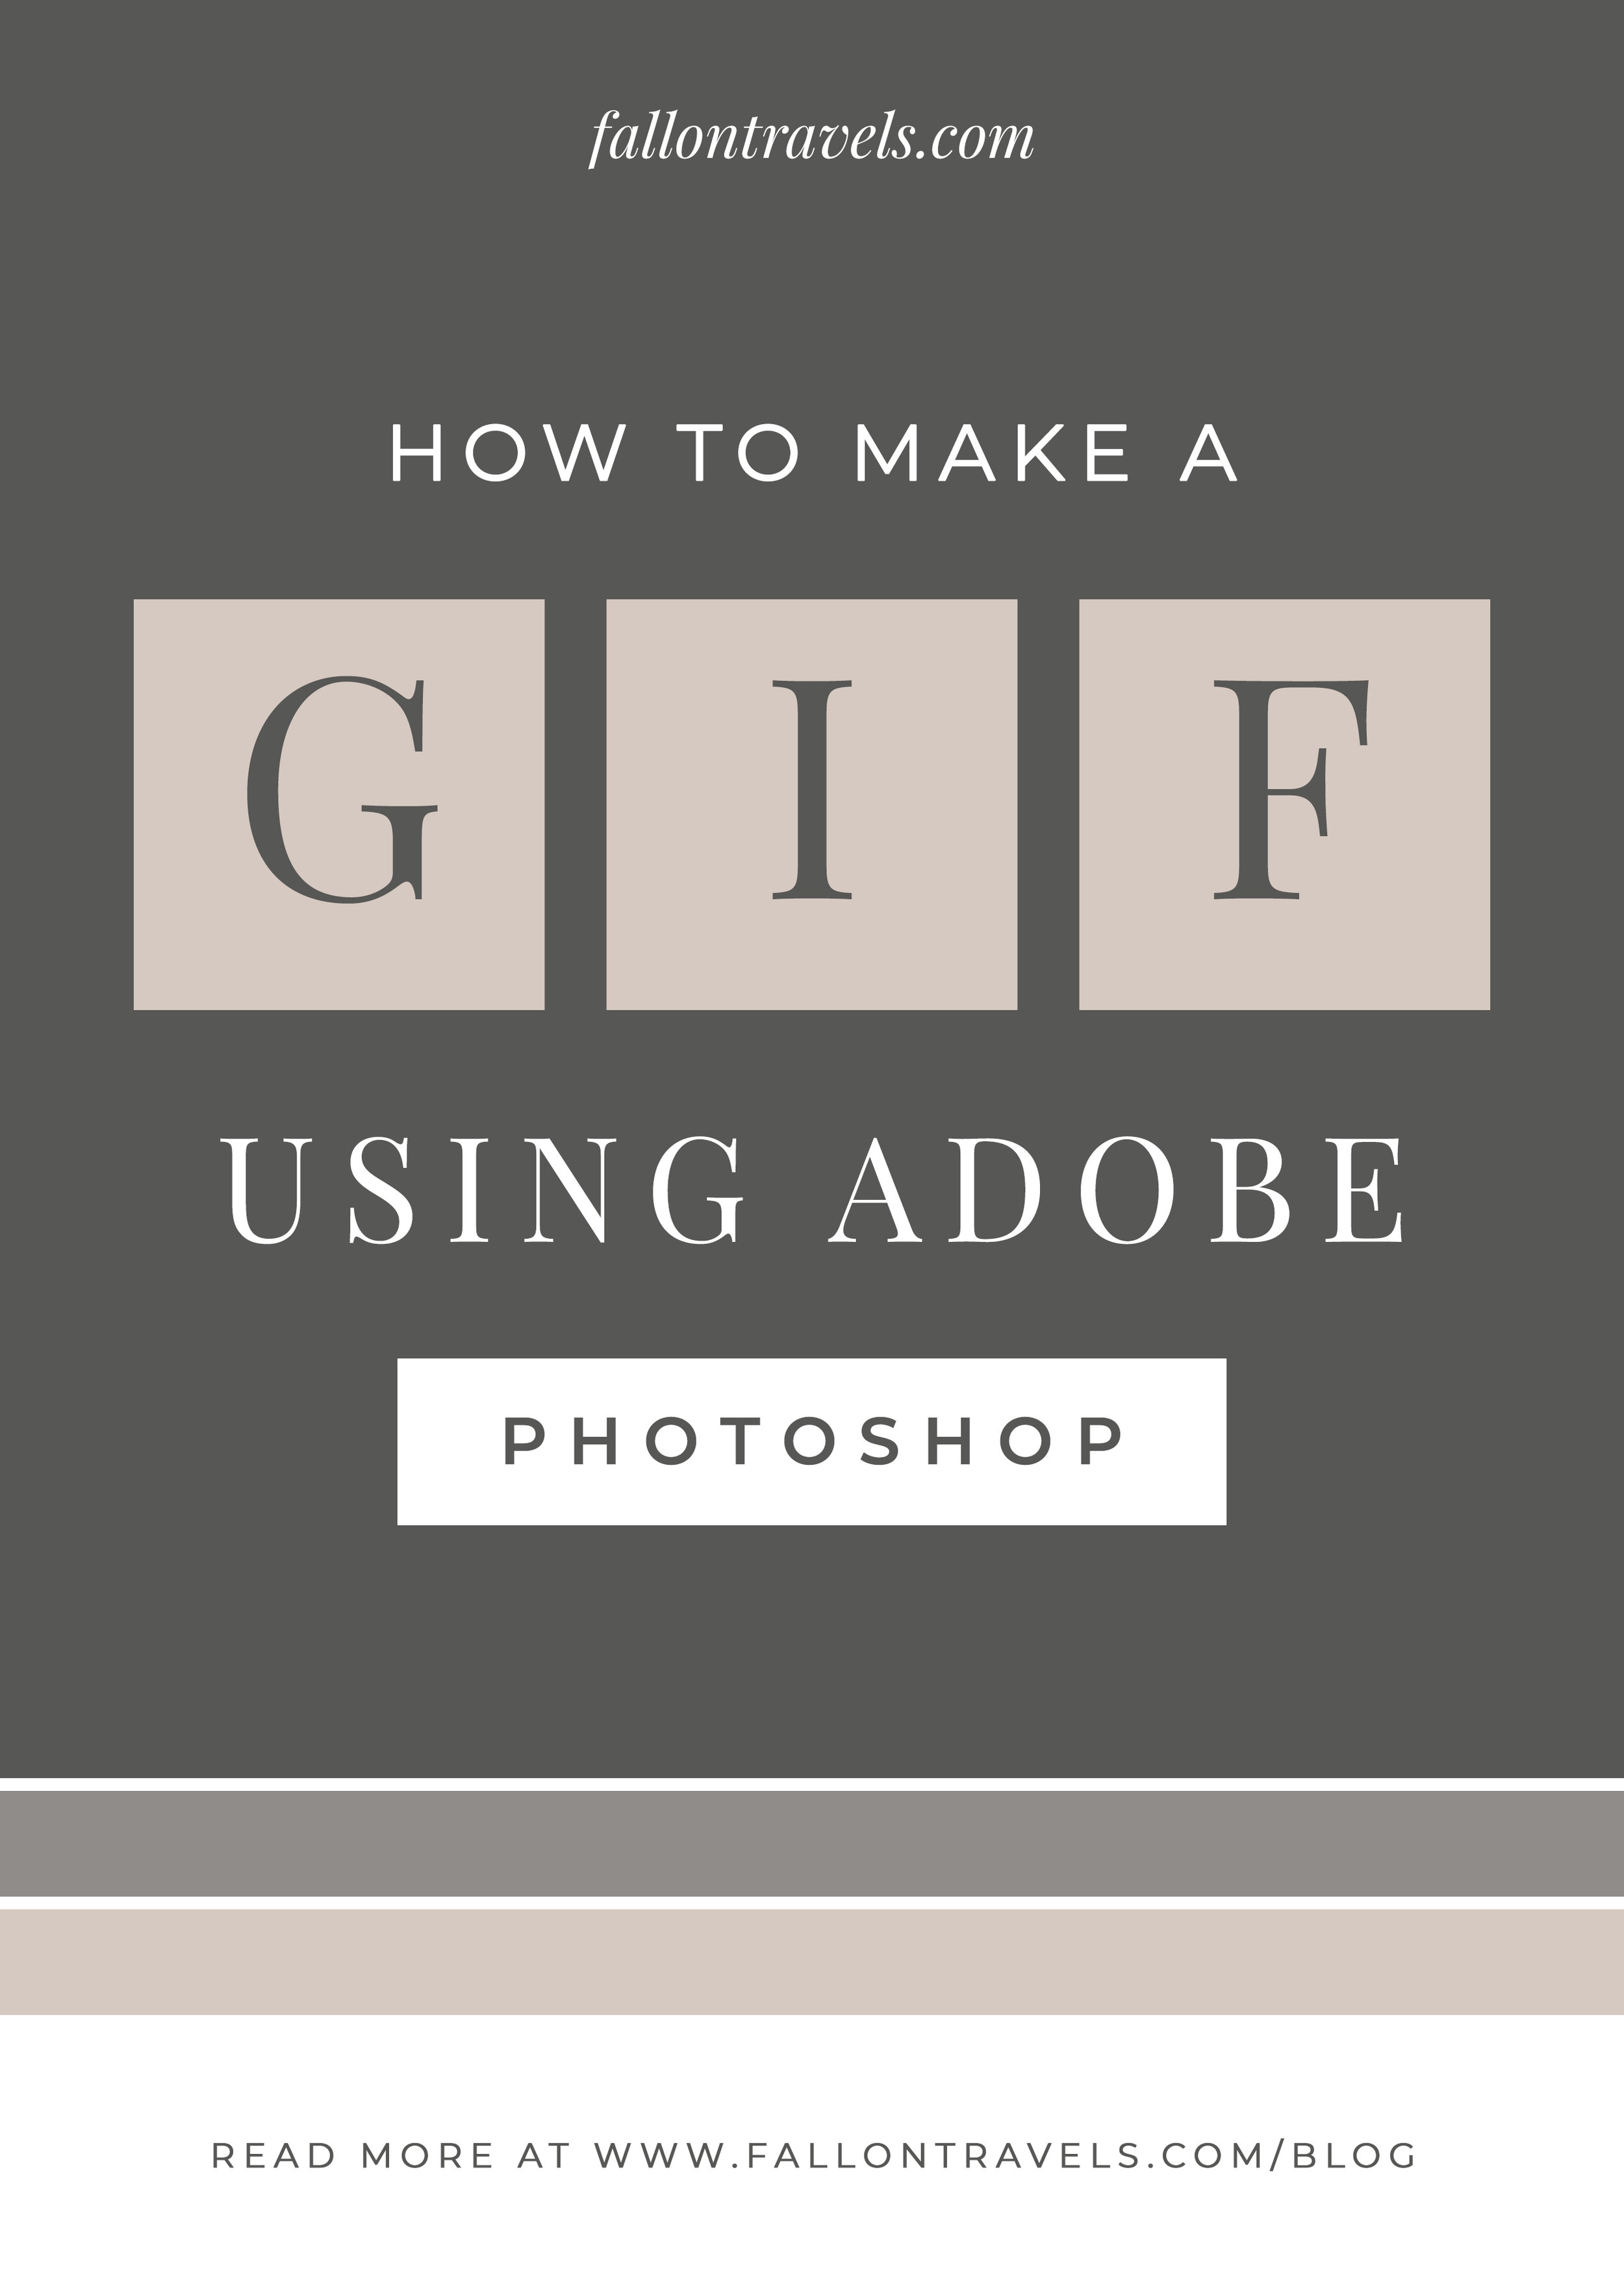
For this example, I am going to use a simple blog post template to demonstrate how I would strategize my GIF animation. I am only using 4 variations of the templates in total (but will be duplicating a few of the template layers), and you can see this below. For this animation, I will be alternating the letters “GIF” between dark grey and white to give the GIF it’s motion effect.
Now, you can follow the steps listed below to actually make your GIF in Photoshop!
Step 1: Upload images to Photoshop CC
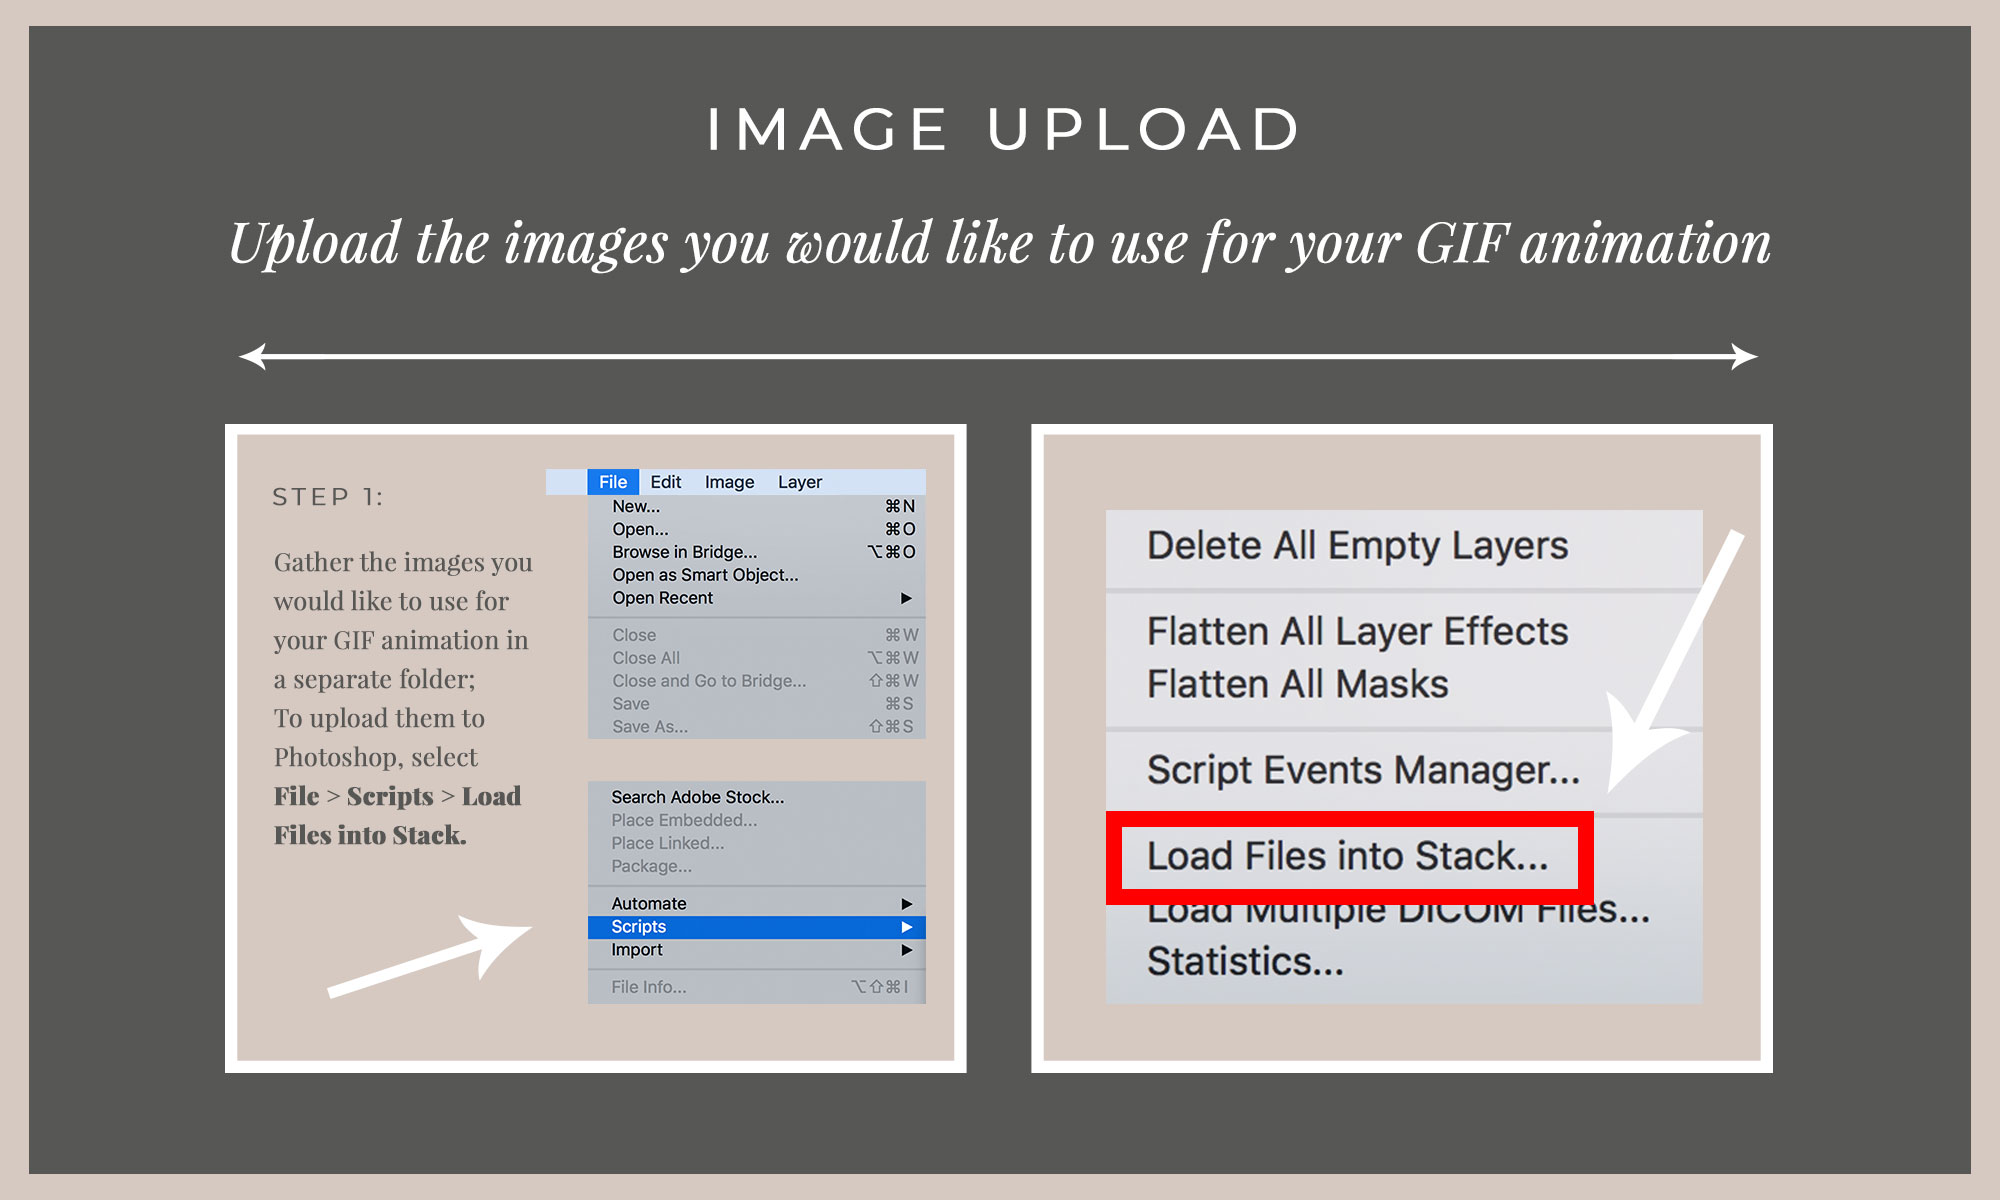
Gather the images you would like to use for your GIF animation in a separate folder; you may want to name/number these files based on the order in which they will appear in your GIF sequence. To upload them into Adobe Photoshop, select File > Scripts > Load Files Into Stack.
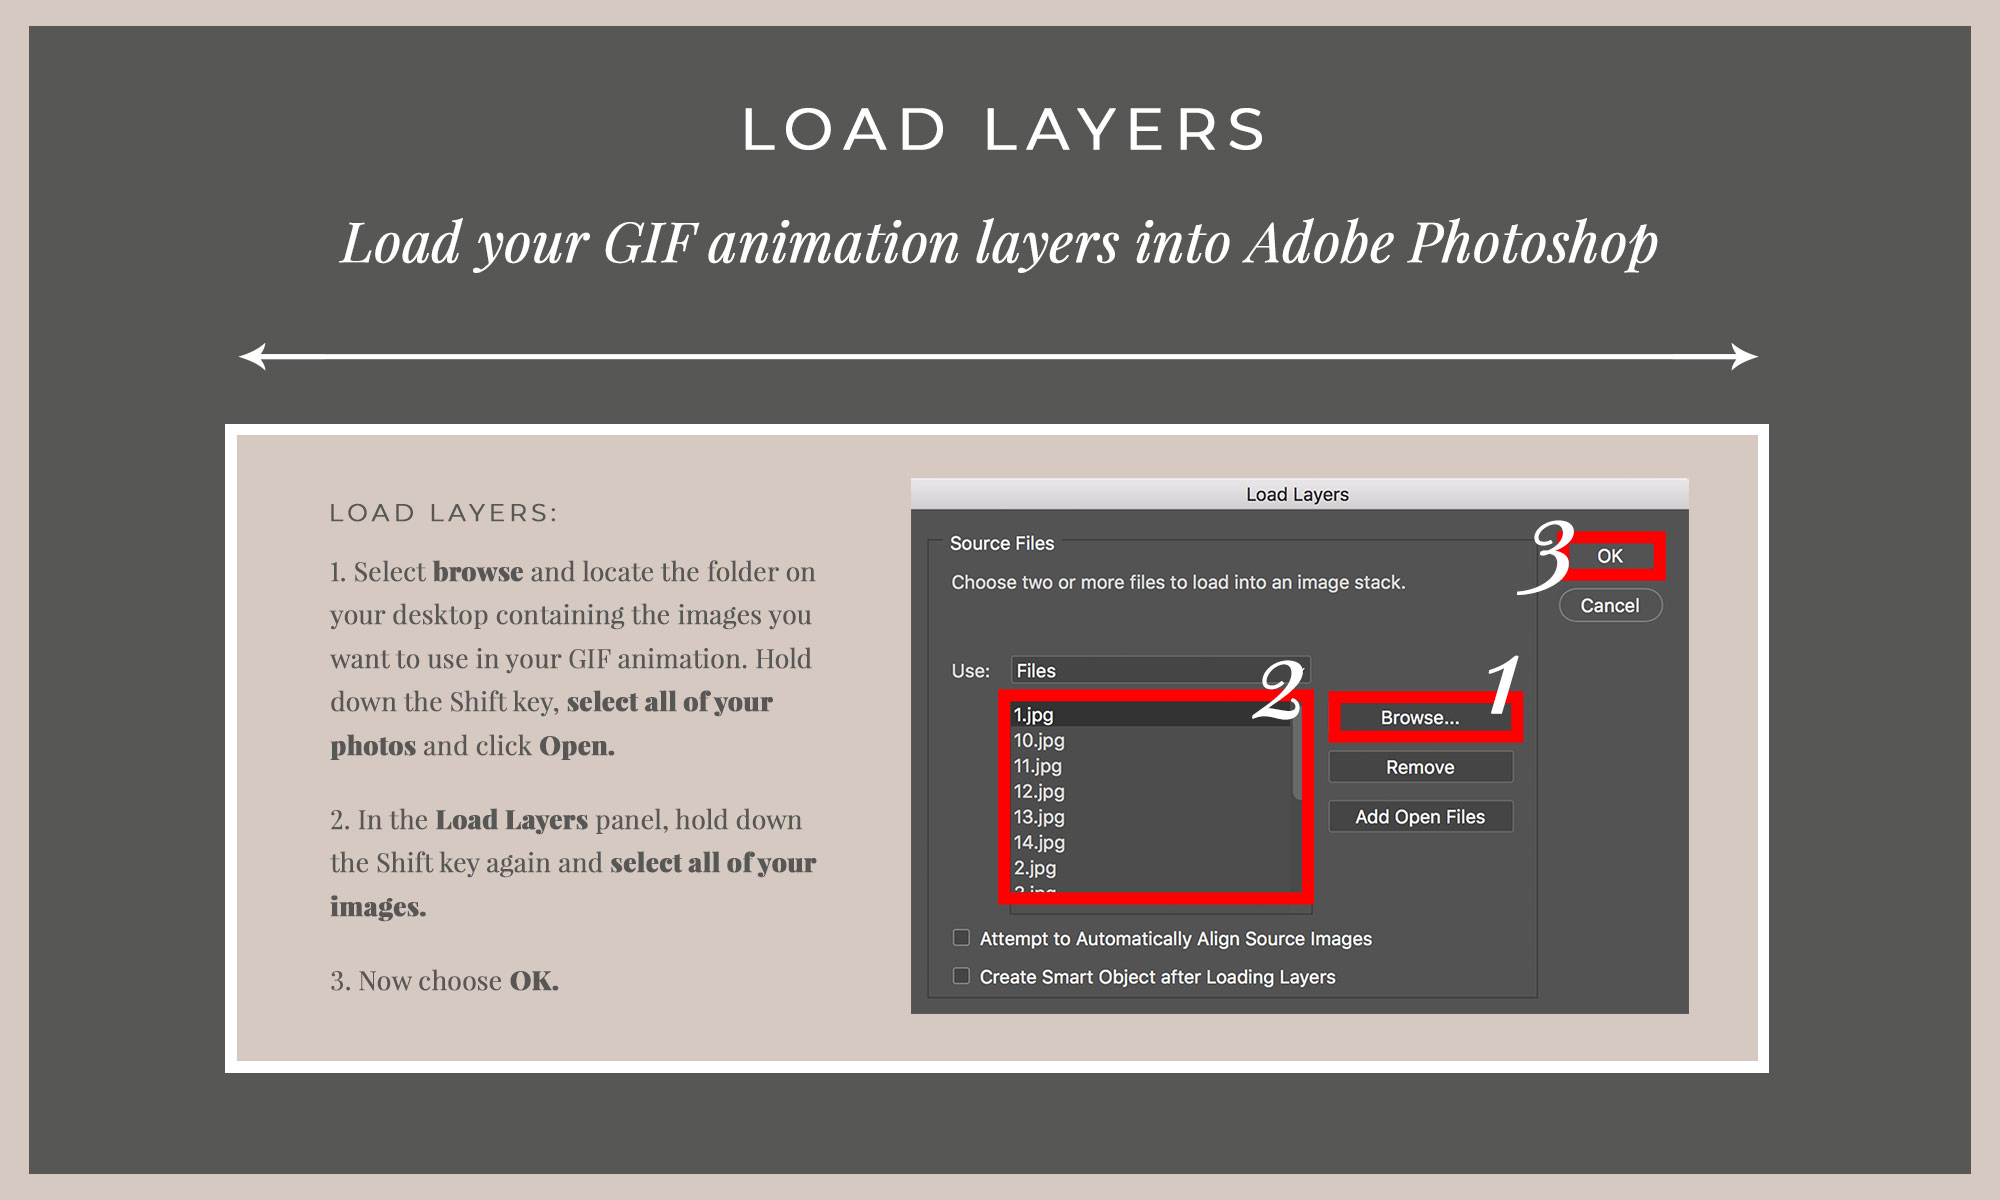
Select browse and locate the folder on your desktop containing the images you want to use in your GIF animation. Hold down the Shift key, select all of your photos and click Open. In the Load Layers panel, hold down the Shift key again and select all of your images. Now choose OK.
Photoshop will then create a separate layer for each of the files you have chosen, which will be displayed in your Layers panel on the right-hand side. These individual layer files are going to become the frames of your animated GIF. You will want to make sure these layers are ordered correctly before moving onto the next step — your first file should be placed at the very bottom, and your last file should be placed at the very top.
Step 2: Open up the Timeline window in photoshop
To open up the Timeline window, you will head to the top navigation and choose Window > Timeline. The Timeline window will appear at the bottom of your screen; this panel allows you to toggle different layers for different periods of time, thereby transforming your static images into an animated GIF.
Step 3: Select “Create Frame Animation”
In the Timeline window, you will see a dropdown menu. Click here to reveal your options, and select Create Frame Animation.
Step 4: Create a new layer for each new frame
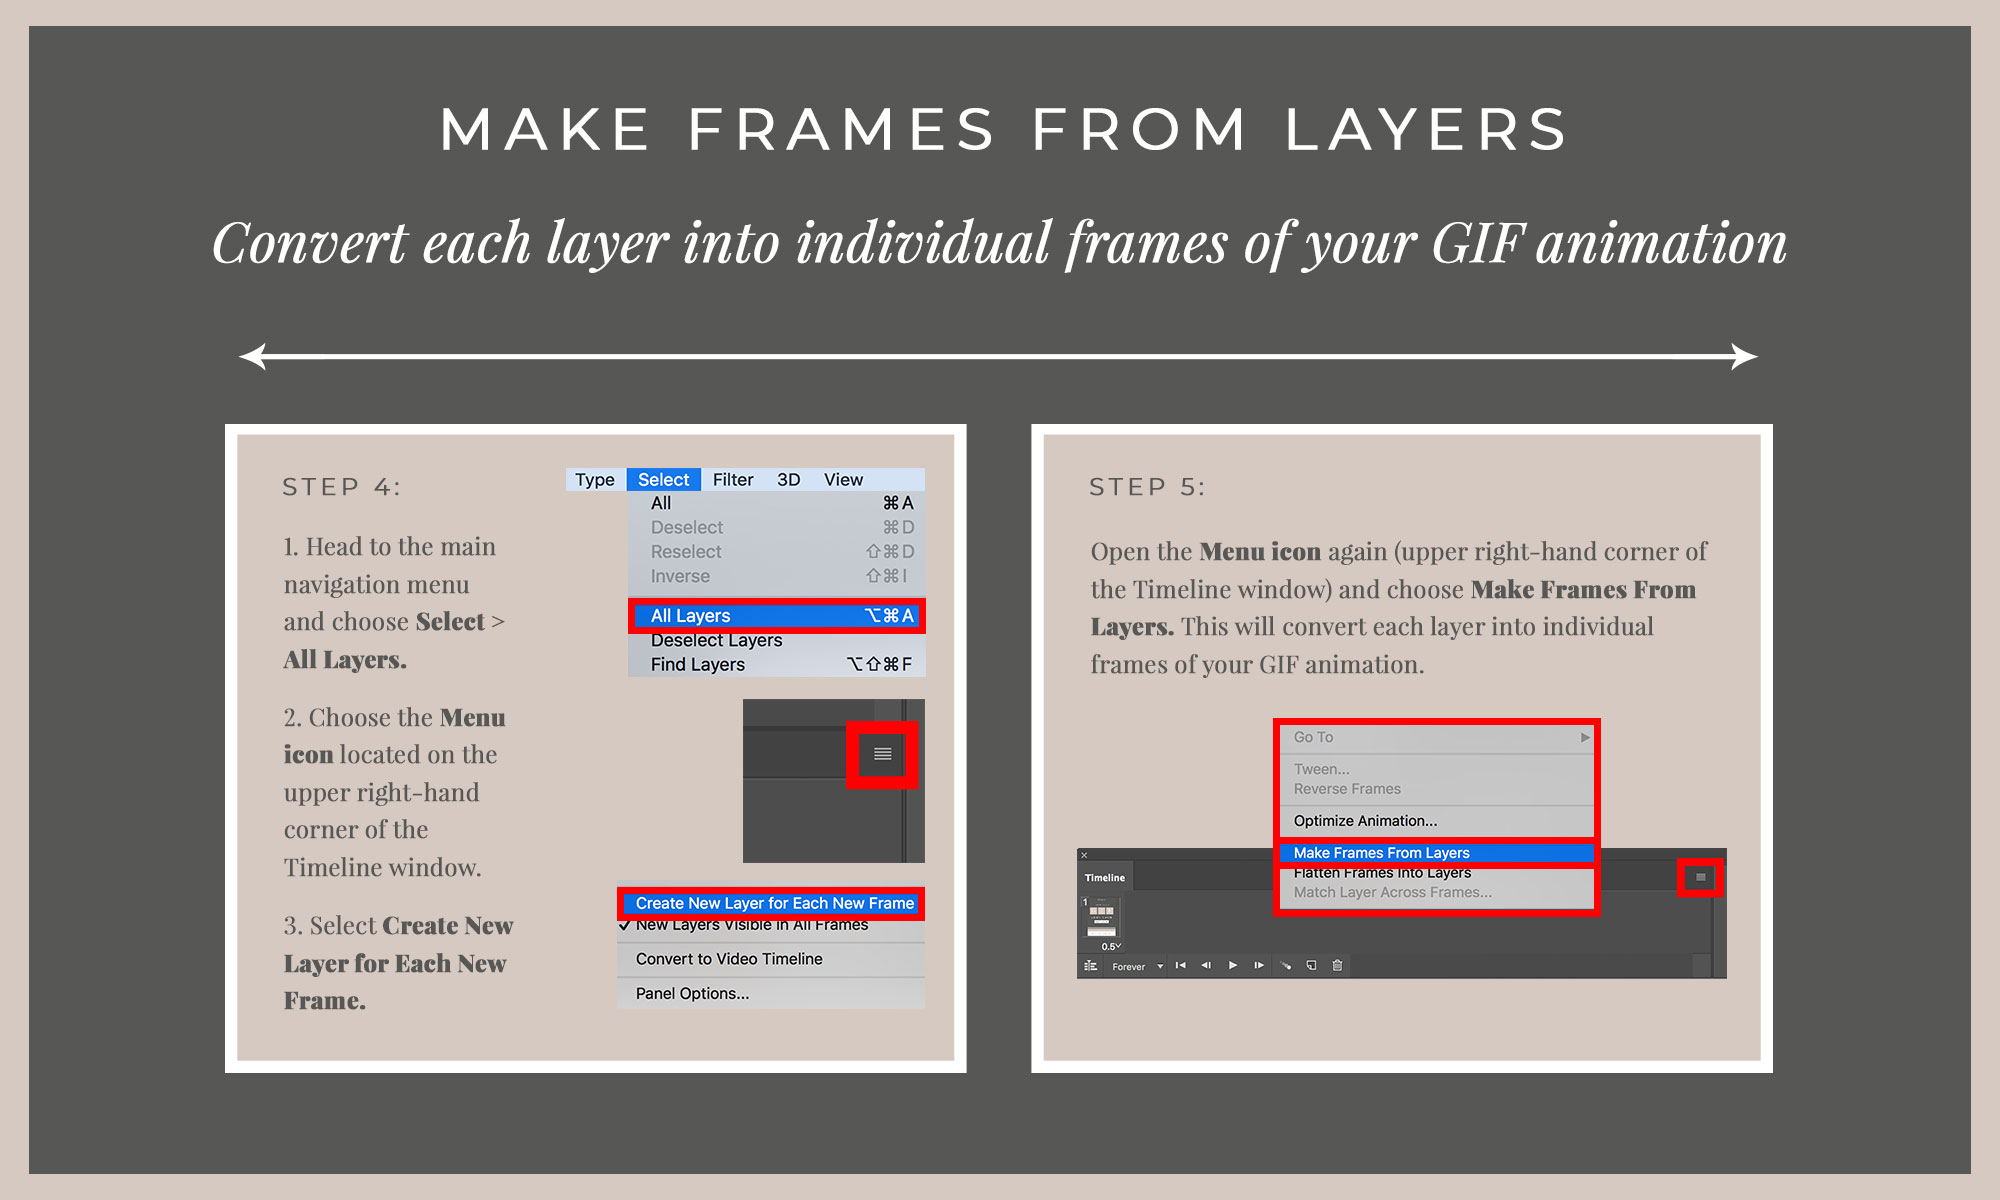
You will first need to create a new layer for each frame:
Head to the top navigation menu and choose Select > All Layers.
Choose the Menu icon located on the upper right-hand corner of the Timeline window.
From the dropdown menu options, select Create New Layer for Each New Frame.
Step 5: Make Frames From Layers
Open the Menu icon again (upper right-hand corner of Timeline window) and choose Make Frames From Layers. This will convert each layer into individual frames of your GIF animation.
Step 6: Decide how long your GIF will be
You’ll now need to select how long your GIF animation will be. To do this, click below each frame and select how long you would like it to appear. If you want to choose multiple frames, then shift + click each frame you would like, and choose how long you want your selections to appear.
Step 7: set your GIF animation to Loop
Now you’re going to select how many times you’d like your GIF animation to repeat. Click on the Repeat dropdown menu at the bottom of your Timeline panel. The default loop number for your animation will be Once, but you can loop the GIF as many times as you’d like. The dropdown menu options will include:
Once
3 times
Forever
Other…
I almost always choose to loop Forever- this is going to create the looping animation you typically see with GIFs. Select Other if you’d like to specify the number of loops in your GIF animation.
Step 8: Preview your animated GIF
You can now preview your GIF animation by selecting the Play icon from the bottom of your Timeline window. If the animation starts to play backwards, you can reverse this by clicking the menu icon on the upper right-hand corner of the Timeline window and selecting Reverse Frames.
Step 9: Save and Export your Photoshop GIF
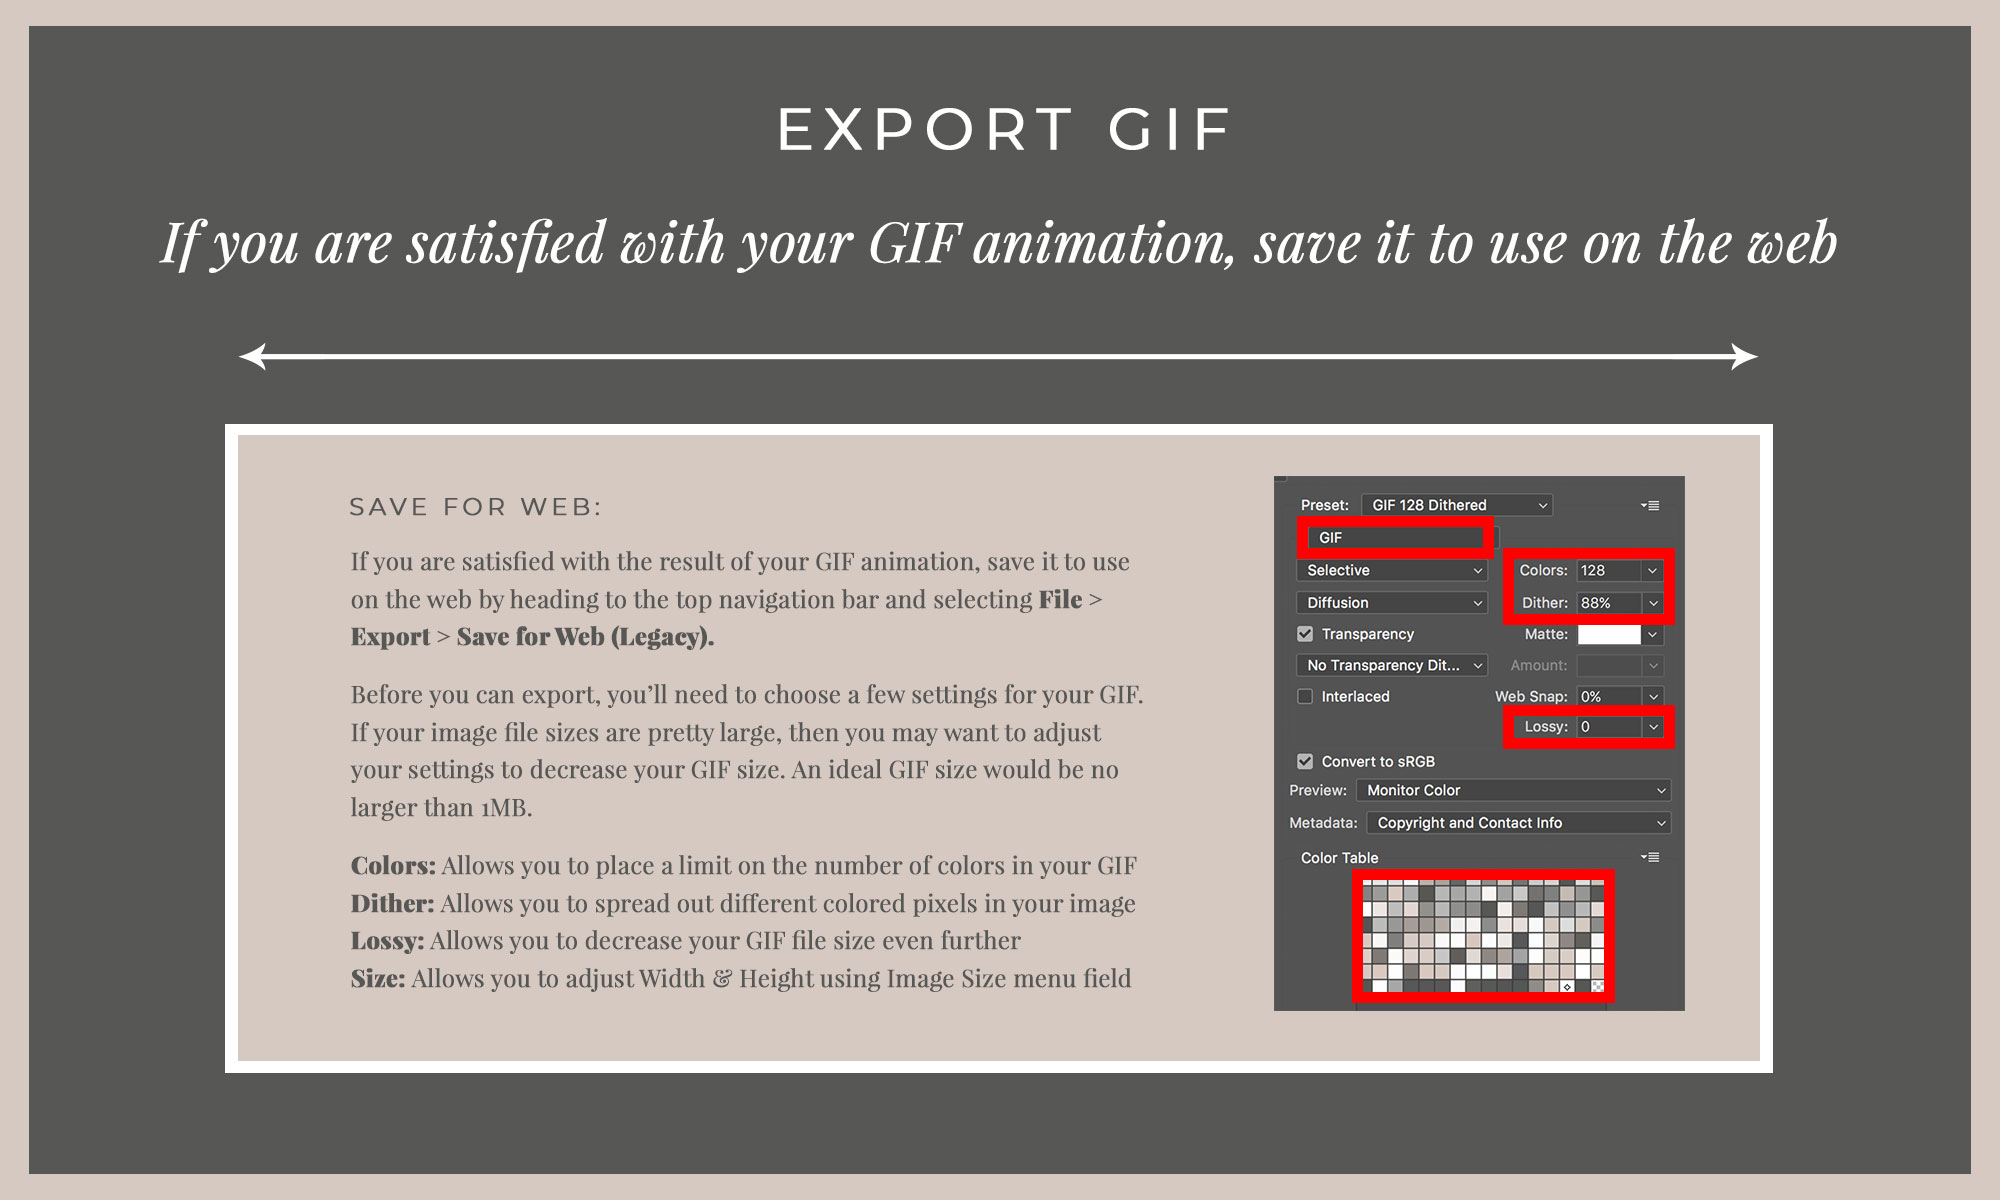
If you are satisfied with the result of your GIF animation, save it to use on the web by heading to the top navigation bar and selecting File > Export > Save for Web (Legacy). Make sure that GIF is selected as the export option.
Before you can finalize the export, however, you’ll need to choose a few settings for your GIF. You’ll want to adjust these based on your own GIF/ the files that were used to create it. If your image file sizes are pretty large, then you may want to play around with your settings to decrease the total size of your export. An ideal GIF size would be no larger than 1MB.
Preset: You can choose a preset for your export settings such as GIF 128 Dithered
Colors: This setting allows you to place a limit on the number of colors used in your GIF. The maximum number of colors you can use for your GIF is 256. My rule of thumb is typically 128 colors — if that doesn’t look good enough, I would bump it up to 256
Dither: This setting allows you to spread out different colored pixels in your image. Higher settings will increase your GIF’s quality, but will also increase the file size. If you created a GIF with gradient elements, then you might want to tweak these settings to prevent color banding in your animation. If your images contain mostly solid colors, then you may want to opt for little to no dither
Lossy: This setting allows you to decrease your GIF file size even further if necessary
Size: If you plan on using the GIF animation for web, or if you want to limit your total file size, you can adjust the Width and Height using the Image Size menu field
If you’d like to preview your animated GIF before finalizing the export, you can select the Preview… button in the lower left-hand corner of your Export window. This will pull up the GIF animation in a new web browser. Choose Save (located at the bottom) and then select a final destination for your animated GIF.
You just made a GIF animation in Photoshop!
Congratulations- you just created your very own GIF! You are now ready to use the animation for content marketing, branding, design- you name it! Let your imagination run wild.
How to make a GIF in Photoshop from video:
Now that we’ve learned how to make a GIF in Photoshop using still images, it’s time to learn how to make an animated GIF from video! The process is almost identical to using still images, except you will need to start by converting the frames of your chosen video into individual layer files.
Step 1: Save the MP4 video to your computer
For this tutorial, I’m using a simple 2 second iPhone MP4 clip that I shot in Paris. You can choose to use your own MP4 video files, or download them from sites like MakeAGif.com or Giphy.com. Before you begin, it’s important to note that you’ll want to trim your MP4 clip down to a reasonable length. Photoshop can not handle extremely large file sizes, so you should ideally try to aim for a 2-3 second video clip (this will be the easiest length to work with).
Once you have chosen your MP4 video file, make sure you save it somewhere on your Desktop.
Step 2: Convert video frames into individual layers
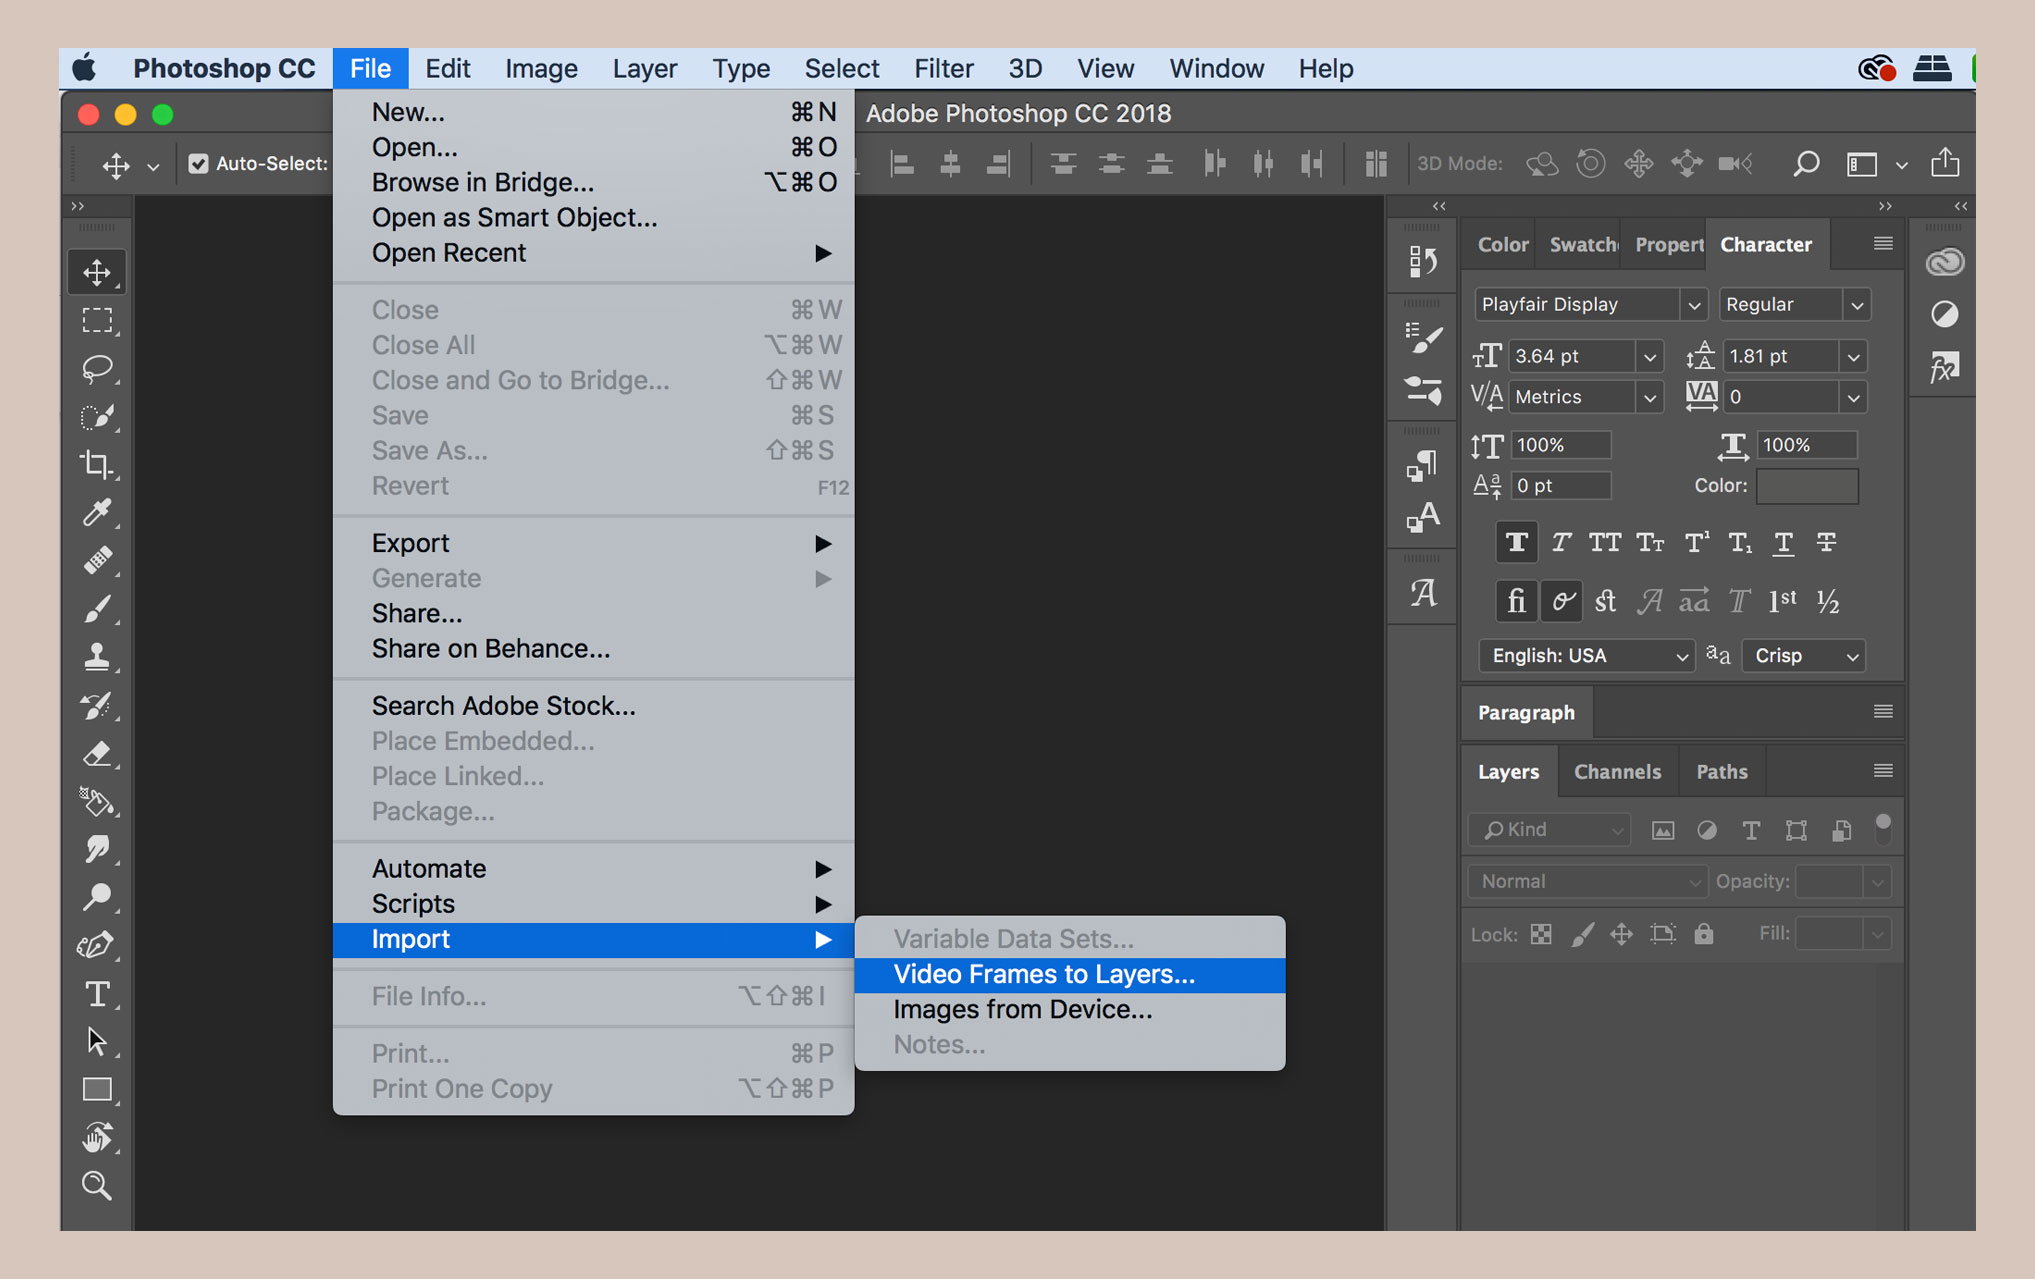
To begin the process, you’ll want to open up Adobe Photoshop and select File > Import > Video Frames to Layers.
Locate the video you would like to use for your GIF animation, and select Open.
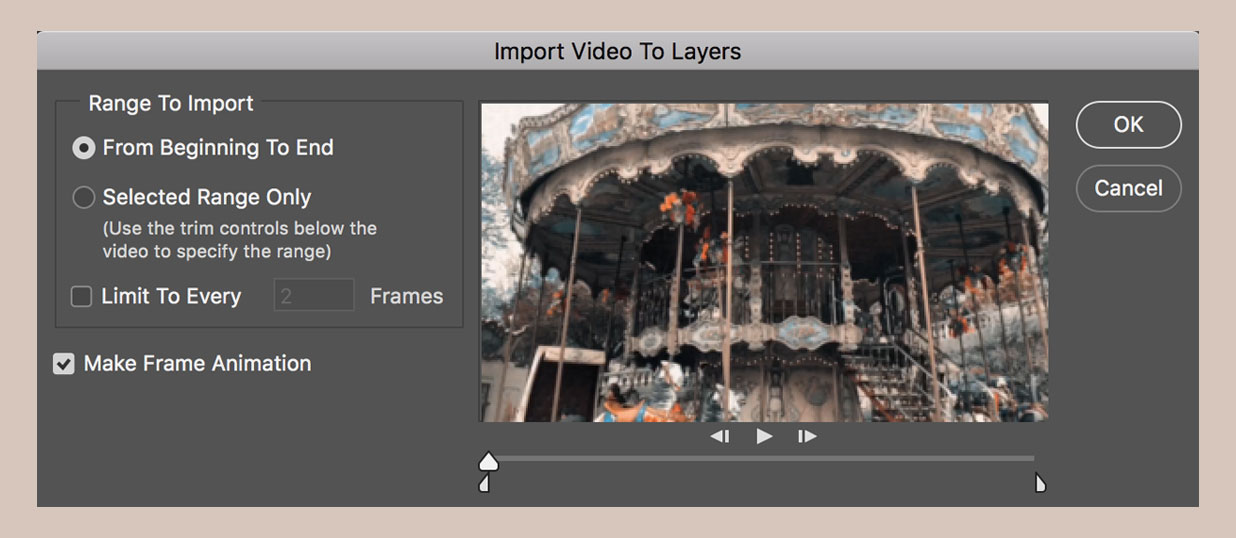
Select OK to convert these video frames into a single layered file.
Step 3: Select your video length
It’s important to note that Photoshop might not be able to import your video if it’s too long. After your video is imported to Photoshop, you’ll see a window pop up which allows you to make adjustments to your GIF length using markers/in-and-out points. You can choose to import the entire video file, or just a small segment of it.
You’re able to make changes to the number of video frames imported into Photoshop, as well as place a limit on the number of frames imported to a fixed interval (i.e. every 2 frames). You may want to note that if you skip too many frames, your animation could end up being choppy; however, every 2 frames is typically a safe bet!
Step 4: Adjust the timing of your video frames
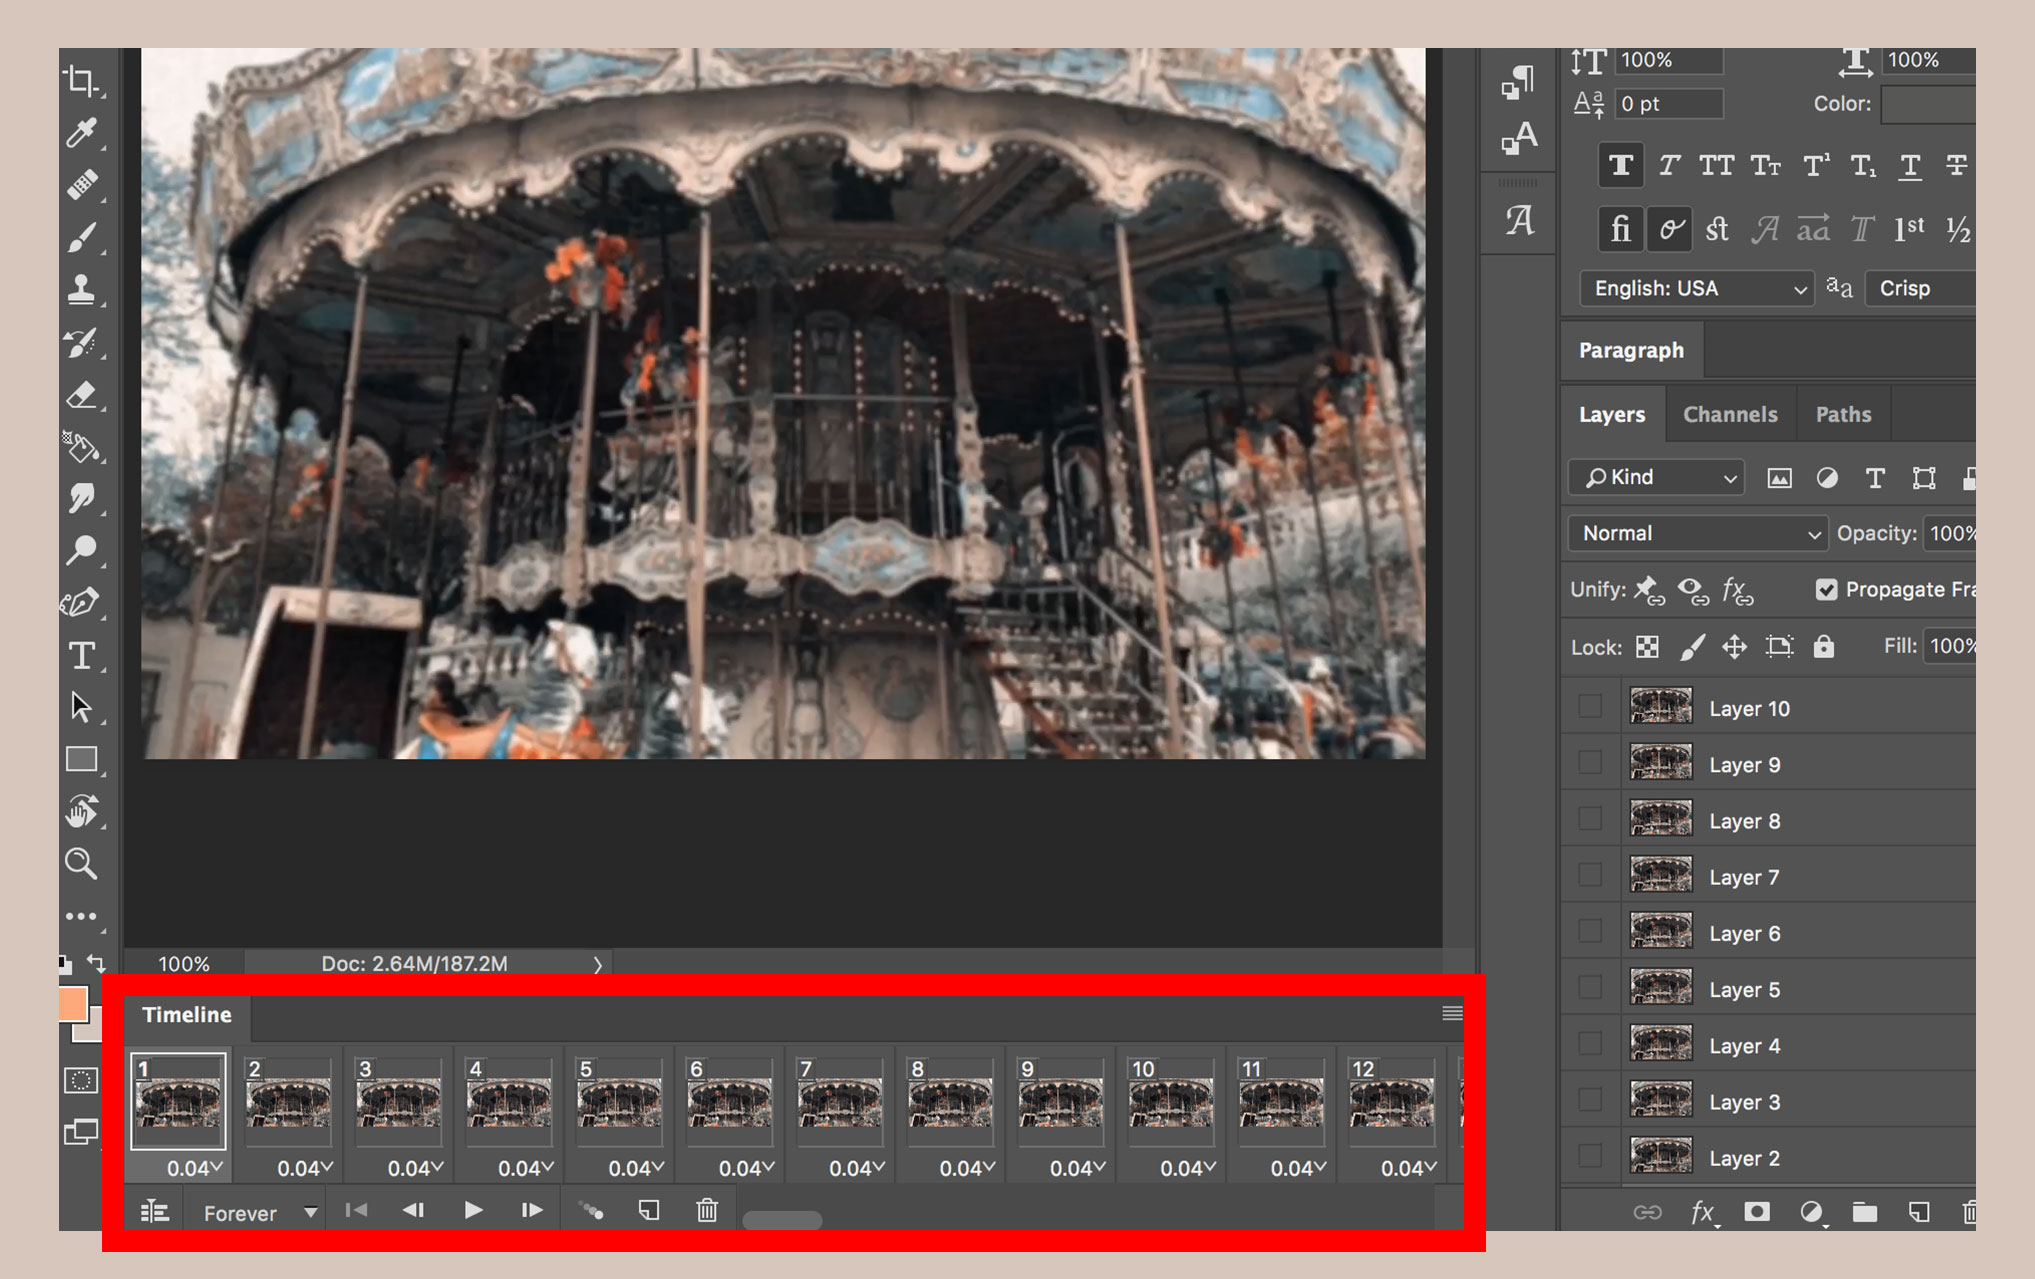
In order to adjust the speed of your GIF, you’ll need to select all of the frames in the Timeline window and choose the timing by clicking the dropdown menu at the bottom.
Step 5: Choose your GIF Loop settings
You can now select how many times you’d like your GIF to loop. Click on the Repeat dropdown menu at the bottom of your Timeline panel (which will display the word Once). The default loop number for your animation will be Once, but you can loop the GIF as many times as you’d like. I always choose to loop Forever- this is going to create the looping animation you typically find with GIFs. Select Other if you’d like to specify the number of loops in your GIF.
Step 6: Export your animated GIF!
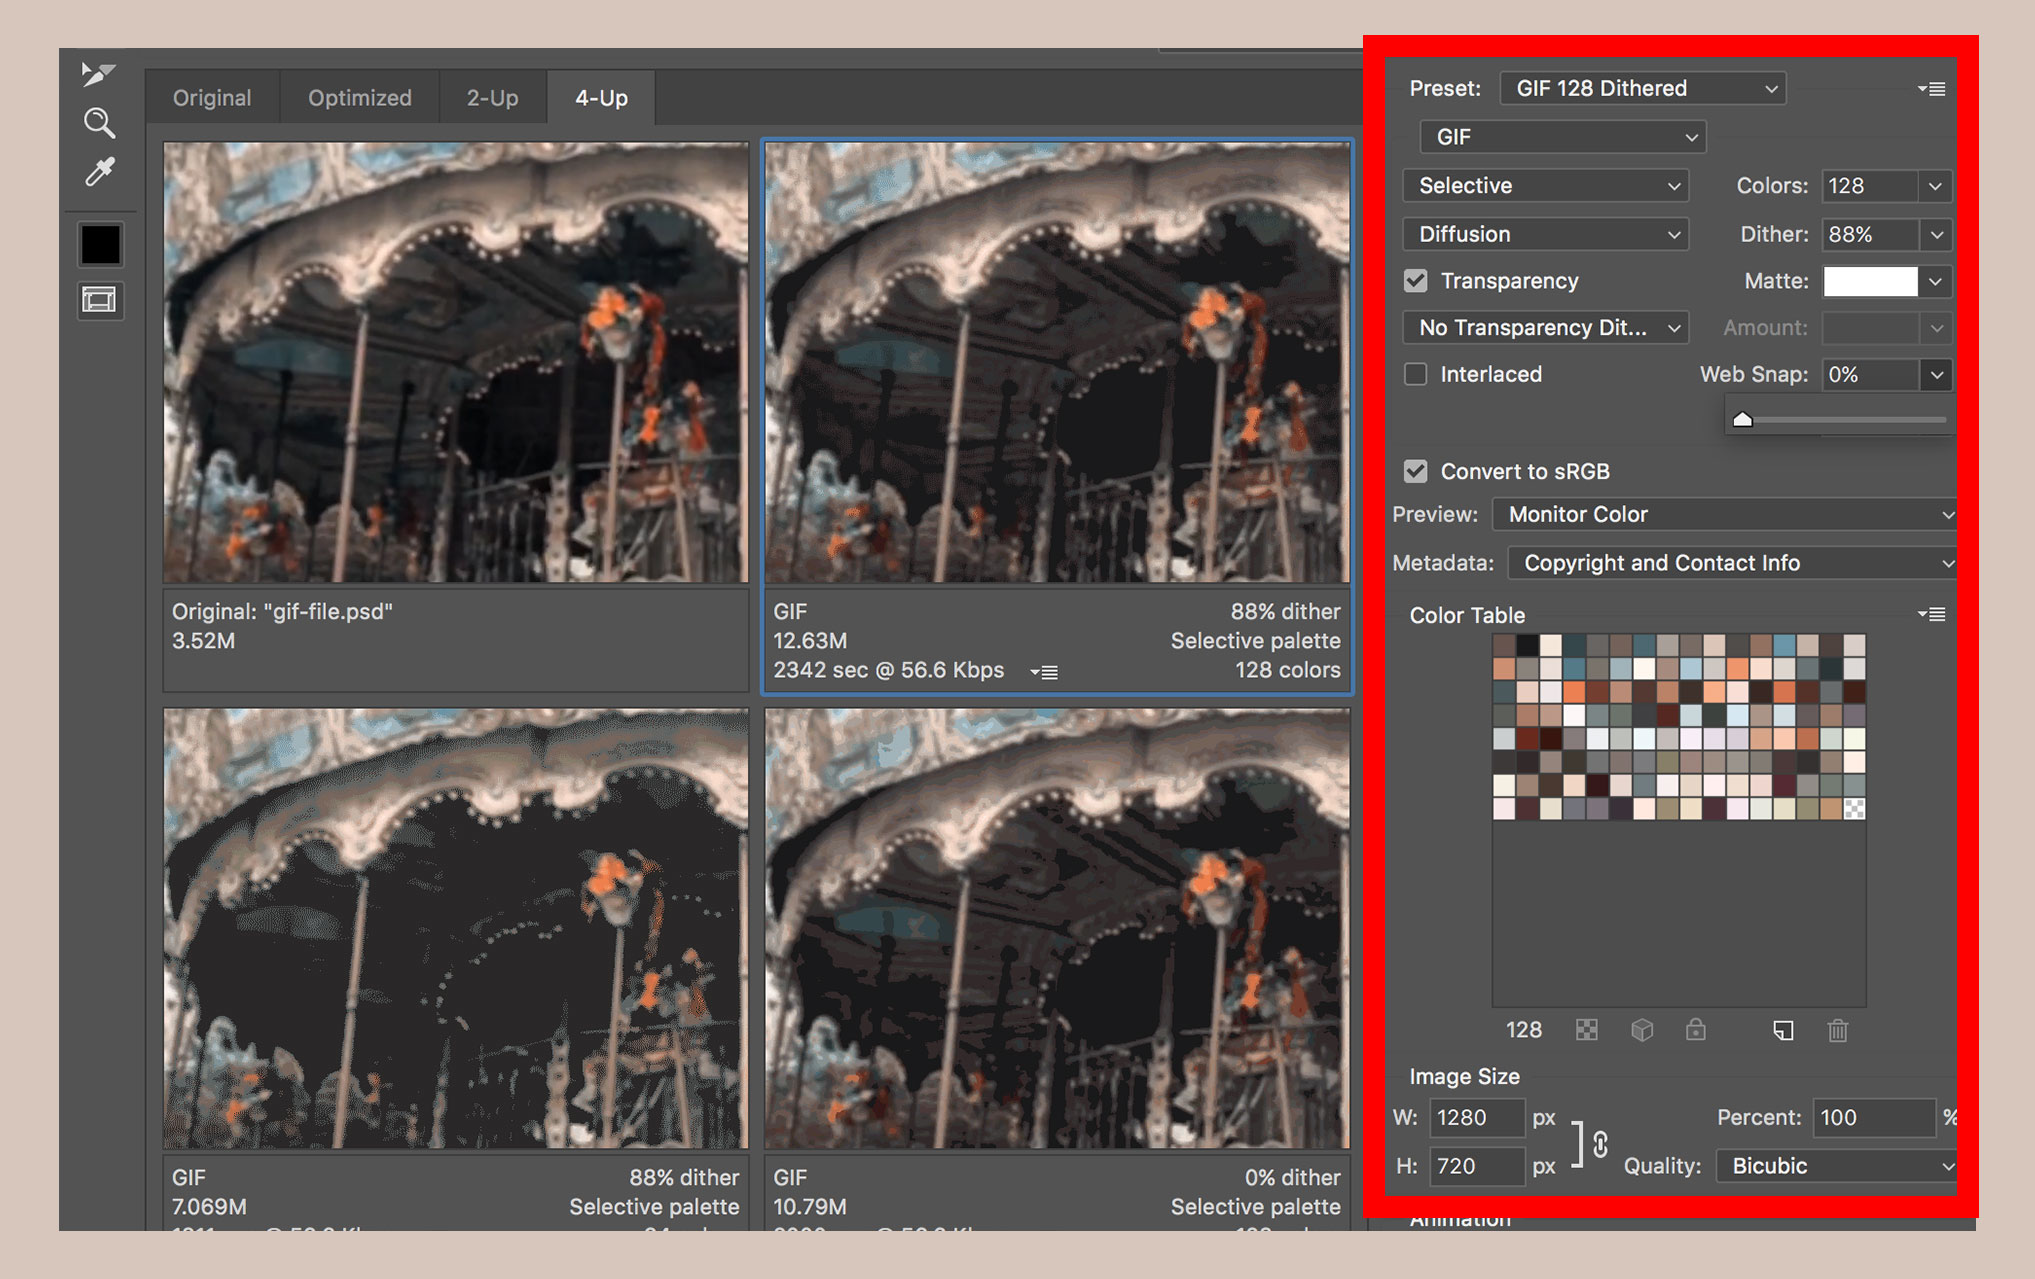
If you are satisfied with the result of your GIF animation, save it to use on the web by heading to the top navigation bar and selecting File > Export > Save for Web (Legacy).
Before you can export the GIF, however, you’ll need to choose a few settings— some adjustments you can make include dither, lossy compression and colors. For example, if you created a GIF with gradient elements, then you might want to select Dithered GIFs to prevent color banding. If your image files contain mostly solid colors, then you can choose No Dither.
If your image file sizes are pretty large, then you may want to play around with your settings to decrease the total size of your export. An ideal GIF size would be no larger than 1MB. Once you are finished with your settings, you can choose Save (located at the bottom) and select a destination for your animated GIF.
How to make a GIF from video - without Photoshop (for free)
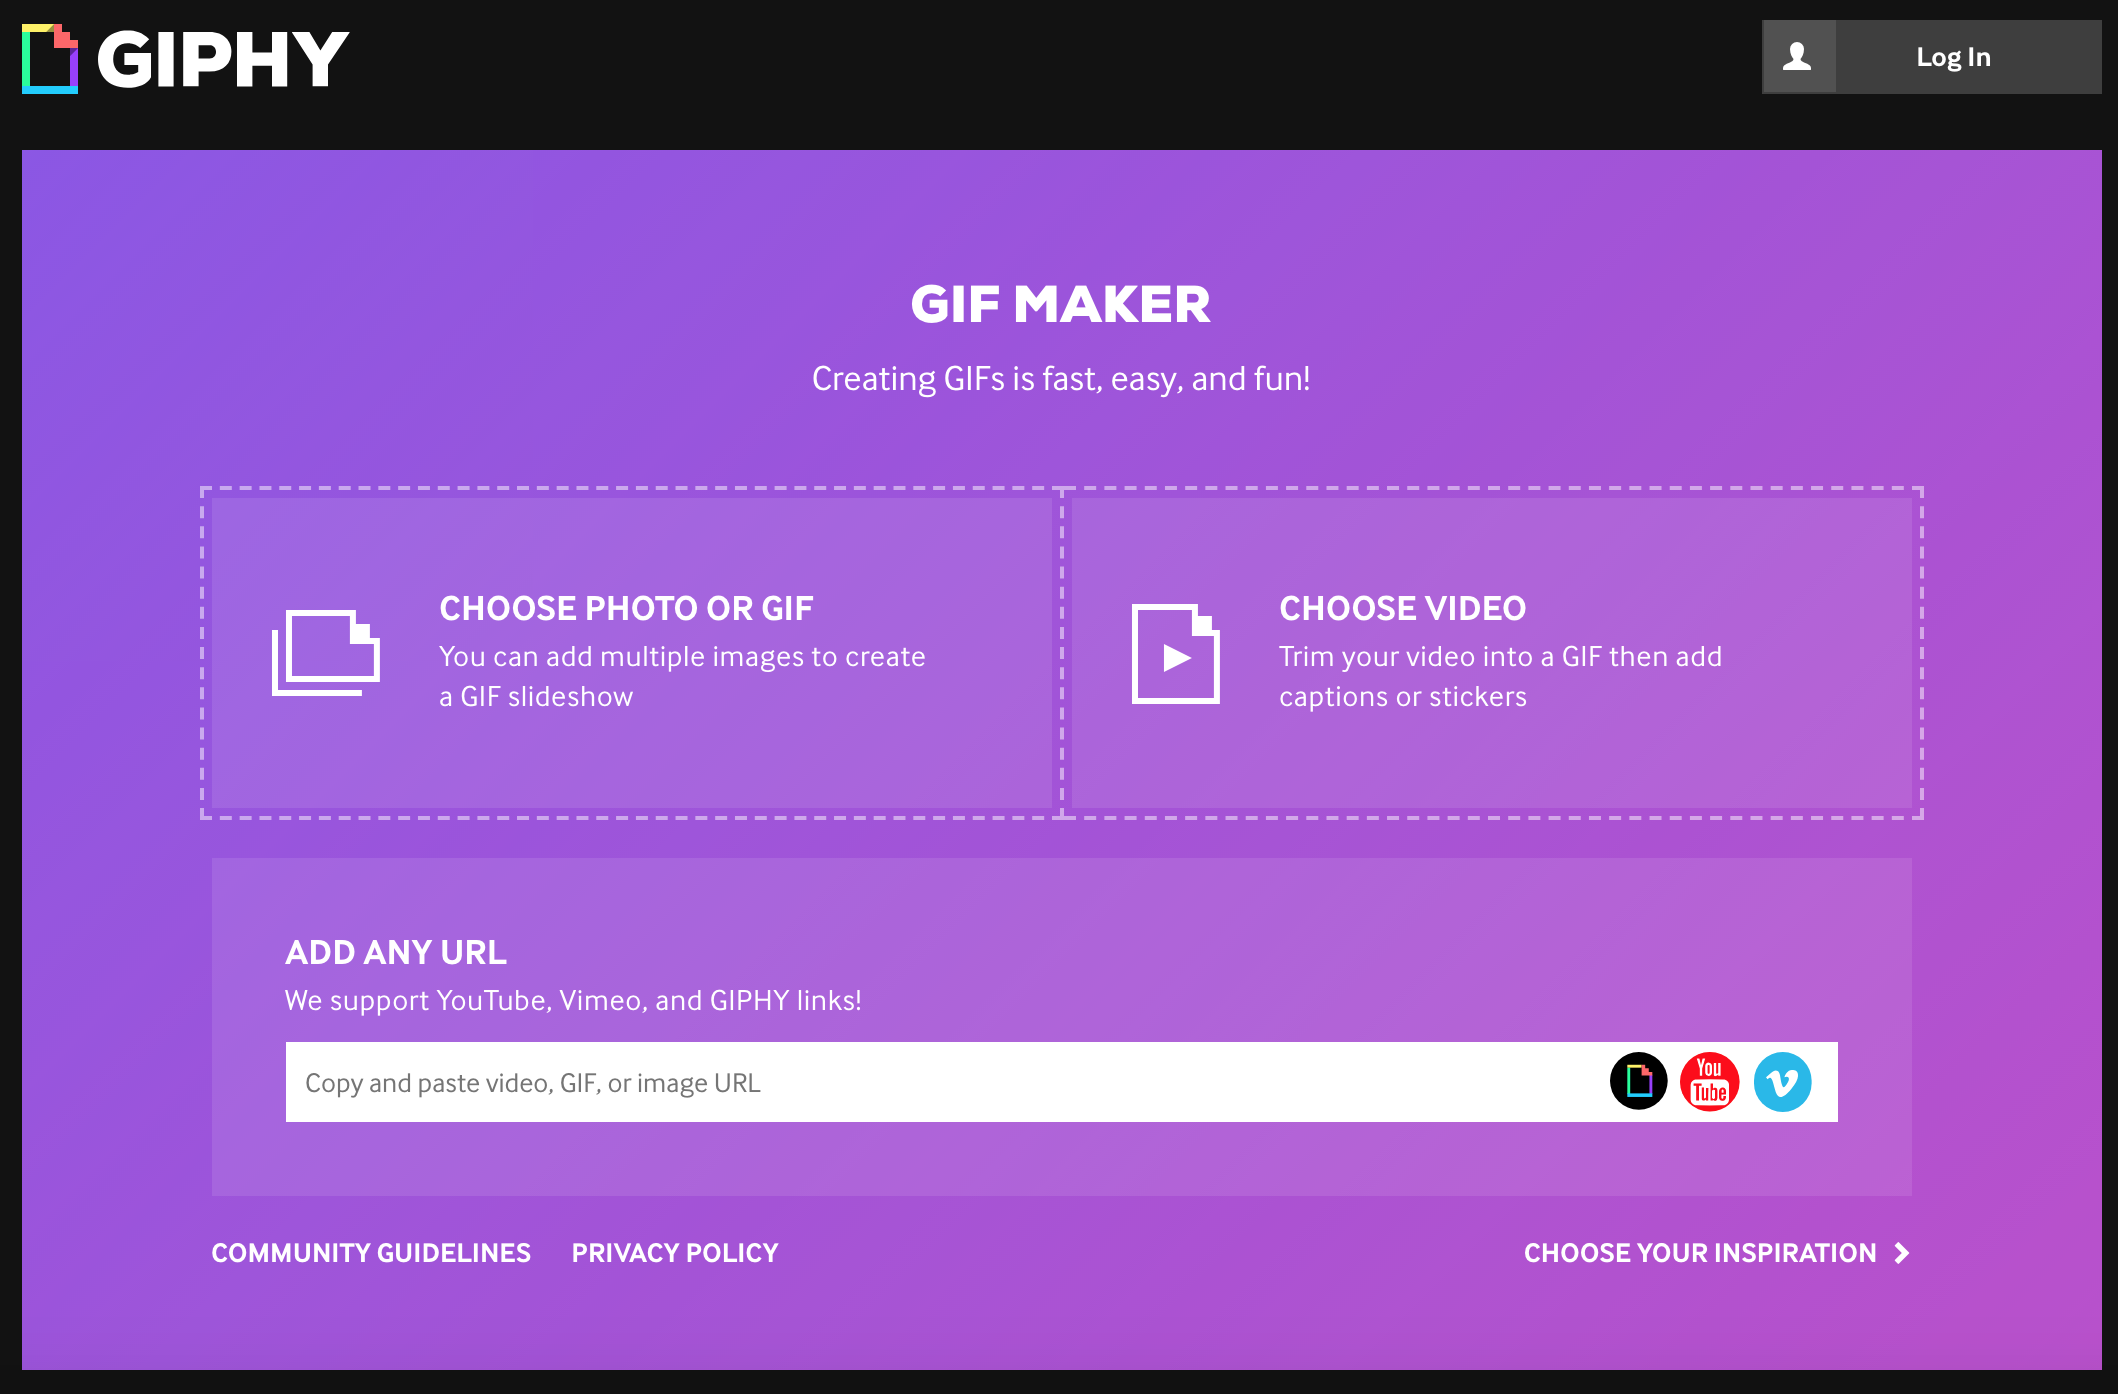
If you’re still feeling a bit overwhelmed with Photoshop, there is no need to fret! There are actually a number of ways you can generate an animated GIF from video without using Photoshop (and for free!). Certain websites allow you to make GIFs on their platform - without handing over your credit card. These include sites such as Giphy, Ezgif, GifMaker, MakeAGif, ImgFlip, Gfycat and more.
There are a few downsides to the free GIF makers in terms of control, such as the image upload limit, file size and timing of the GIF animation. Nonetheless, these platforms are a great resource for individuals who are a little less tech-savvy, and don’t want the added learning curve of Photoshop. Follow along these steps for an example of one free GIF maker route you could take:
Step 1: Choose your gif maker website and upload your video
As an example, I’m going to explain these steps using Giphy (as this is one of the most popular GIF websites). To begin creating your GIF using an existing video file:
Go to Giphy.com (or the website of your choice)
Upload the video file from your computer, or type in the URL of an existing video you would like to use
Step 2: make any necessary edits to your video
Once your video is uploaded to Giphy.com, you can make a few edits to your video for your GIF animation. You may want to make changes to:
GIF start point: Choose the segment of your video where you want your GIF to begin
GIF length: Choose how long you want your GIF animation to play
Caption: You can add a caption for your GIF (optional)
Step 3: export your gif animation!
Once you have made any necessary changes for your animation, you can go ahead and finalize your GIF!
Click the button that says Create GIF
Once the export is complete, you can download your new GIF animation!
And you’re finished! You can now use your animated GIF on any platform that accepts GIF format.
How to upload your GIF animation to Instagram
At this time, Instagram unfortunately doesn’t allow you to upload GIF animations to your feed. The platform does, however, support MP4 video content. So if you want your animation uploaded to Instagram, you’re going to need to convert your GIF to an MP4 video file. You could either do this in Photoshop or use another online service to get the job done. For both processes, you’ll want to make sure your GIF is cropped into the appropriate dimensions for Instagram. I’ll explain both options in further detail below:
Convert your GIF animation to an MP4 video using Photoshop:
If you’re well-versed in Photoshop, you may just want to go ahead and use it to convert your GIF to MP4 video content. The only thing you’ll want to watch out for is the file size of your GIF; If the file size is too large, Photoshop may take some time to process your video render. Nonetheless, you can follow along these simple steps to convert your GIF to MP4:
Make sure your GIF is cropped into appropriate dimensions for Instagram
Go to File > Export > Render Video
A dialog box will pop open for your video settings- name your file and choose where you’d like to save it to
Most of your settings will remain as default (but again, watch out for your file size). Choose Render!
Upload the video file to your Instagram feed!
Convert your GIF animation to an MP4 video without Photoshop:
If you’re not quite as versed in Photoshop, there are plenty of free websites out there that allow you to convert your GIF into an MP4 file. An example of one of the websites is EZGIF.com , and you can follow along these simple steps to create your mp4 file:
- Make sure your GIF is cropped into appropriate dimensions for Instagram
- Go to EZGIF.com (or GIF to MP4 website of your choice)
- Download your new MP4 file
- Upload the video file to your Instagram feed!
How to Use GIFs in your Content Marketing
Upload your GIF animation anywhere online, and it should be able to play seamlessly in most cases. Some examples of common GIF marketing strategies are social media, e-mail newsletters and campaigns, blog posts and website content.
use animated gifs on social media:
Animated GIFs are a great way to boost your engagement on various social media platforms. It is important to note, however, that some platforms won’t accept GIF file format. For example, (at this time) Instagram does not allow you to upload GIF animations- only MP4 files in terms of video content. GIFs will, however, work on most online platforms.
The following social media platforms do accept GIF uploads:
Pinterest
Twitter
Facebook
The following social media platforms do NOT accept GIF uploads:
Instagram
Note: While Instagram does not currently accept GIF format, it does have a few GIF features already built into the app. These include pre-made GIF animations for Instagram Stories, along with Boomerang, which allows you to create and share your own GIF.
Want to learn more about Instagram Stories, GIF Stickers AND snag some free goodies while you’re at it?! You might be interested in this blog post:
use animated gifs In your blog post:
The blogging world seems to become more and more saturated with each passing day. So why not get a leg up the your competition by sprinkling animated GIF content throughout your blog posts? Some examples might include:
Your blog post cover image
An animated infographic of your blog post
An animated template with a call-to-action (CTA)
Use animated GIFs in your email newsletter:
You can attach animated GIFs to your email newsletter campaigns, and they will display just as a regular still image would. So why not have a little fun with your emails? Attaching GIF animations to your newsletters will not only help you stand out in a crowded space with unique video content, but it will also give your brand a higher chance of being remembered by readers. Some ways that brands are currently using GIF animations in their email newsletter include:
Product display
Announcement for upcoming event
Sale or discount offer
Product description that might be too challenging to explain in words. For example, a complex tech product that could be described better using visual content
One very successful example of a brand using this strategy effectively: Dell’s first GIF-centered email effort. The company was preparing to launch its Dell XPS 12 Convertible Ultrabook, categorized as a “convertible” product. But because no one understood what convertible products were at the time, Dell was faced with the unique challenge of explaining the concept to potential customers. The Dell team went beyond static imagery, and instead launched by using a GIF animation to successfully explain its latest product.
Dell’s GIF-centered email campaign produced the following results:
A 6% increase in open-rate
A 42% increase in click-rate
A 103% increase in conversion rate
A whopping 109% increase in revenue!
GIF animations have truly changed the internet as we know it today. If created effectively, GIFs can provide us with entertainment, education and everything in between. They are a great way to stand out in a saturated space with unique video content, which can give your brand a much higher chance of being remembered. They are also just a fun way to get your message across!
Feel free to leave a comment below and let me know your thoughts on GIF animation. And if you attempted this Photoshop tutorial (or used one of the free GIF makers), I would love to know how your GIF animation turned out. Send it on over so I can see your creative project in action! And, as always, if you have any questions for me, don’t hesitate to reach out or drop a comment below.
You’ll also love
Hi there! I’m Fallon. A Florida native who, after receiving my masters degree in the U.K., decided to nix the 9-5 path in search of something more. Now, I run my graphic and web design business straight from my laptop, all while traveling the world. I’ve now traveled to over 25 countries and have knocked some pretty big adventures off my bucket list… and I’m just getting started. Follow along my journey as I present tips, guides and resources on solo female travel, photography, videography, entrepreneurship & the crazy lifestyle of a digital nomad.

