How to create fillable worksheets, workbooks & checklists with Canva & PDFescape + FREE Templates
Disclaimer: Hey there, friend! This article includes affiliate links for Canva (a design tool I use, love & swear by) and I would love if you decided to use them. Affiliate links help creators like me to fund the free content that we provide on our blogs. Thank you for your endless support!
Have you ever pulled your hair out over how to create a workbook, worksheet or checklist to grow your email list? Well I’m happy to let you know that creating a simple 1-2 page workbook doesn’t have to be nearly as difficult as it might seem!
And no, creating worksheets doesn’t mean that you have to hire a graphic designer...
…Or spend hours watching Photoshop/InDesign courses on Skillshare (yep, been there).
Instead, by using a simple-to-use design program, you can quick and easily put together a stunning opt-in freebie or digital product that your audience will LOVE!
And what better way to accomplish this… than by using my very fave online tool for design & content creation— Canva Pro (previously Canva for Work)!
But don’t worry— you can accomplish all of your design needs with the free version of Canva! I just happen to be obsessed with the latest Canva Pro tips, tricks & features and can’t stop blabbin’ about them.
Either way, whether you’re a food blogger or a fashion blogger, if you’re looking to skyrocket your email list with an amazing freebie…
…. I’ll show you just how quickly anyone can make worksheets, checklists or a workbook using Canva.
Sound good?
Aaaand because we’re biz BFF’s now… I’m also giving you VIP access to some of my very own Canva design templates.

Trust me when I tell you— these have quite literally saved my tush when it comes to speeding up my content creation workflow & getting organized with all the endless graphics I’ve created.
But don’t worry, I’ll still be giving you all the juicy dets on how to create them from scratch, as well as my fave time-saving Canva design hacks. Heck.. I’ll even be showing you how to make your worksheets fillable & interactive for your audience so they can easily use them without printing them out.
We’ll be covering it all, my friend!
In this post, get ready to learn how to create stunning worksheets, workbooks and checklists in Canva… so you can skyrocket your email list & start nurturing your amazing new subscribers ASAP!
Alrighty, let’s do this thang!
Grab my FREE worksheet, workbook & checklist Canva templates
Just click this graphic below & I’ll send you my Canva worksheet, workbook & checklist templates for FREE so you can create your own opt-in freebie that your audience is sure to love!
What are lead magnets & content upgrades & why you need them
If you’re a blogger or online entrepreneur, I probably don’t have to tell you why list-building (aka growing your email list) is SO important if you want to scale your online business.
And while there’s all kinds of list-building strategies out there, there’s one that’s by far the simplest way to grow your email list. And that’s by offering…
... a lead magnet or content upgrade.
To keep it simple, a lead magnet is a valuable piece of content (i.e. a guide, cheatsheet or workbook) that you give to your blog readers for free, in exchange for their name & email address.
Workbooks, worksheets & checklists… what’s the difference?
To be completely honest, workbooks, worksheets & checklists are all pretty similar, but the end-goal is what makes each of them unique.
I’ll explain what I mean below:
Worksheet lead magnet
If you want to create an opt-in freebie that allows your reader to answer open-ended questions about your lead magnet topic…
… you might want to create a worksheet template that provides your audience with form fields & long-form text boxes to fill out their answers.
Checklist lead magnet
If you want to create a lead magnet/content upgrade that is action-driven….
…you might want to create a checklist template that provides your readers with very actionable steps they can take, in the form of checklist boxes, to achieve XYZ goal
Workbook lead magnet
You can think of a workbook lead magnet as a combination of worksheet and checklist templates!
This will almost be like a “mini eBook”… except it will be more action-driven and provide very specific tasks for your audience.
Must-Know Canva Design Tips, Tricks & Hacks
I’m all about working smarter, not harder in my online biz. And after spending the last few years immersed in this design app, I think it’s safe to say I have a few tricks up my sleeve.
Listed below, I’ve included a few of my must-know Canva design tips, tricks & hacks. I wanted to offer these before you begin creating the worksheet templates, so you can hopefully speed up your lead magnet & opt-in freebie workflow!
Create your Canva brand kit
While templates are an amazing starting point… you definitely want them customized them to match YOUR brand.
And by using the new Canva brand kit feature… you can save SO much time in your design process. You’ll be able to easily access your brand color swatches, fonts & imagery in a giffy.
Just a quick note! You’ll only be able to access the Canva brand kit if you’re on the Canva Pro plan.
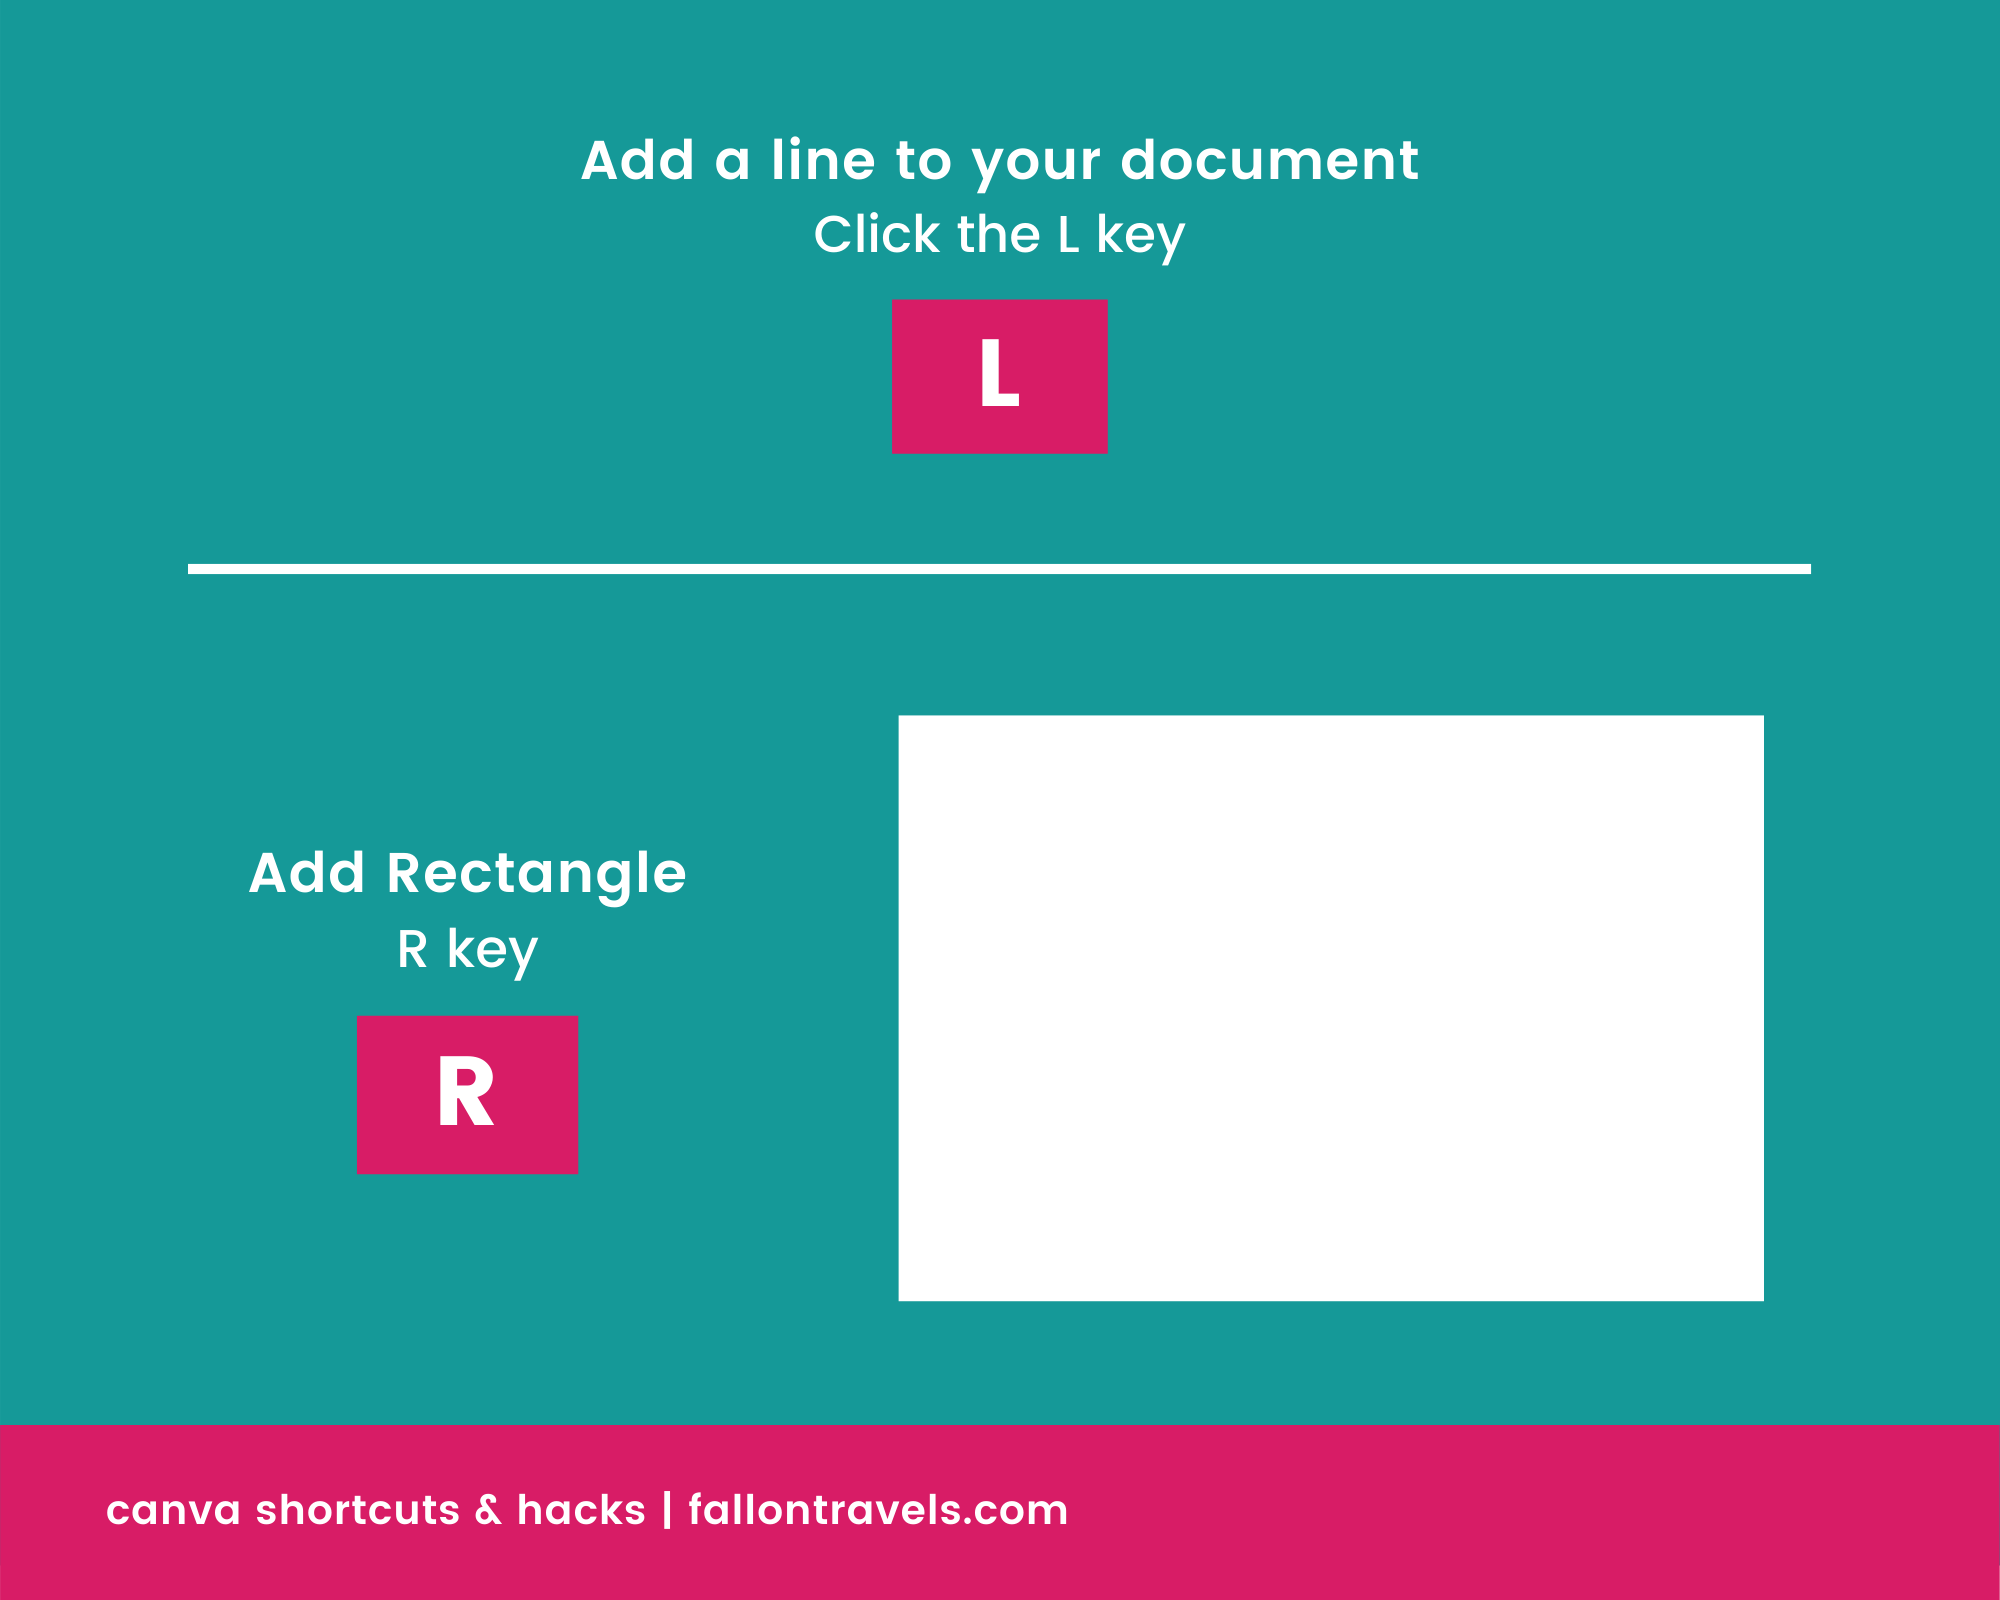
Use Canva keyboard shortcuts
While I honestly have a TON of Canva keyboard shortcuts up my sleeve, I’ll save the long list & give you just a few of my fave:
Add a line to your document: Click the “L” key
Add a rectangle to your document: Click the “R” key
Transform text to Uppercase: Shift + cmd/ctrl + “K” key
Group Elements: cmd/ctrl + “G” key
Ungroup Elements: shift + cmd/ctrl + “G” key
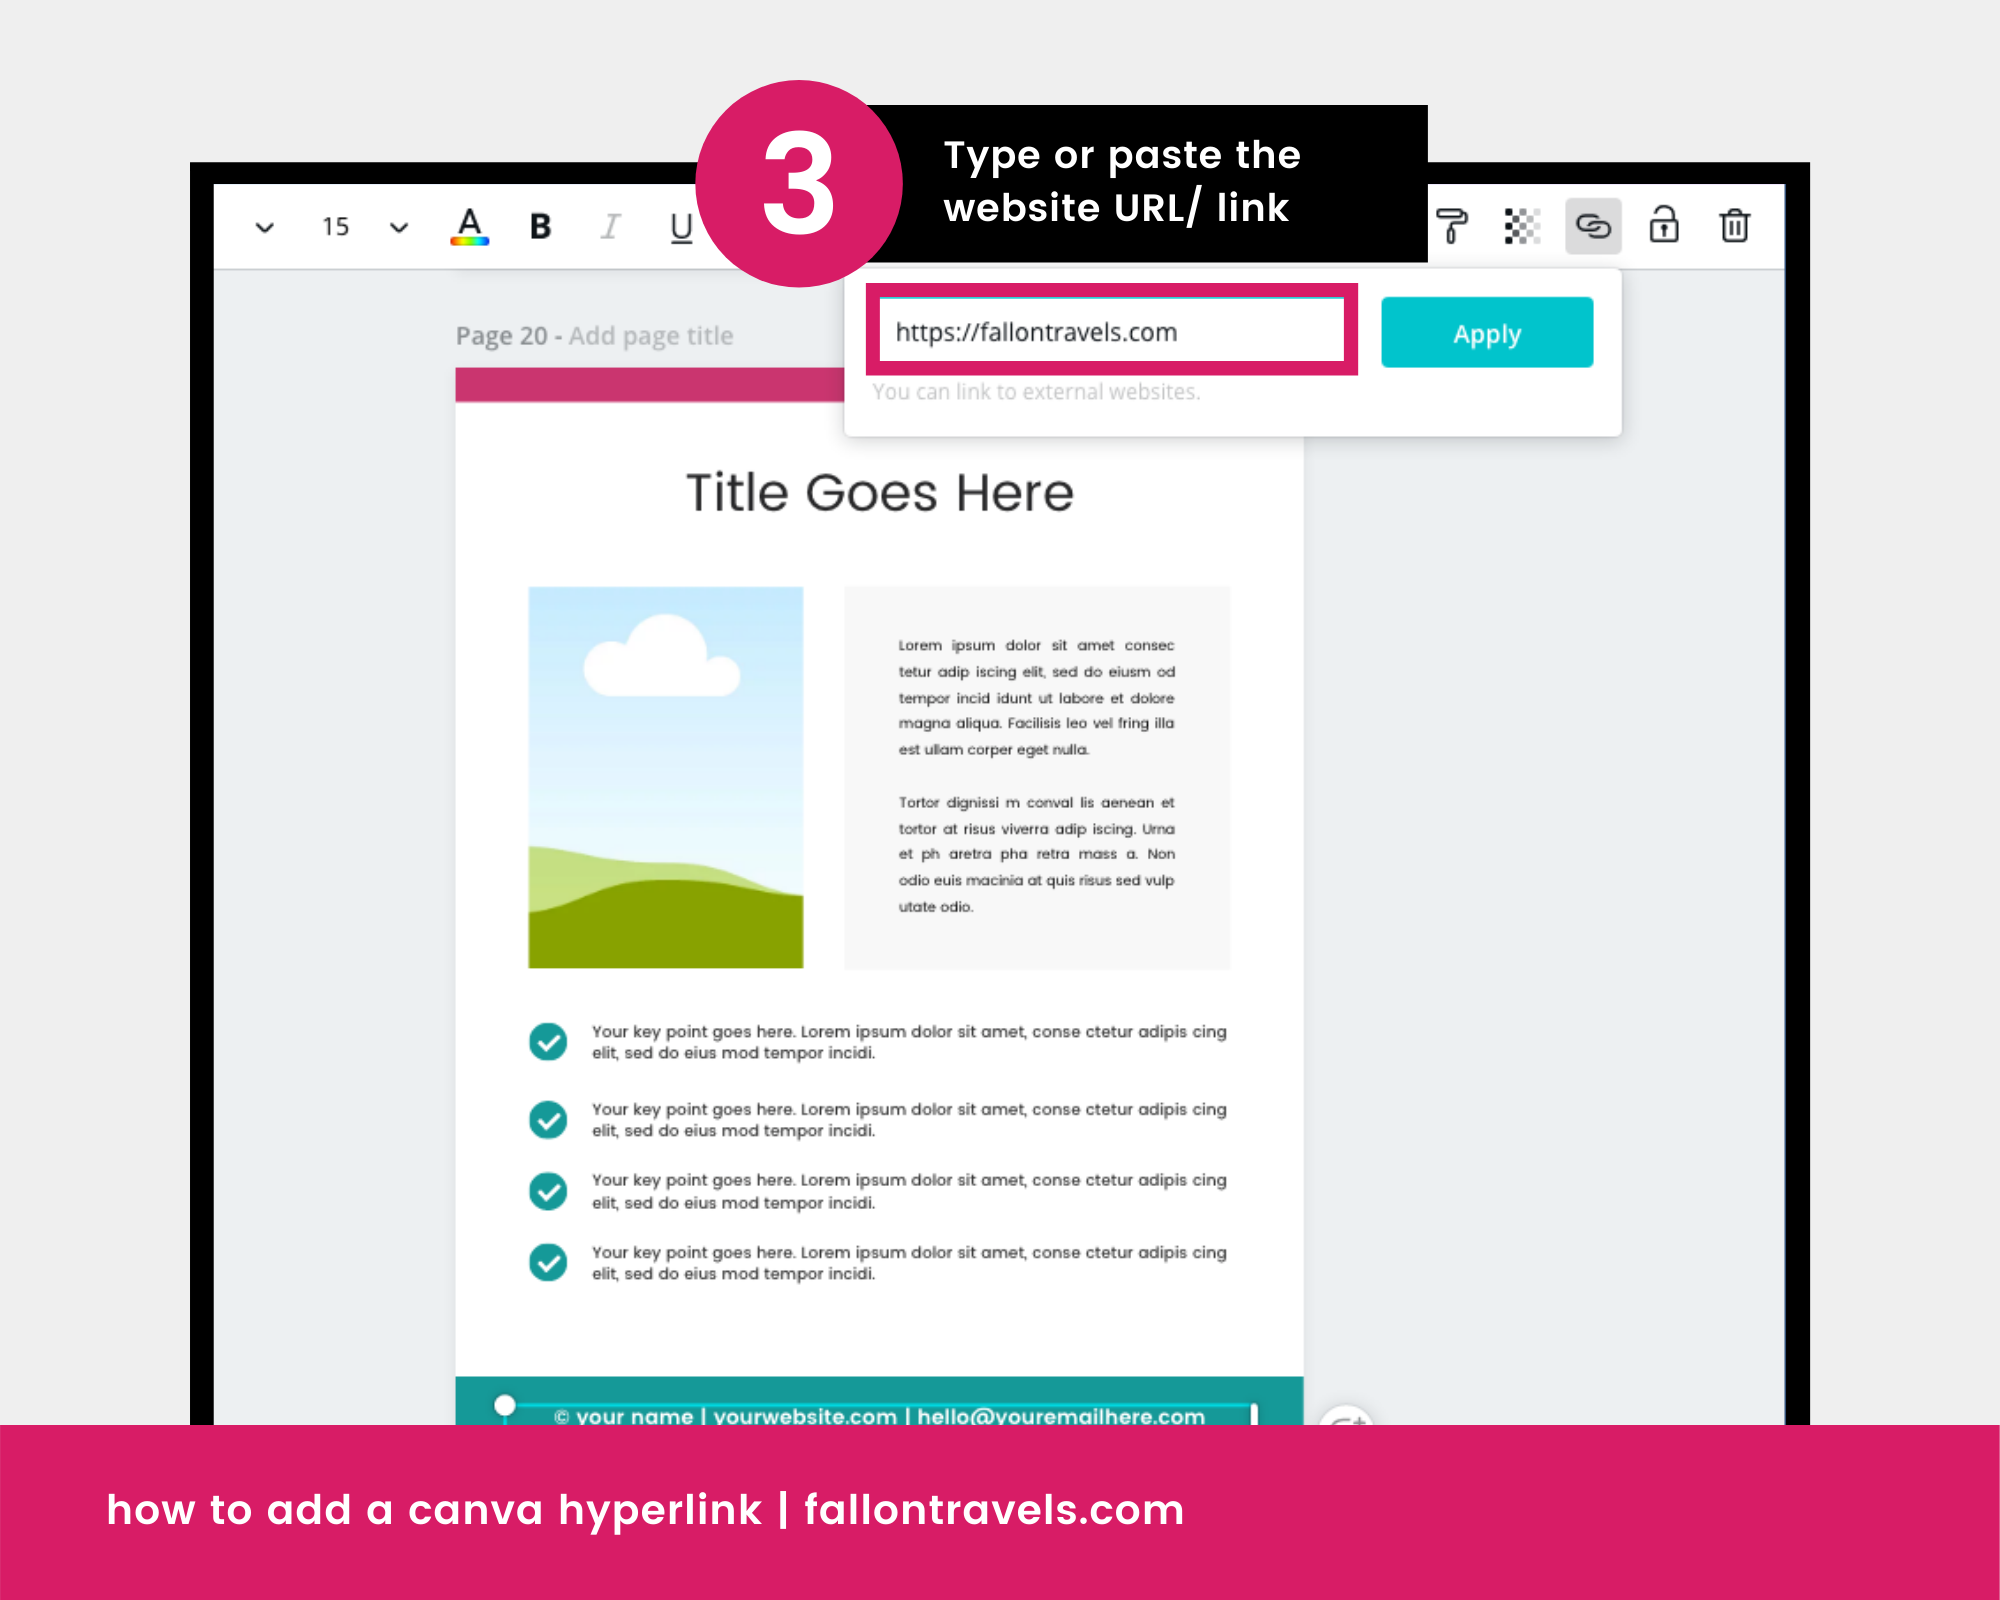
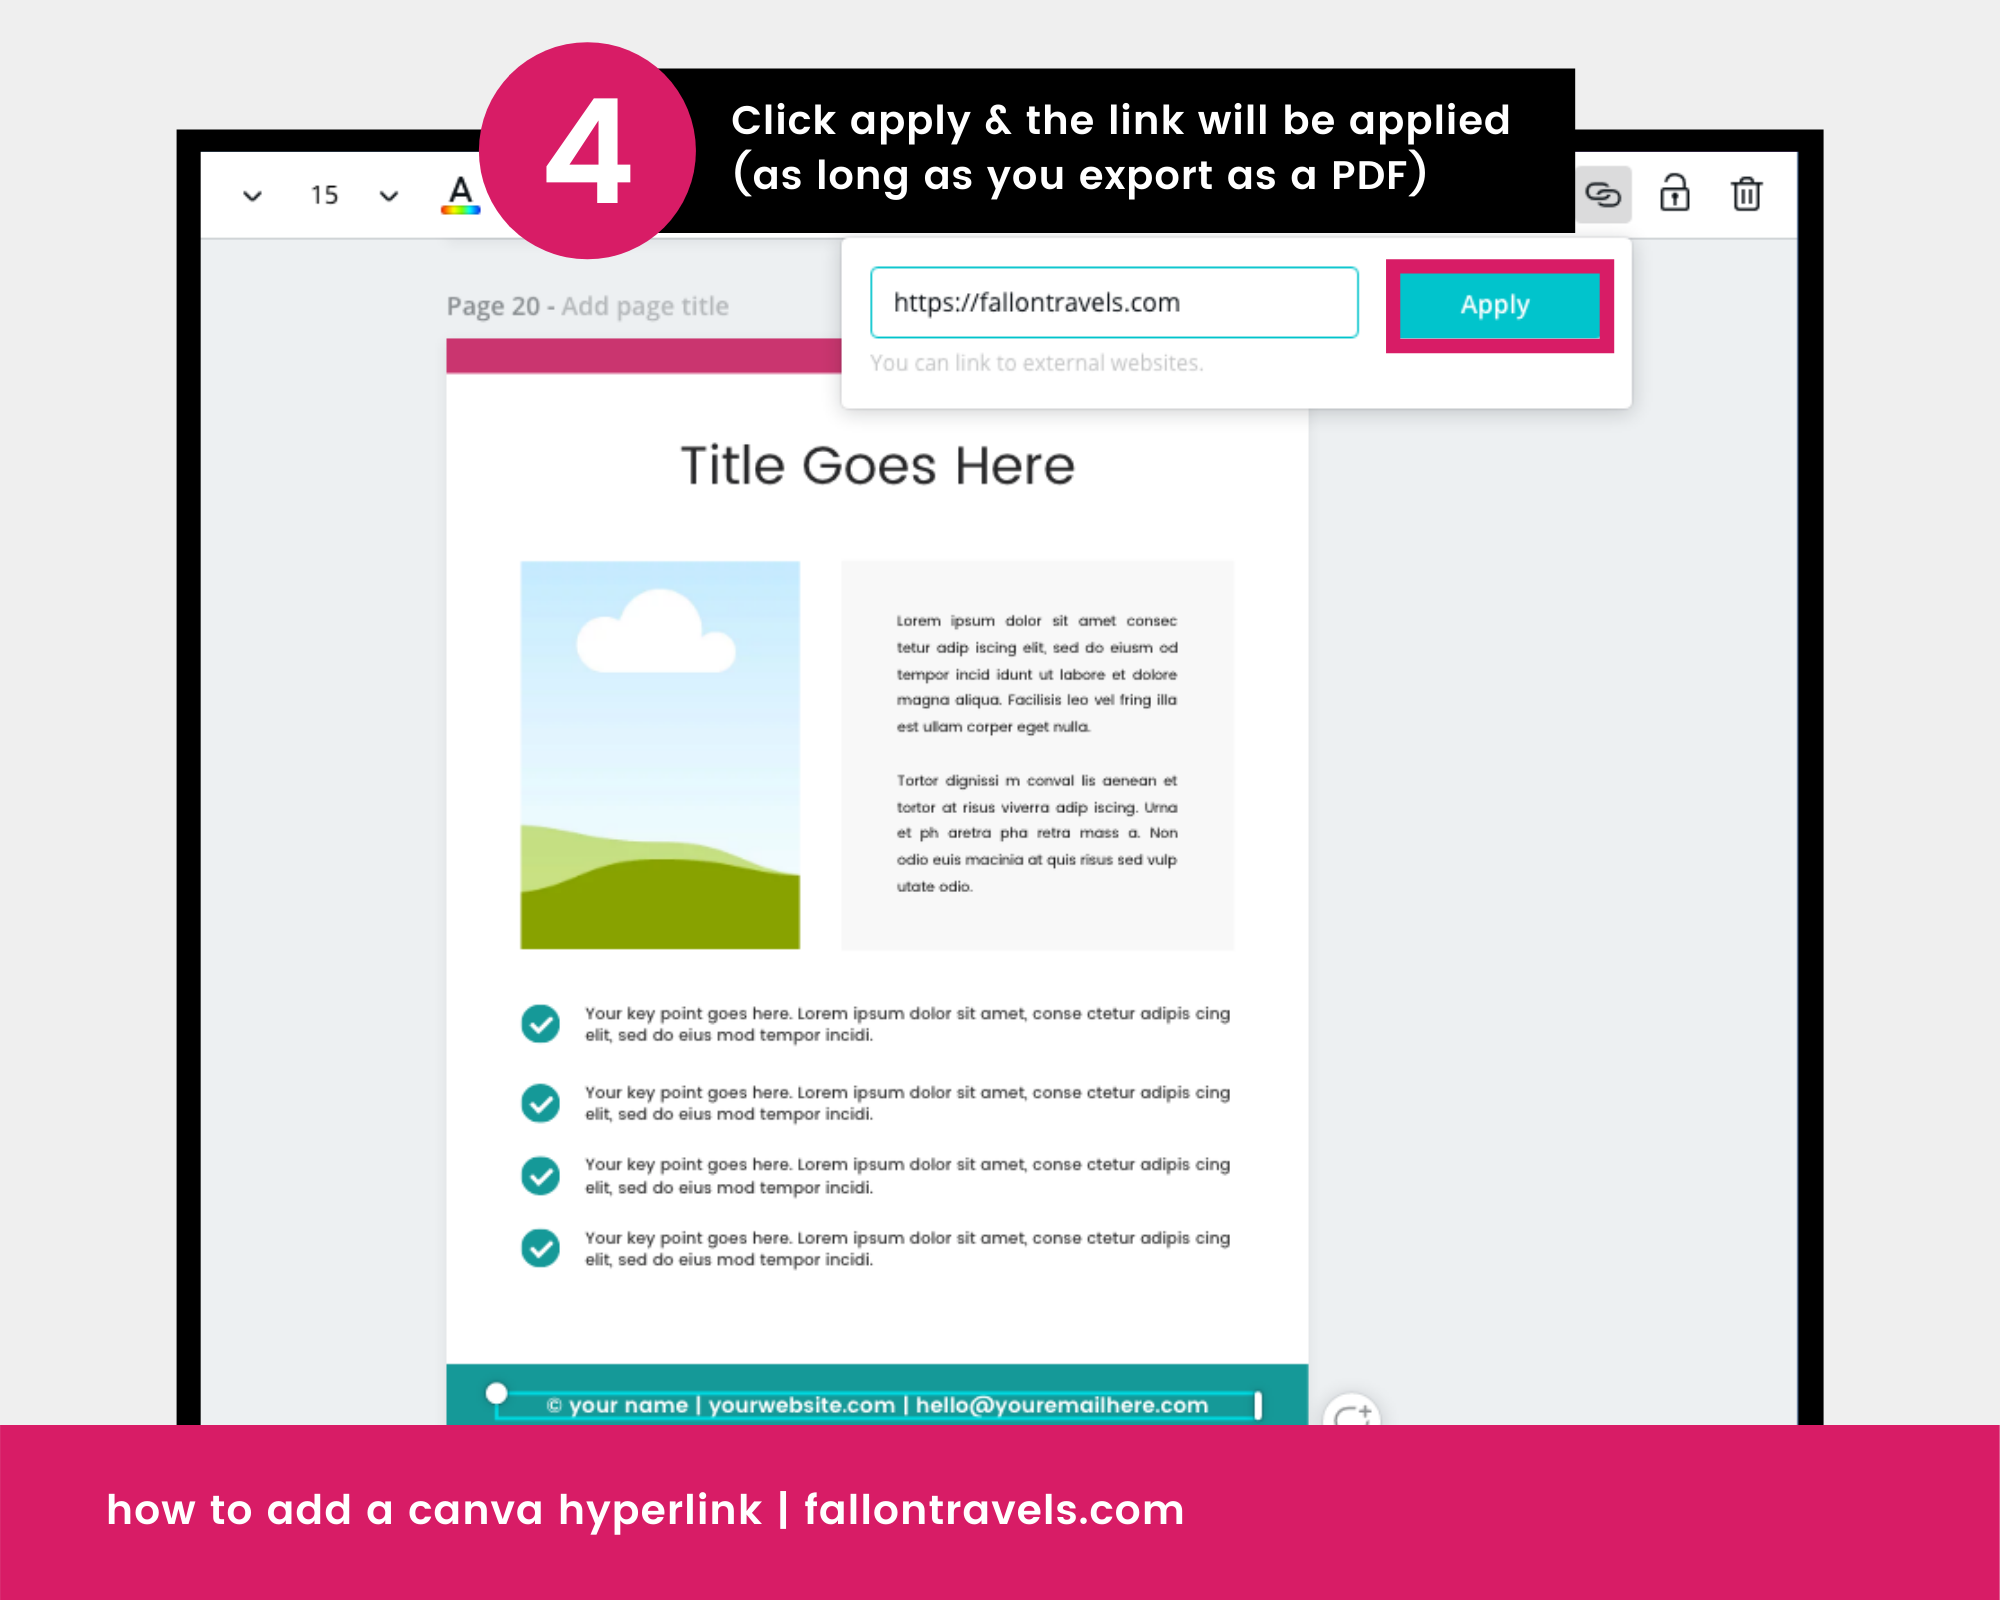
How to hyperlink on Canva
Adding a Canva hyperlink is super simple, and I’ve included a step-by-step process & screenshots below in case you need a visual reference.
Step 1: Click on the design element or text box that you want to turn into a hyperlink
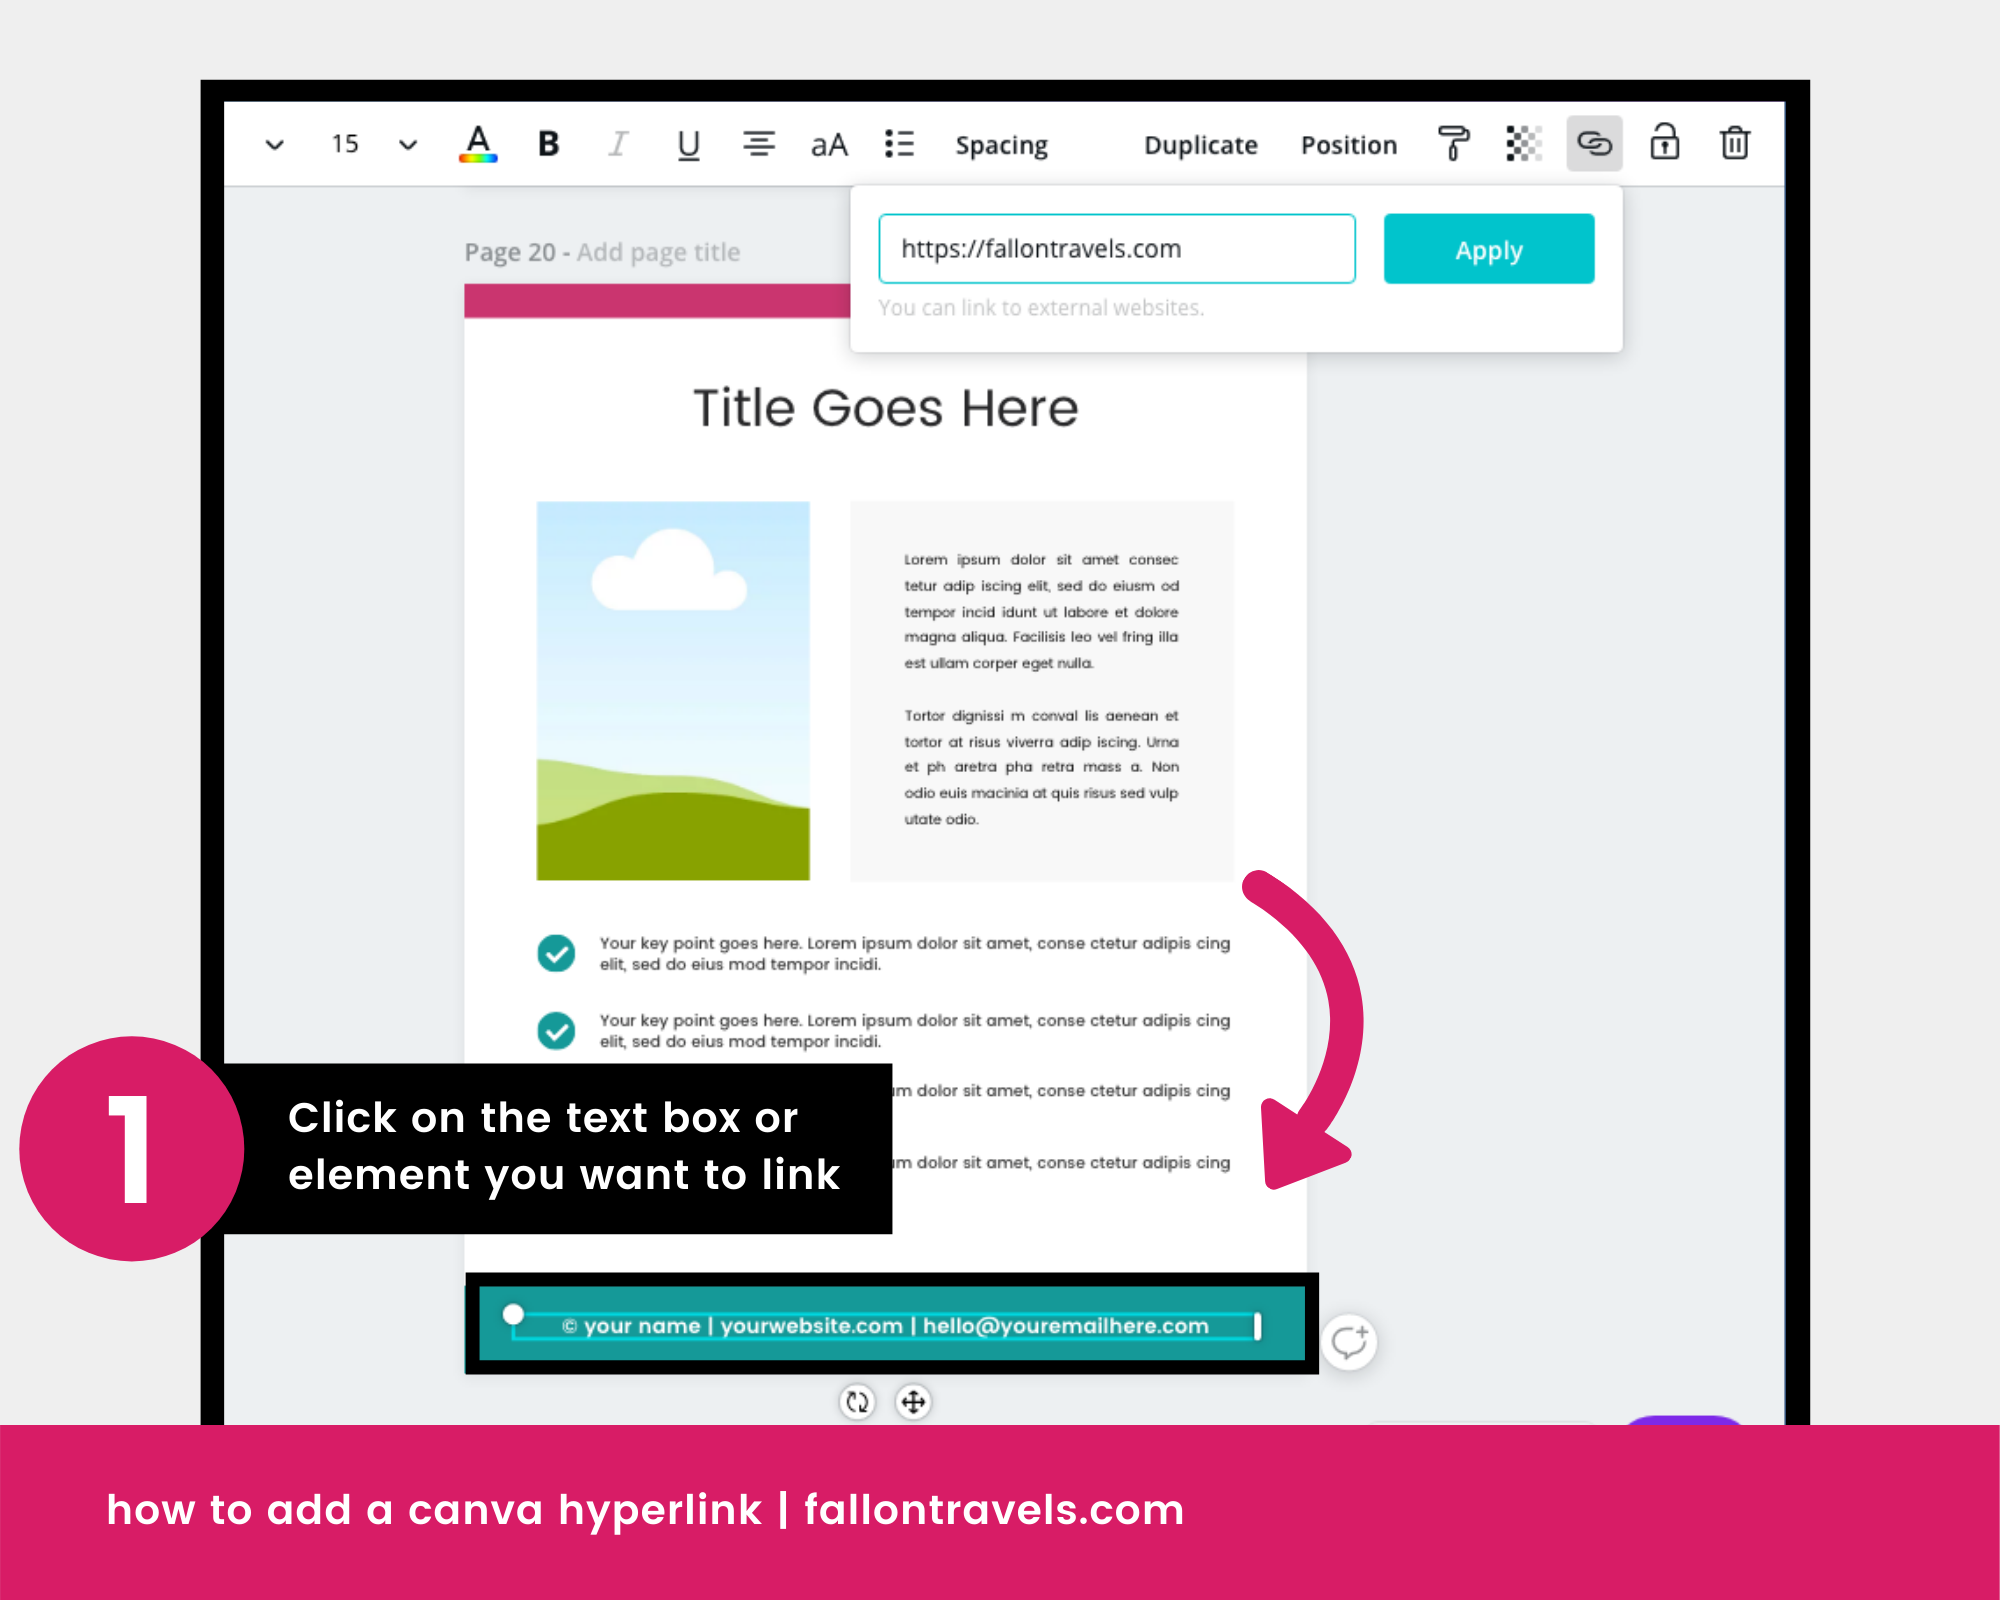
Step 2: Click on the link icon in the editor toolbar
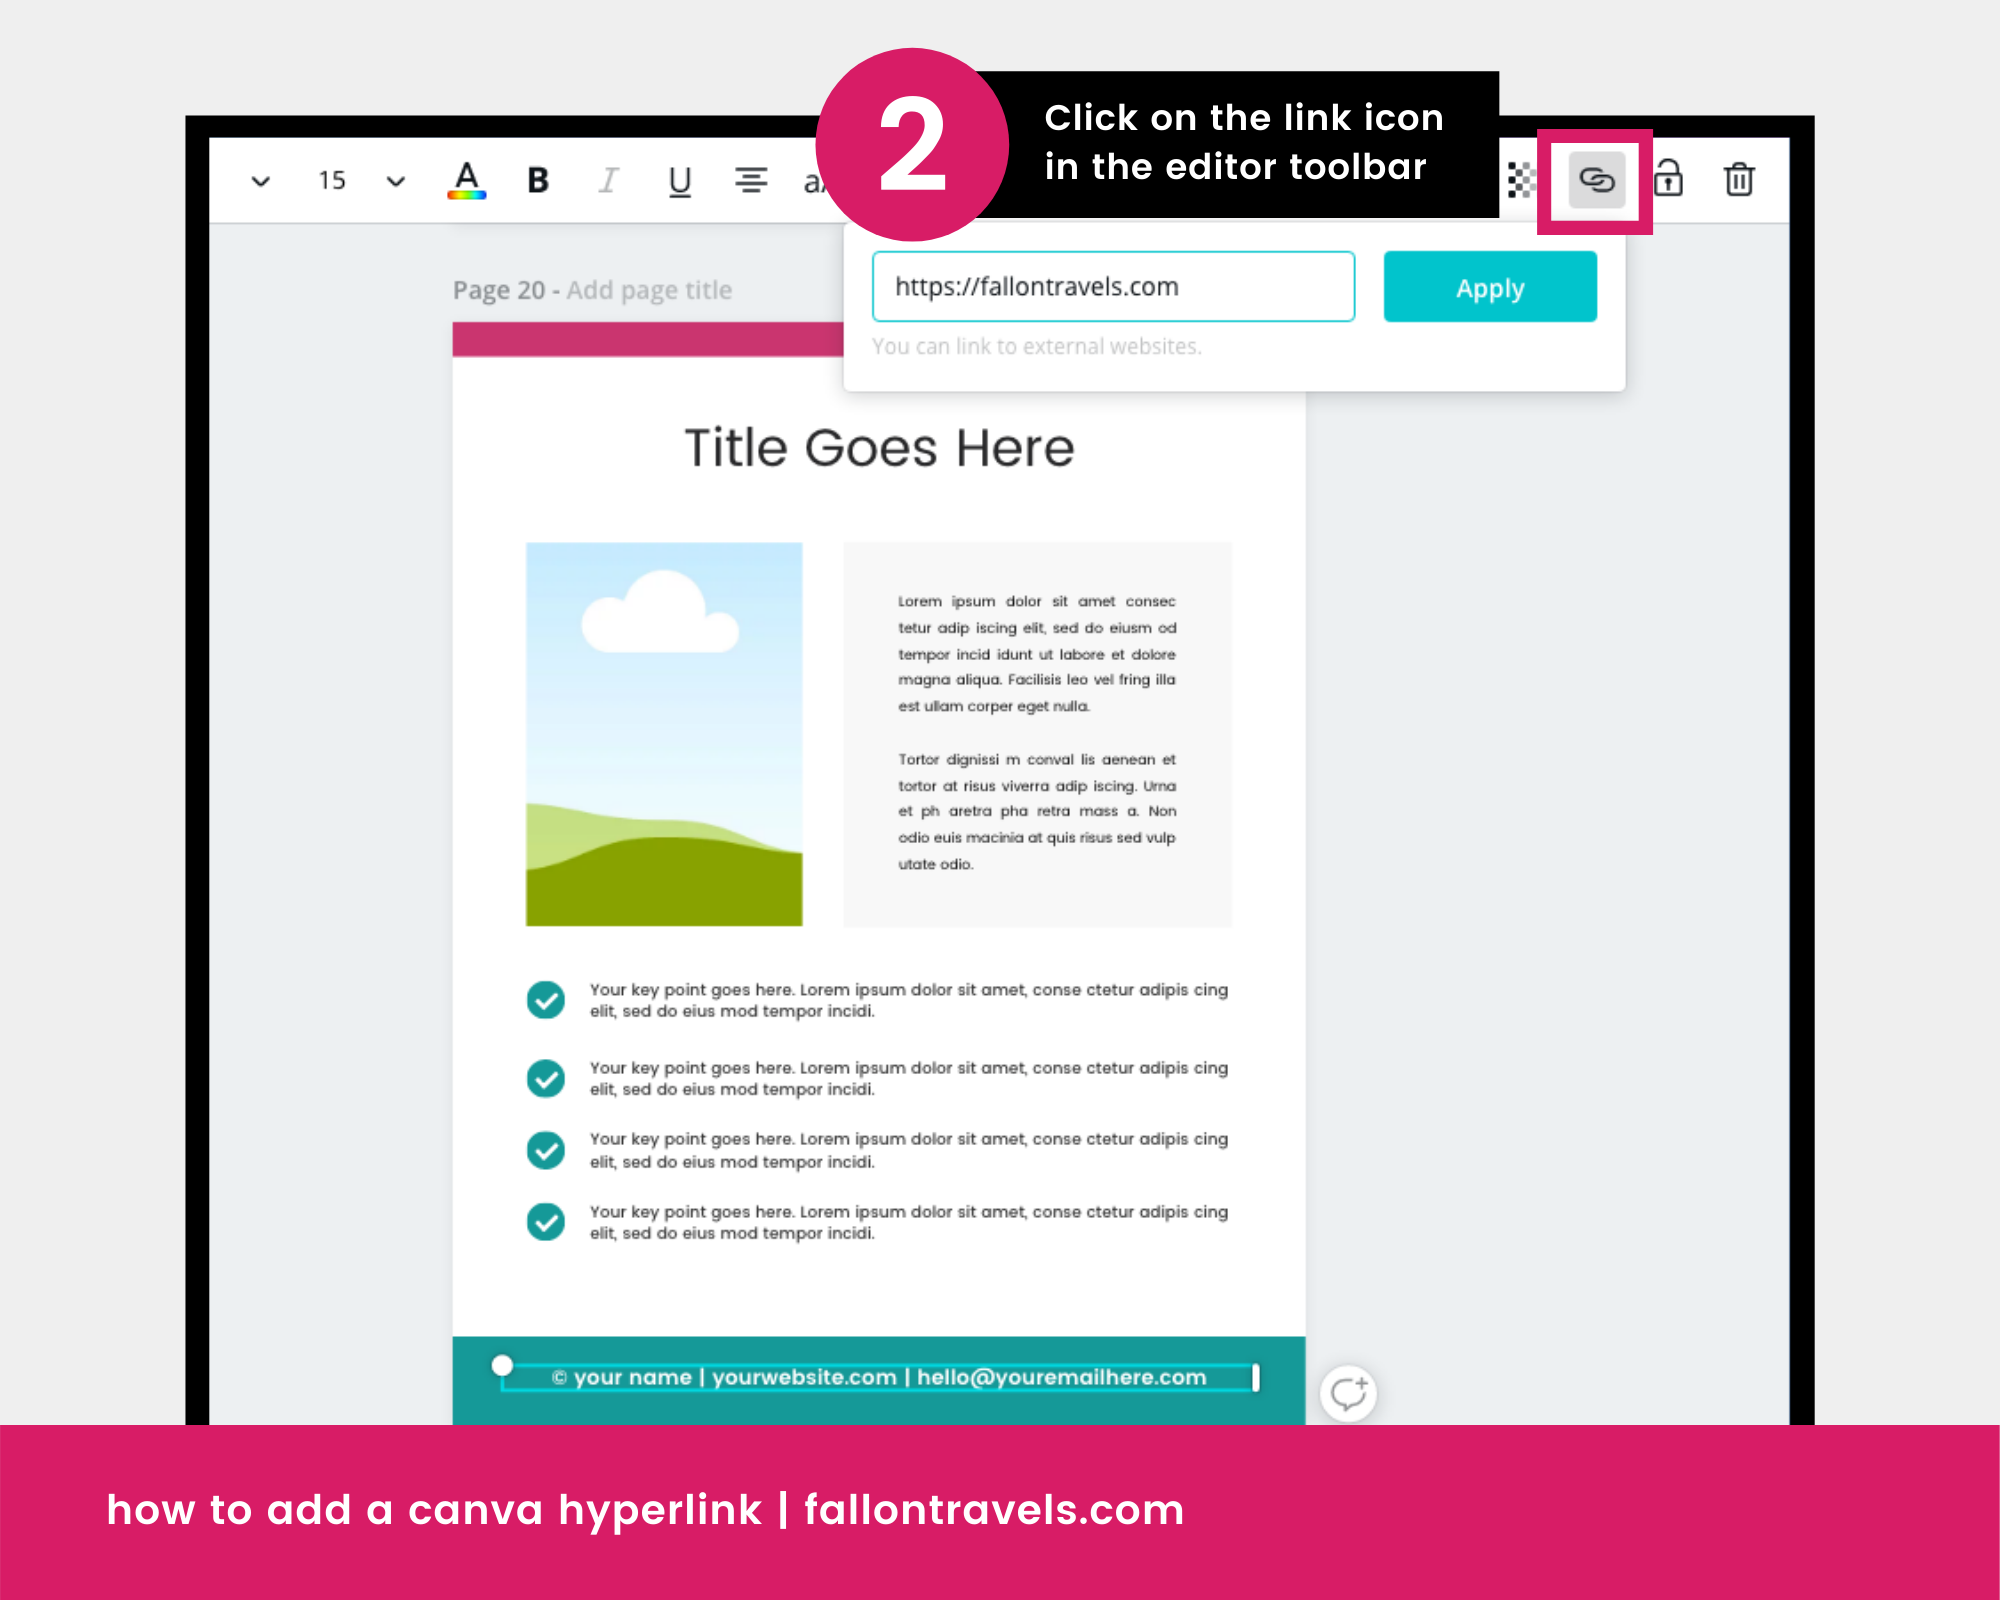
Step 3: Type or paste the website URL/link
Step 4: Click the Apply button to save the link
Just a side note— you might wanna check out my full blog post on how to hyperlink in Canva…
…because there’s been a few recent updates to the feature that are definitely worth checking out!
How to copy from one design to another in Canva
In Canva, it’s much easier to just copy from one design to another than starting from scratch each time (which sounds like an absolute nightmare in my opinion!).
To make a copy of your design template, just click this little icon as pictured below…

…. and your template will now be copied into a brand spankin’ new template so you don’t have to start from scratch ever again (whoop whoop!).
You can of course just copy the individual elements as well if you want the layout to look slightly different from the previous.
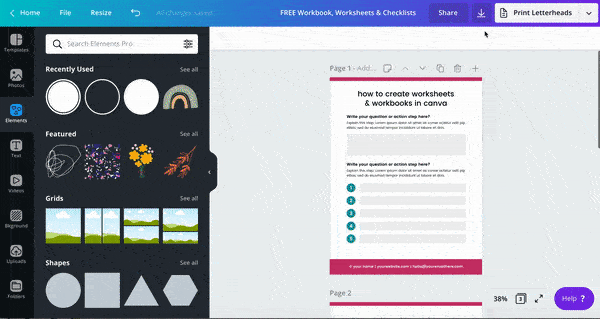
How to design a worksheet or workbook in Canva
So here’s the thing about Canva templates. While they honestly are an amazing starting point…
…they’re not exactly designed with the “modern blogger” in mind (i.e. opt-in freebies, ebooks, lead magnets & content upgrades).
Not to mention the fact that there’s so many possibilities… it’s hard to know exactly where to get started without losing your sanity!
So that’s why, if you haven’t already, I suggest downloading my Canva templates! They give you a solid starting point to help 10x your opt-in freebie workflow!
But if you want to start yours from scratch, just follow the steps I’ve provided below. :)
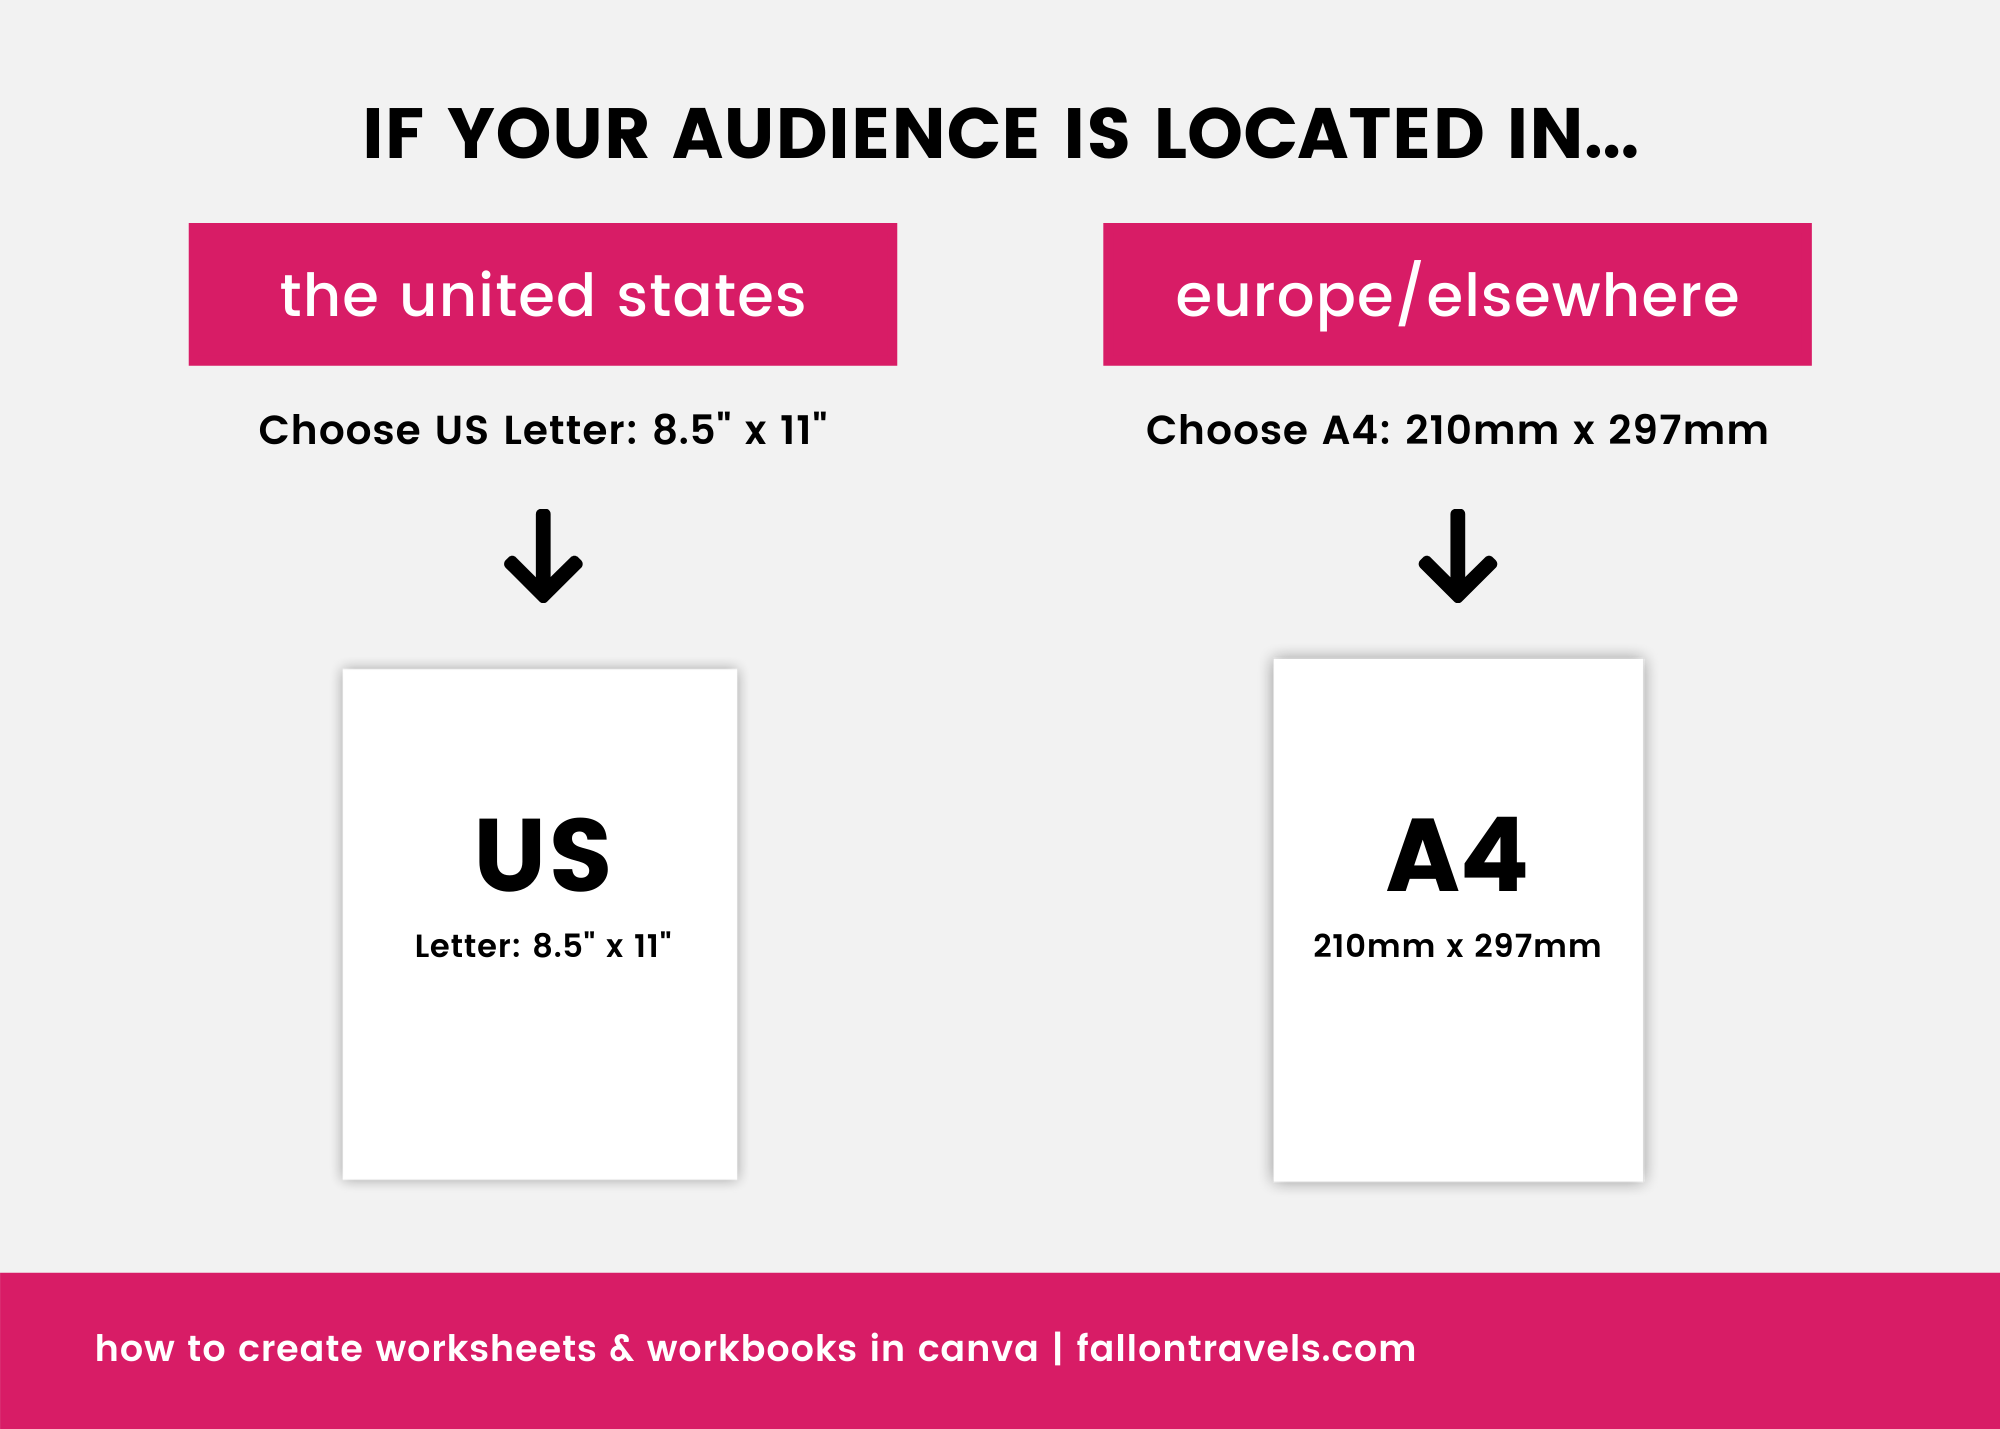
1. Choose your template document size
The first thing you’ll need to do in Canva is choose your template document size.
Listed below, I’ve included the 2 most common sizes for lead magnet templates:
US letter format: 8.5” x 11”
A4 format: 210mm x 297mm (21” x 29.7”)
The size you choose really depends on your audience… if most of your audience is located in the US, go with US Letter.
If most of your audience is located in Europe/ the rest of the world… go with A4.
So if your audience is mostly US-based (like mine), you can go ahead & follow the steps below:
Login to your Canva account
Type in “US Letter” and you’ll see the document size pop up
Click it, and you’ll be redirected to a blank template to begin the design process!

2. Rename your Canva document
I suggest renaming your template document before you begin designing…
… because it can save you SO much time & frustration later down the road!
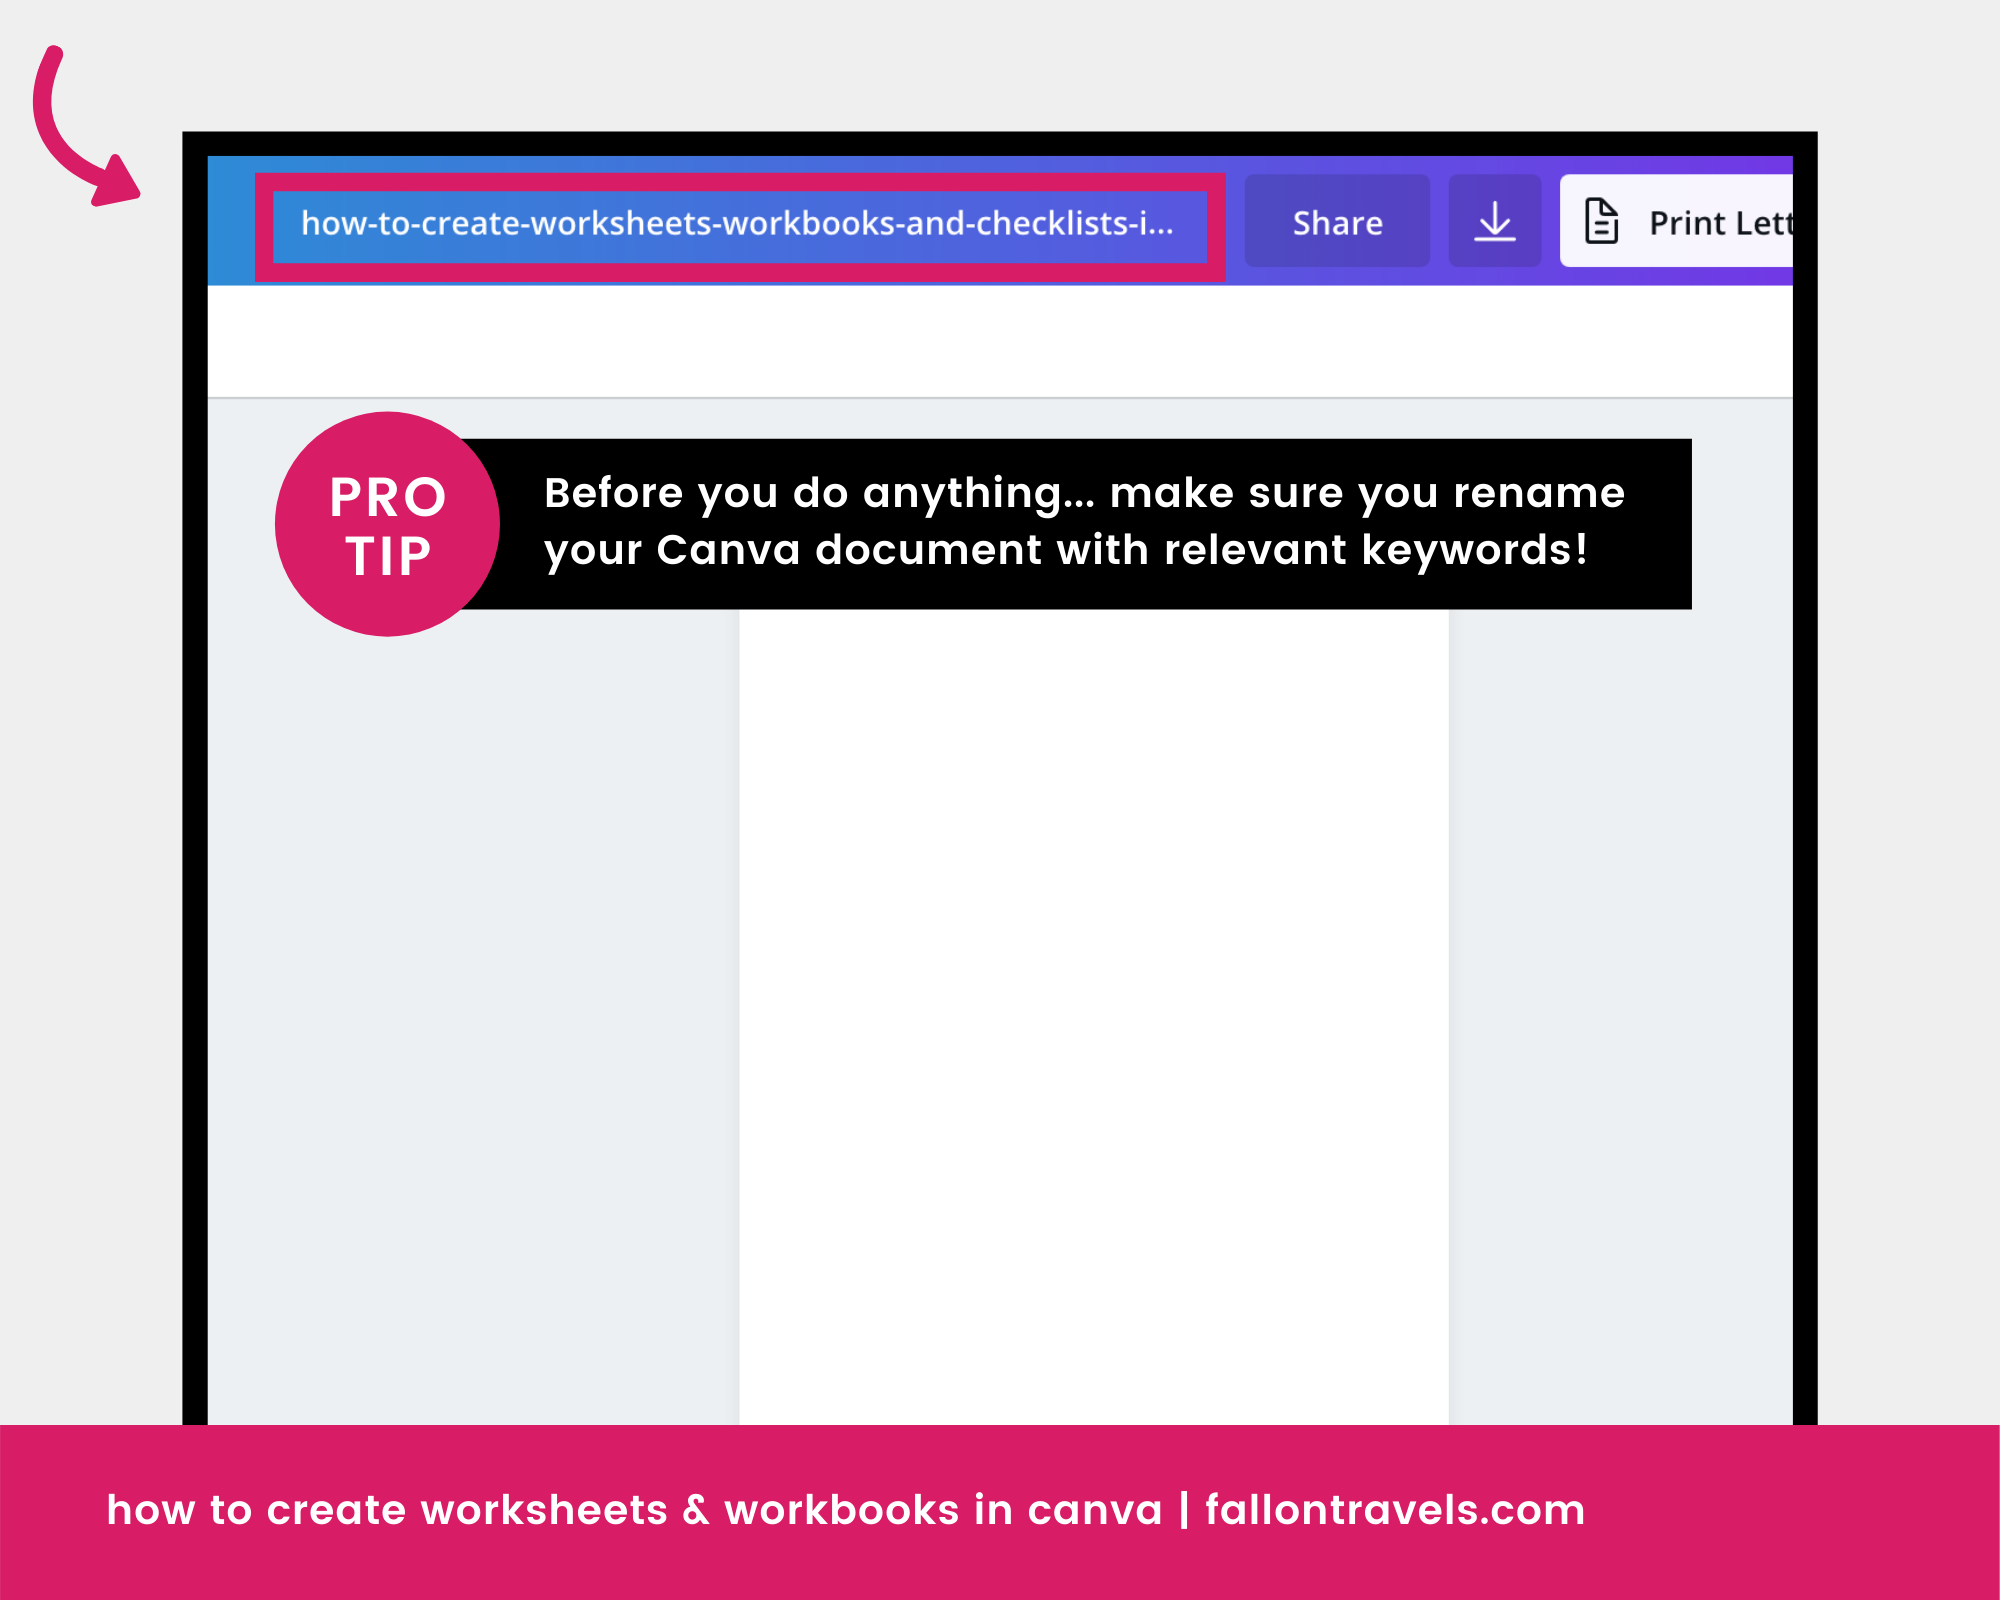
Not only will it save your butt when it comes to file organization and SEO purposes (keyword rich tags = higher rankings), but if you’re using Canva Pro…
… you’ll be able to use the new “Search” feature to locate your files in a giffy (which BTW has already come in handy for me multiple times).
So just do yourself a quick favor & start naming those Canva files. :)
3. Add a text box in Canva (shortcut)
Adding a text box in Canva is incredibly simple! And I thought you should know how to do it now…
… since you’ll be using it quite often during your lead magnet creation process!
So the traditional way of adding a text box is to click on the “Text” tab of your design panel on the left-hand side. But I mean, let’s be real… that’s one extra unnecessary click of your mouse!
So I’m gonna let you in on just one more Canva design hack to speed up your workflow even further. :)
Just click the letter “T” on your keyboard and a textbox will display on your template! *Canva shortcuts = best thing ever*
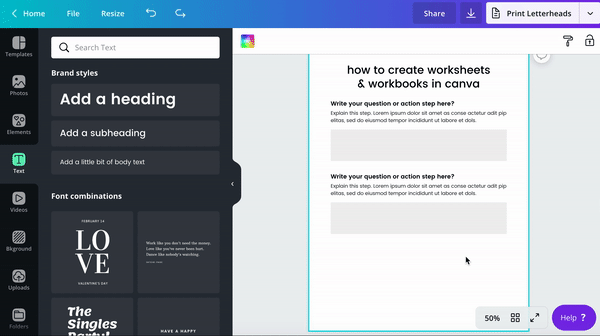
4. Create a title for your worksheet header
You’ll definitely need to create a title for your worksheet header so your audience knows what your freebie is about!
And in the case that you don’t want to just use the “T” shortcut, I’ve provided some steps & a visual reference for the text panel below.
To add a title, click the Text tab on your left-hand side panel & choose one of your Brand styles (note: this is a Canva Pro feature).
If you’re on Canva’s free plan, you can select one of the pre-set headers (they’ll say Add a heading) or one of Canva's font combinations.
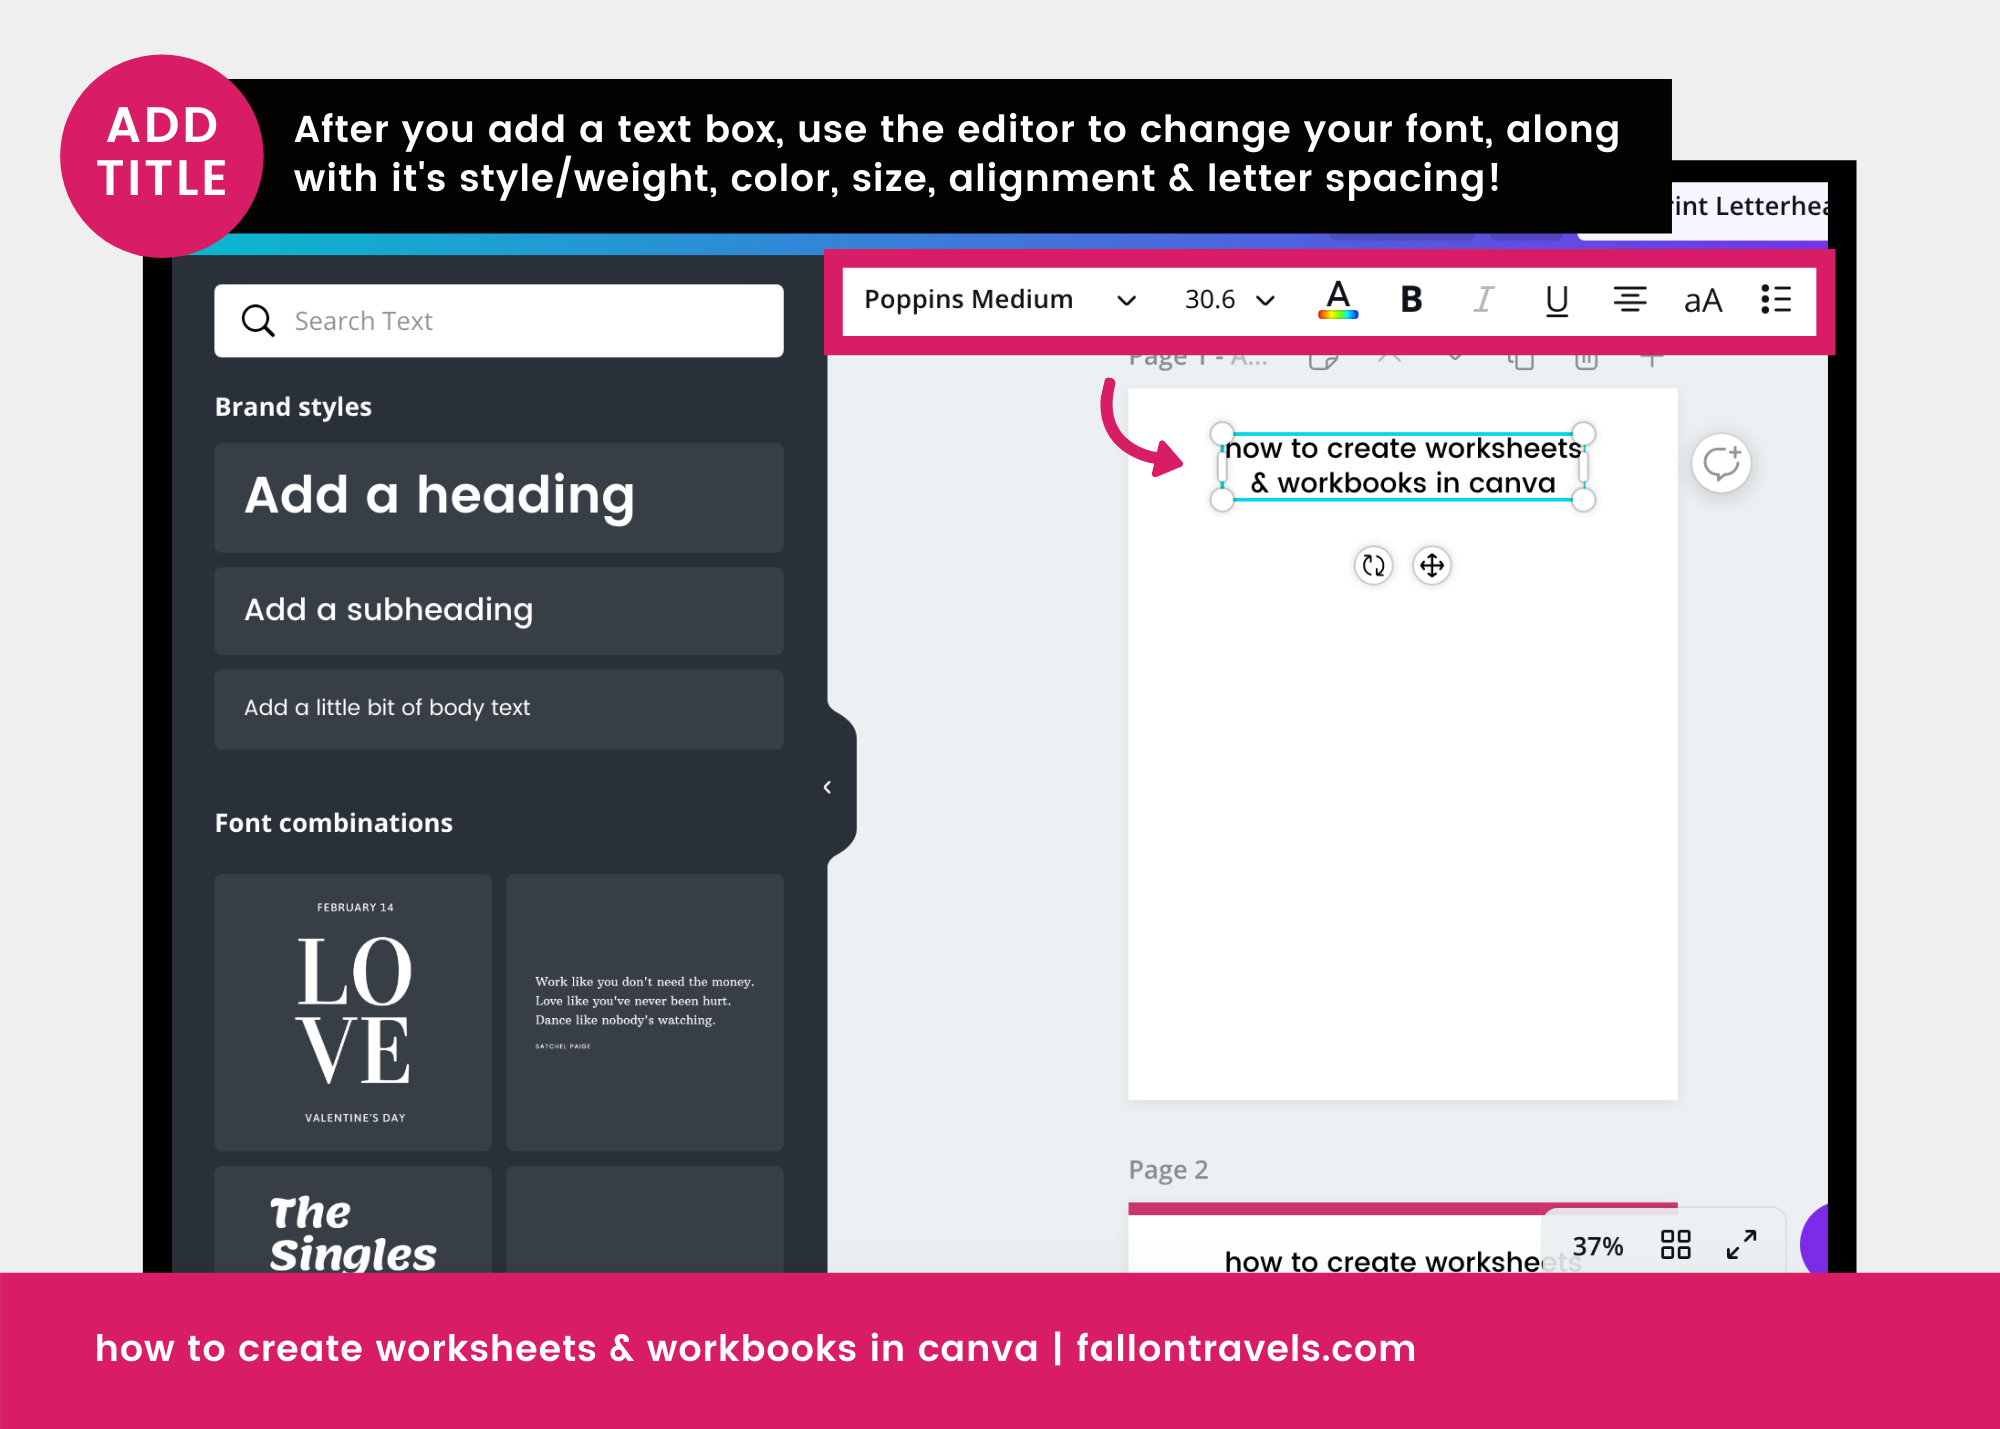
You can use the editor at the top of your screen to change the following:
Font (rule of thumb: try to stick to 1-2 fonts total in your branding/design graphics)
Font style/weight (i.e. light, medium, bold, italicized)
Font size
Font color
Alignment (i.e. right aligned, center aligned, left aligned)
Uppercase or lowercase
Letter spacing
Make sure to reposition your title so it’s centered towards the top of your document (or left/right aligned if that’s what you prefer).
Canva has a handy “snap into place” feature that allows you to just snap the text box to the center of your document.
Alternatively, you can click “Position” in the editor & choose “Center”.
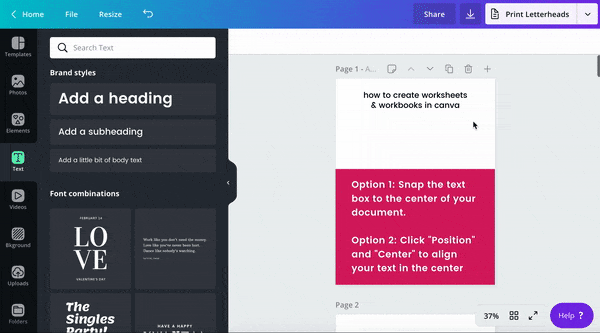
5. Add a shape element to the worksheet header
Personally, I like to add some sort of shape element to most of my Canva templates…
…whether that be a rectangle block behind text, a circle with a number inside, or a simple line to break up large blocks of text.
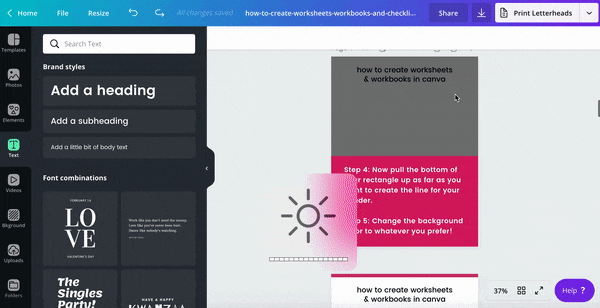
For this worksheet, I’ll be adding a rectangle that I’ll scale down to a tiny little sliver & stick up at the top of my page!
To add the shape element, follow the steps below:
Step 1: Add a rectangle to your page using the “R” keyboard shortcut
Step 2: Click “Position” in your toolbar at the top & choose “Top”— this ensures your rectangle is sitting right at the top of your page
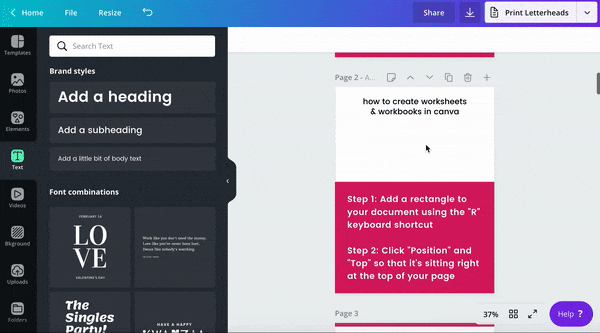
Step 3: Pull both sides of your rectangle until they reach the edges of your template
You can do this one at a time, or all at once by holding down the “Alt” key & dragging both sides until they meet the edges
Step 4: Now pull the bottom of your rectangle up as far as you want to create the line for your header. It’s really up to you how big or small you want this to be!
Step 5: Change the background color by going up to the color editor & choosing one of your brand colors.
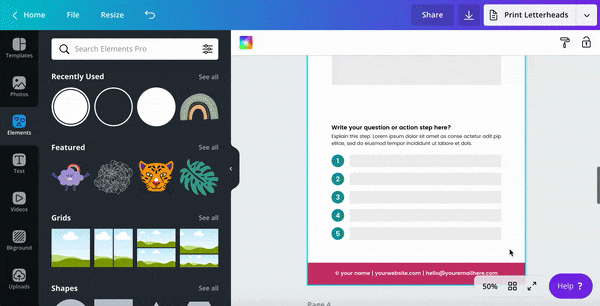
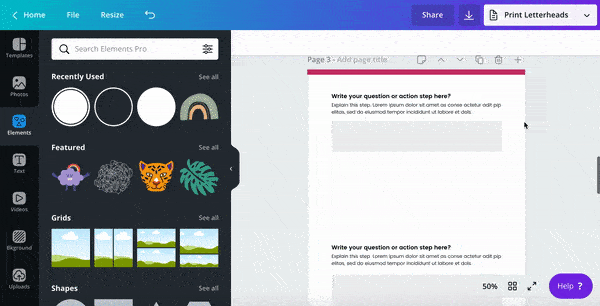
6. Add the workbook sections— questions & action-tasks
Next, you can add a brief description to your worksheet to let your audience know what the worksheet is about…
…but I’m just going straight into the workbook section for this template— i.e. the questions & action-tasks (see below).
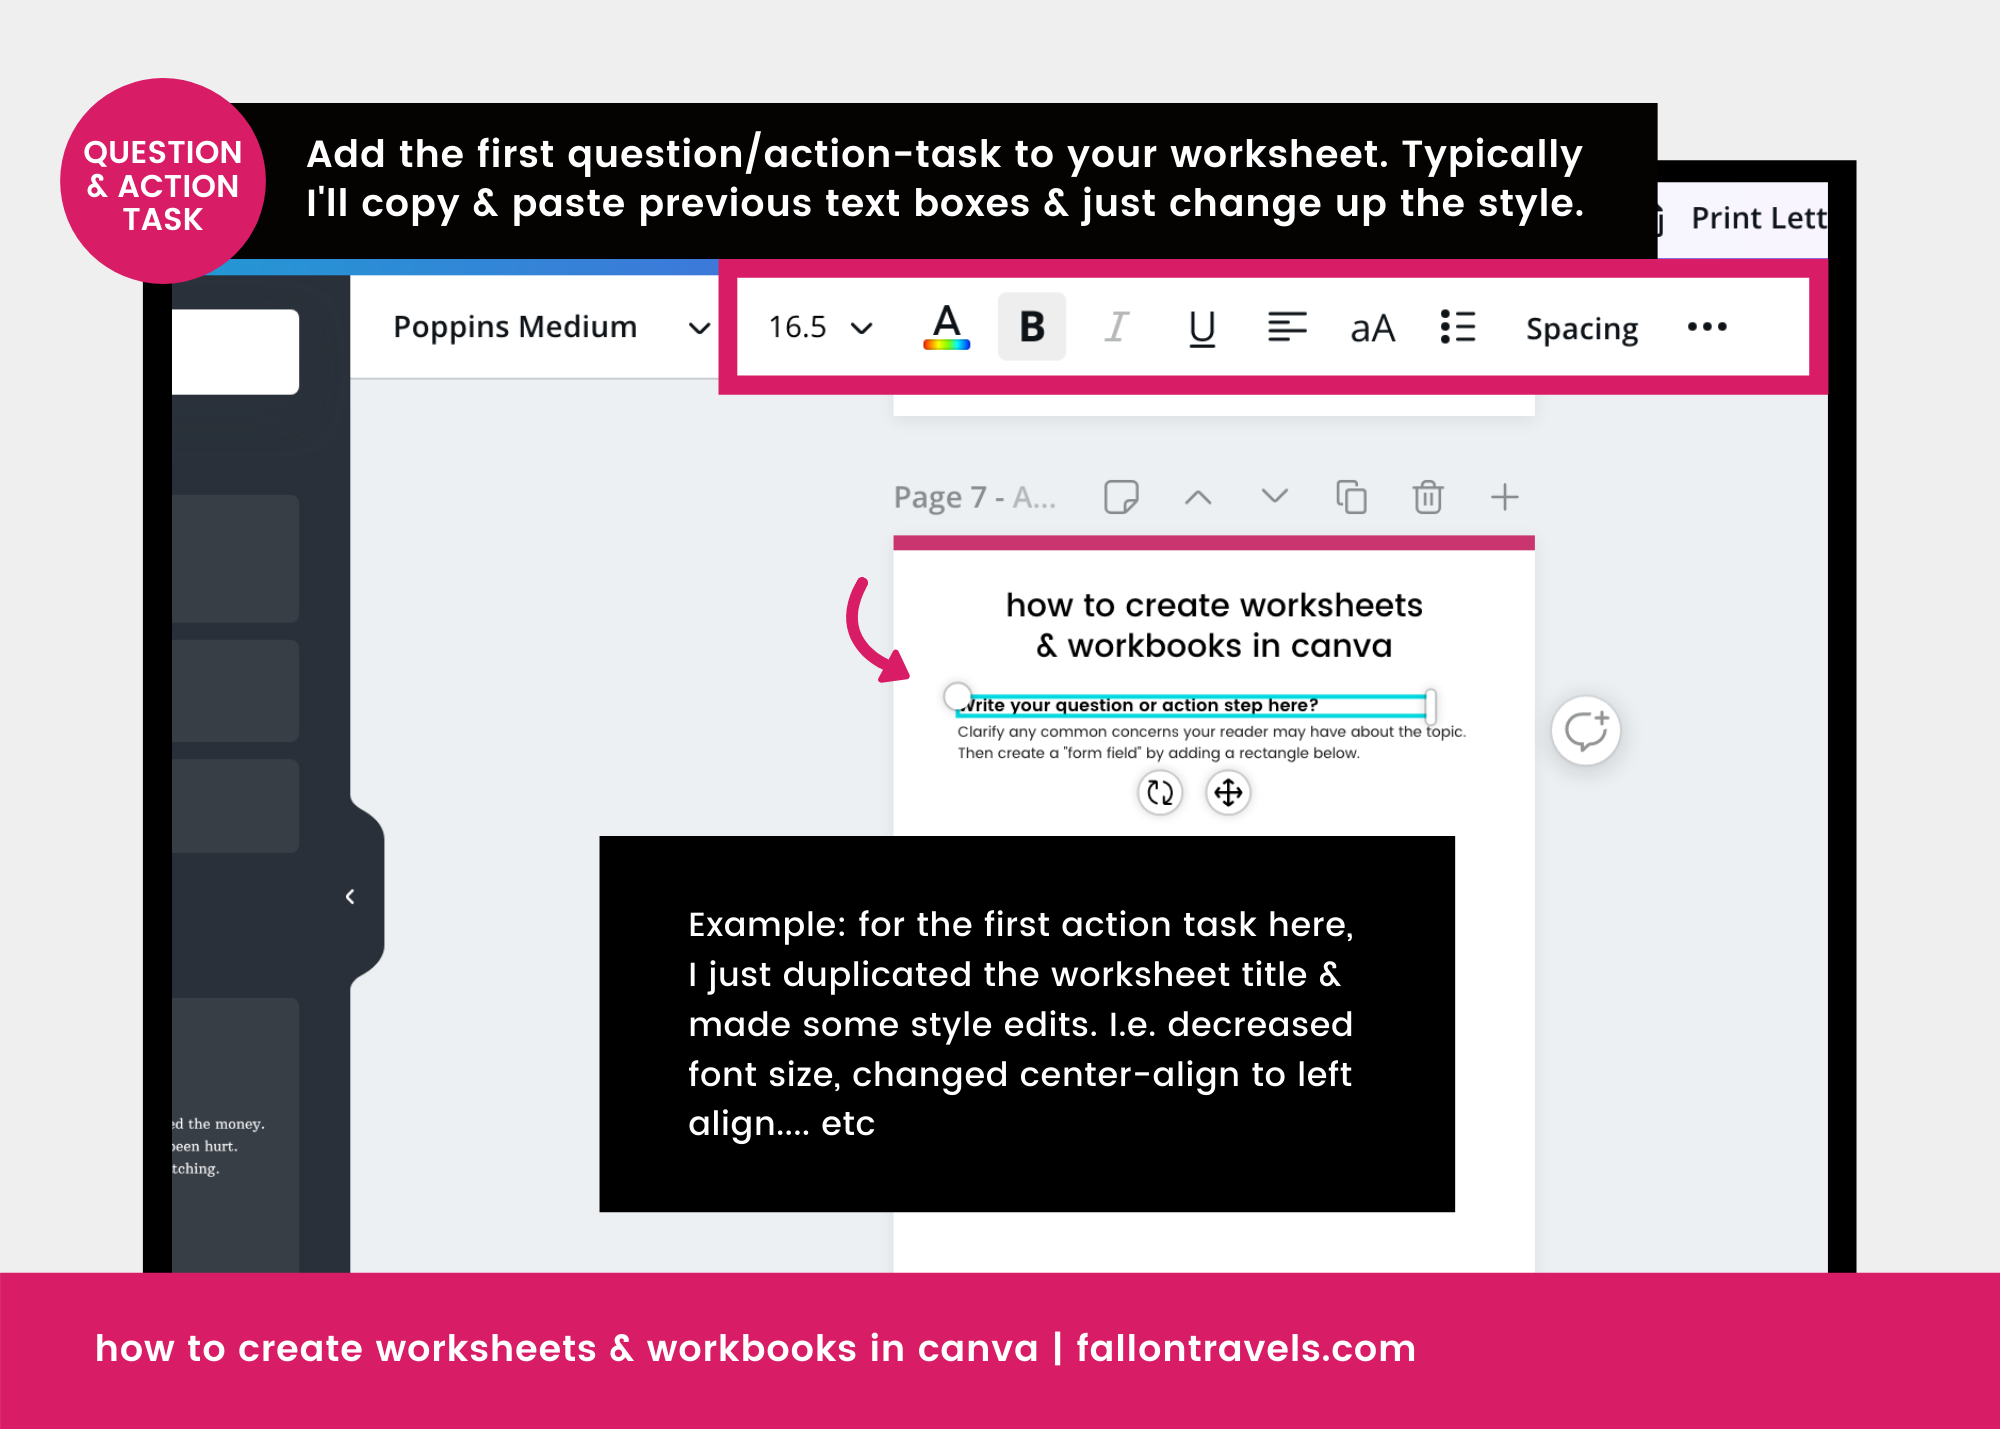
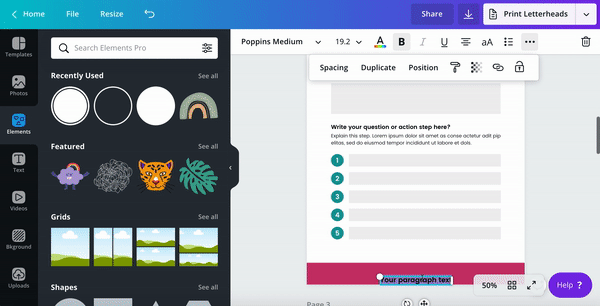
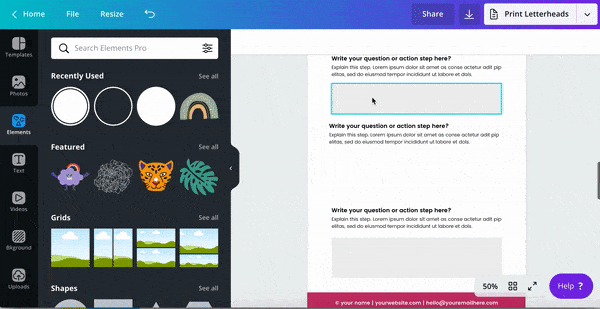
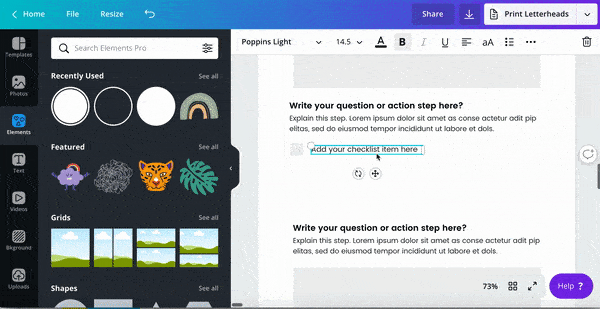
You can add a text box for the question using any of the methods we talked about earlier.
I’ll typically just make a duplicate copy of any text boxes that already exist on my page (i.e. the worksheet title). From there, I’ll make any necessary style edits, such as:
Decreasing/increasing font size
Changing text alignment
Adjusting font weight
You can also add a 1-2 line summary right under your question… so your readers know exactly what you’re expecting from them.
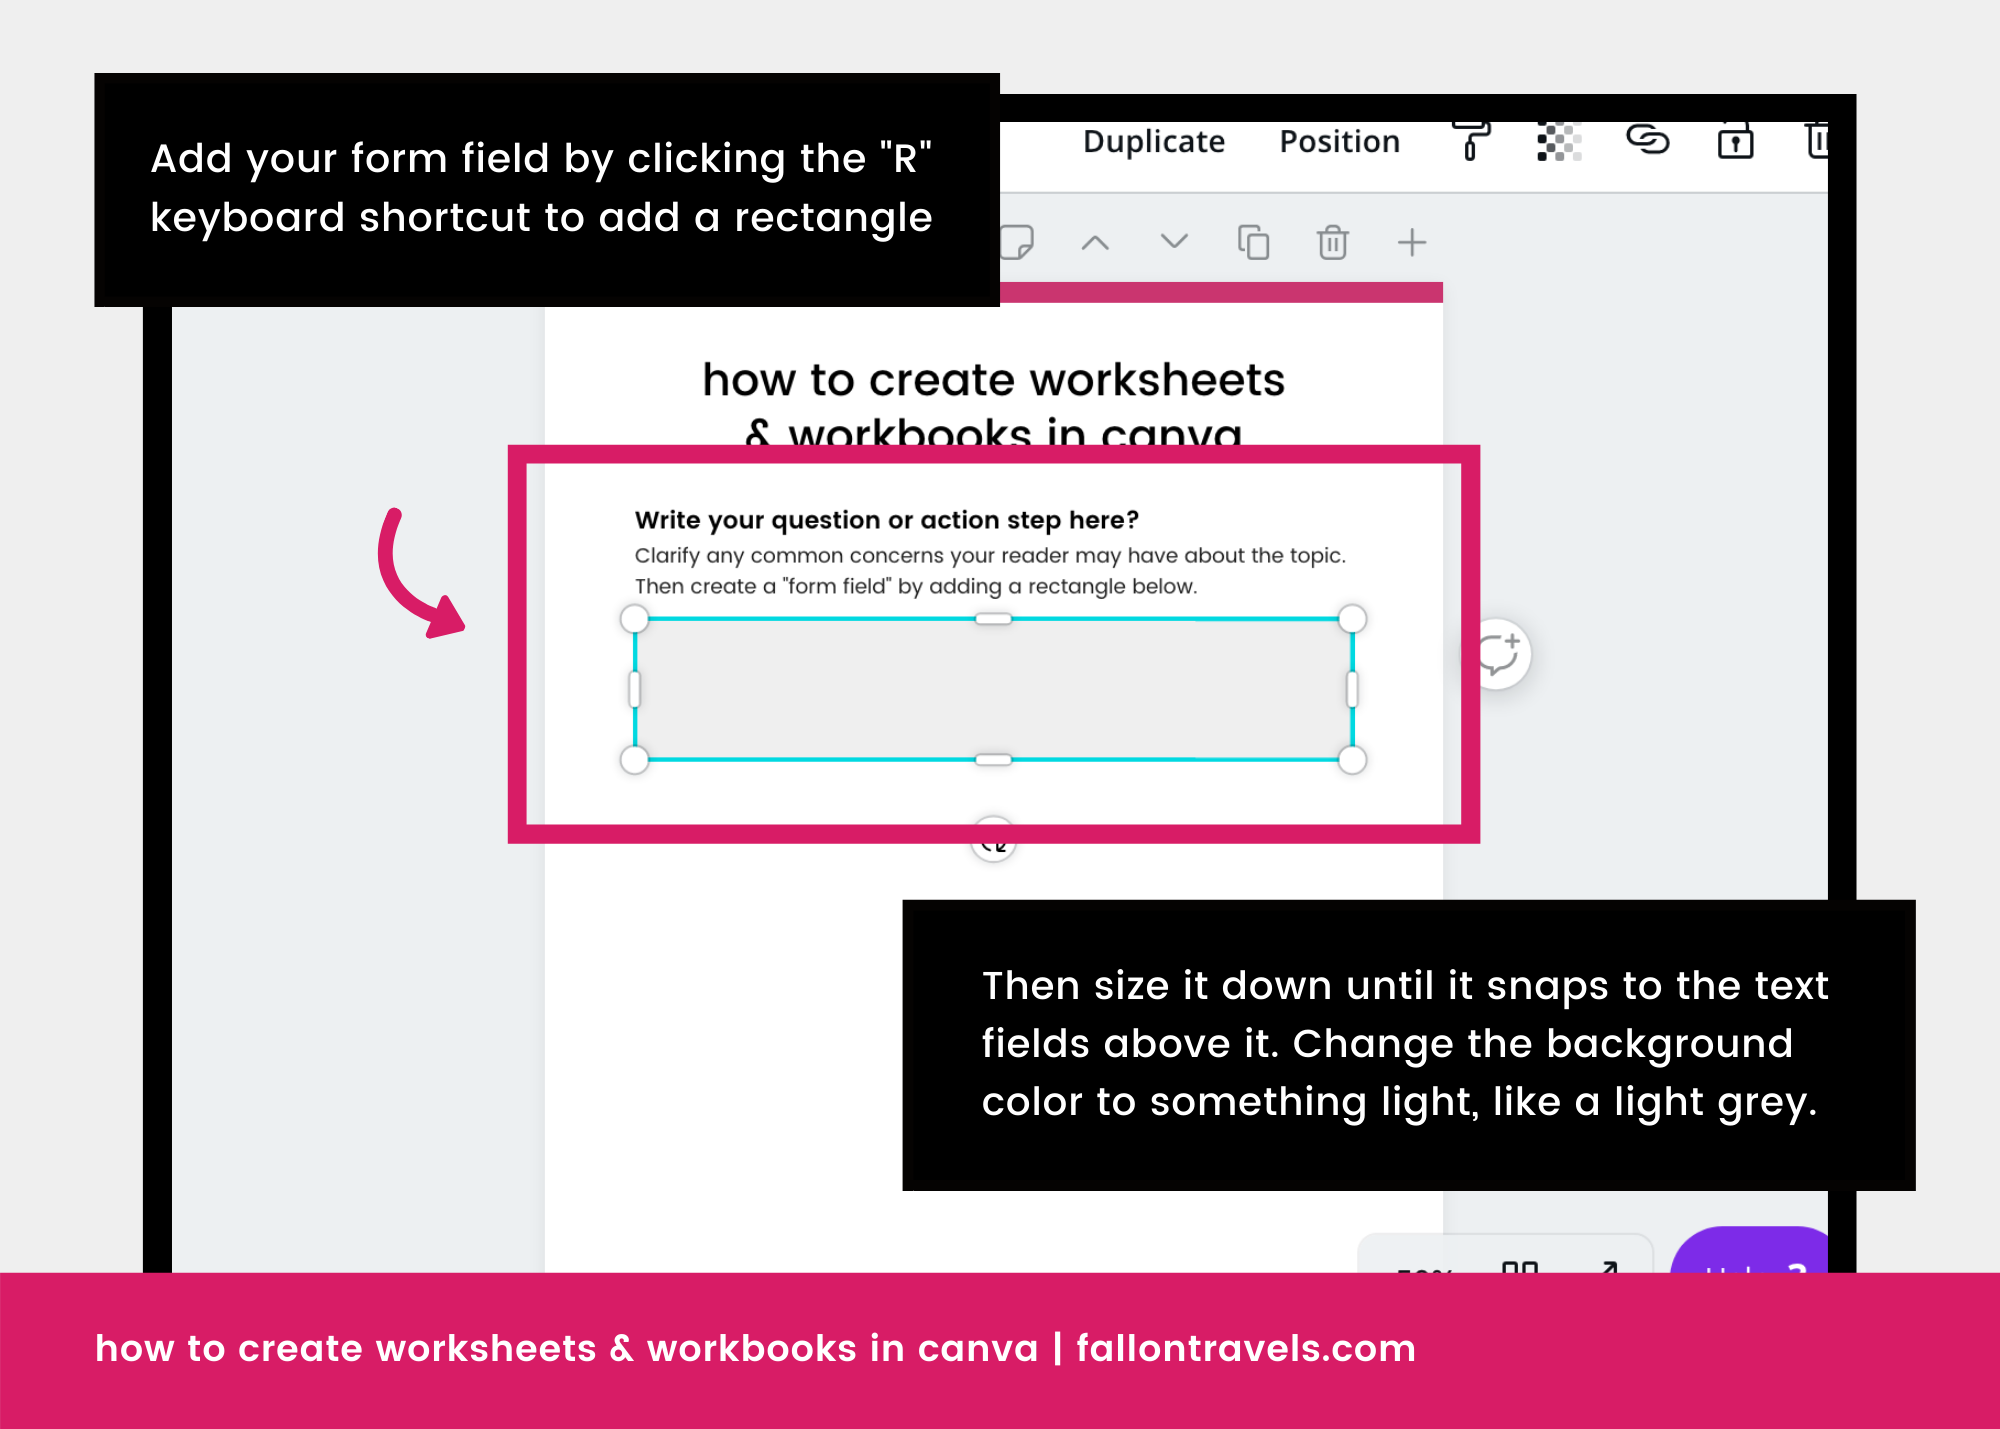
Then you just need to pop in a form field… you know, so your audience can actually use the worksheet!
Again, just use the “R” keyboard shortcut to add a rectangle to your page, then size it down until it snaps to the text fields above it.
Change the background color to whatever you’d like… I typically just go with a light grey.
7. How to add style to your worksheet templates
Come on— let’s be real. You probably don’t think of worksheets or workbooks as being the most fun opt-in freebie to create for your audience…
… but they can be if you add a few simple design elements to give your templates a more stylish, modern look!
So while you could just make a duplicate copy of the existing worksheet elements until your page is filled…
…I’m gonna show you a couple tricks to not only speed up your Canva design workflow, but to create an eye-catching worksheet your audience will love.
PS: This section does require some GIF animations to show you my screen… but they’re a bit fast-paced. I had to try & optimize the files as much as possible, so please just bear with me here. :)
So the first thing you need to do is group the text/workbook elements together from the first action task (this ensures that everything stays nice & clean… and aligned!).
Next, you’ll need to make a duplicate copy of the grouped elements and drag them into place below the first set of elements.
PS—you can save some time with these Canva keyboard shortcuts:
Group elements: cmd/ctrl + “G”
Ungroup elements: shift + cmd/ctrl + “G”
Duplicate selection: cmd/ctrl + “D”
The next thing you’ll need to do is ungroup the elements, then drag the form field (the one in the 2nd element set) up & over to the right as shown in the GIF below.
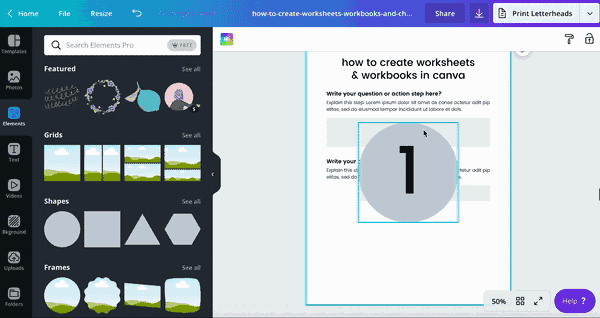
From there, add a circle to your page by clicking the “Circle” shape from the elements tab…
Add a text box on top of the circle
Type the number “1”
Then enlarge your font so it fits snug inside the circle.
You can then scale both the circle & number down at the same time by selecting both elements & holding the “Alt” key while dragging down on the corners

Change the color of your circle/font to match your brand
Scale the circle down so it fits right in line with the grey workbook form field
So this next part might seem a little confusing (sorry!). Follow along the steps below, but feel free to leave a comment below if you need any help/ want some extra design tips— I’d be happy to help!
To create multiple numbered workbook fields, follow these steps:
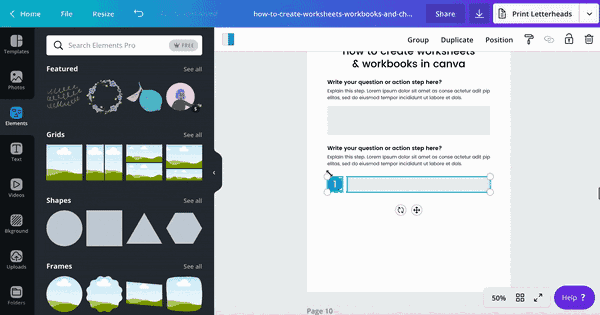
Group the circle, number and workbook field together (if your circle/number are currently grouped, you’ll need to ungroup these first & then regroup all 3)
Next, click “position” to move the grouped element to a central location. I’m choosing, “center” and “middle”
From there, make 4-5 duplicate copies of the element and position them to the same location as the first (remember, Cmd/Ctrl + “D” is the duplicate shortcut)
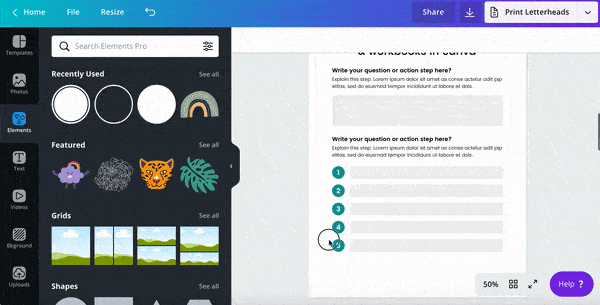
Click on the top layer, and drag it down until you can see the grouped element underneath
Drag down all of the grouped elements until there is an equal amount of space in between each one (but don’t let go of the originals while you’re dragging down!).
You can see all this madness for yourself in the GIF below!
Hopefully that explanation wasn’t completely awful (lol)… I have a few Canva video tutorials planned out over the next few weeks, so I’ll definitely be updating this article once they’re published!
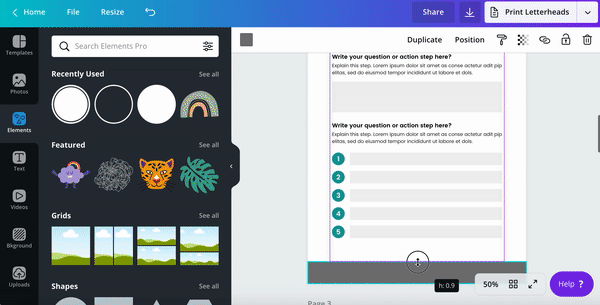
8. Add a footer to your Worksheet & Workbook Canva templates
You’ll also want to add a footer section that includes your website & biz info to each of your worksheet, workbook and opt-in freebie templates.
To add a footer, follow the steps below:
Add a rectangle to your document using the “R” keyboard shortcut
Click “Position” in your toolbar at the top & choose “Bottom”— this ensures your rectangle is sitting right at the bottom of your document
Pull both sides of your rectangle until they reach the edges of your template
Again, you can do this all at once by holding down the “Alt” key & dragging both sides until they meet the edges
Now pull the top of your rectangle down as far as you want to create your footer
Change the background color by going up to the editor & choosing a color swatch. I’ll typically either choose black (Hex code #000000) or one of my brand colors for the footer, but totally up to you
Now add a text box for your name & copyright info, website etc by using the “T” keyboard shortcut
Type something like “© your name | yourwebsite.com | hello@youremailhere.com”
Drag the text box & position it right in the center of the rectangle we just created. If you can’t get it just right, click “Position” in the editor & choose “center” to align the text
Make sure that your font is visible by choosing a color that creates contrast from your background color, and try different variations of the font (i.e. light, medium, bold)
And voila! Your footer is ready to go. :)
How to design a checklist template in Canva
A checklist template is going to include the exact same process for all steps listed above, except you’ll add checklist boxes to the template so you can create step-by-step action tasks for your reader.
So, using the “copy from one design to another” Canva hack we talked about earlier, we’re just going to duplicate the worksheet page into a new document.
Once you’ve duplicated the page, you can go ahead & delete the header title.
You can then move the first workbook section up towards the top of your template.
Delete the circle/numbered section of the second half of the worksheet template.
From there, you can convert this part of the template into a regular workbook section as shown in the GIF below.
Duplicate one of the workbook text box sections as shown below, and move it towards the middle of the template— this will be our “checklist” section for the page.
Duplicate one of the grey boxes & scale it down to the size of a “checkbox”— basically, you just want a small grey box sitting under this middle section.
Add a text box for your checklist item, and position it right next to the grey checkbox you just created.
From there, just follow these steps & you’ll be good to go:
Group your text box & checkbox sections together
Duplicate as many sections as you need & line them up with an equal amount of space in between each one as shown in the GIF below

How to download your workbook as a PDF in Canva
Exporting your workbook as a PDF document is a piece of cake in Canva! Just follow the steps below:
Click the download icon at the top of your screen
You’ll have two PDF file types to choose from:
PDF Standard
PDF Print
I recommend opting for PDF Print… it’s’ Canva’s suggested file type & it’s much higher quality than standard!
How to use PDFescape to make your worksheets & checklists fillable
You might want to make your worksheets, checklists & workbooks more interactive for your audience by making the form fields fillable.
While you unfortunately can’t do this in Canva…
…you can add the fillable fields quickly and easily using a free online tool called PDFescape (whoop whoop!).
OK, let’s create this bad boy.
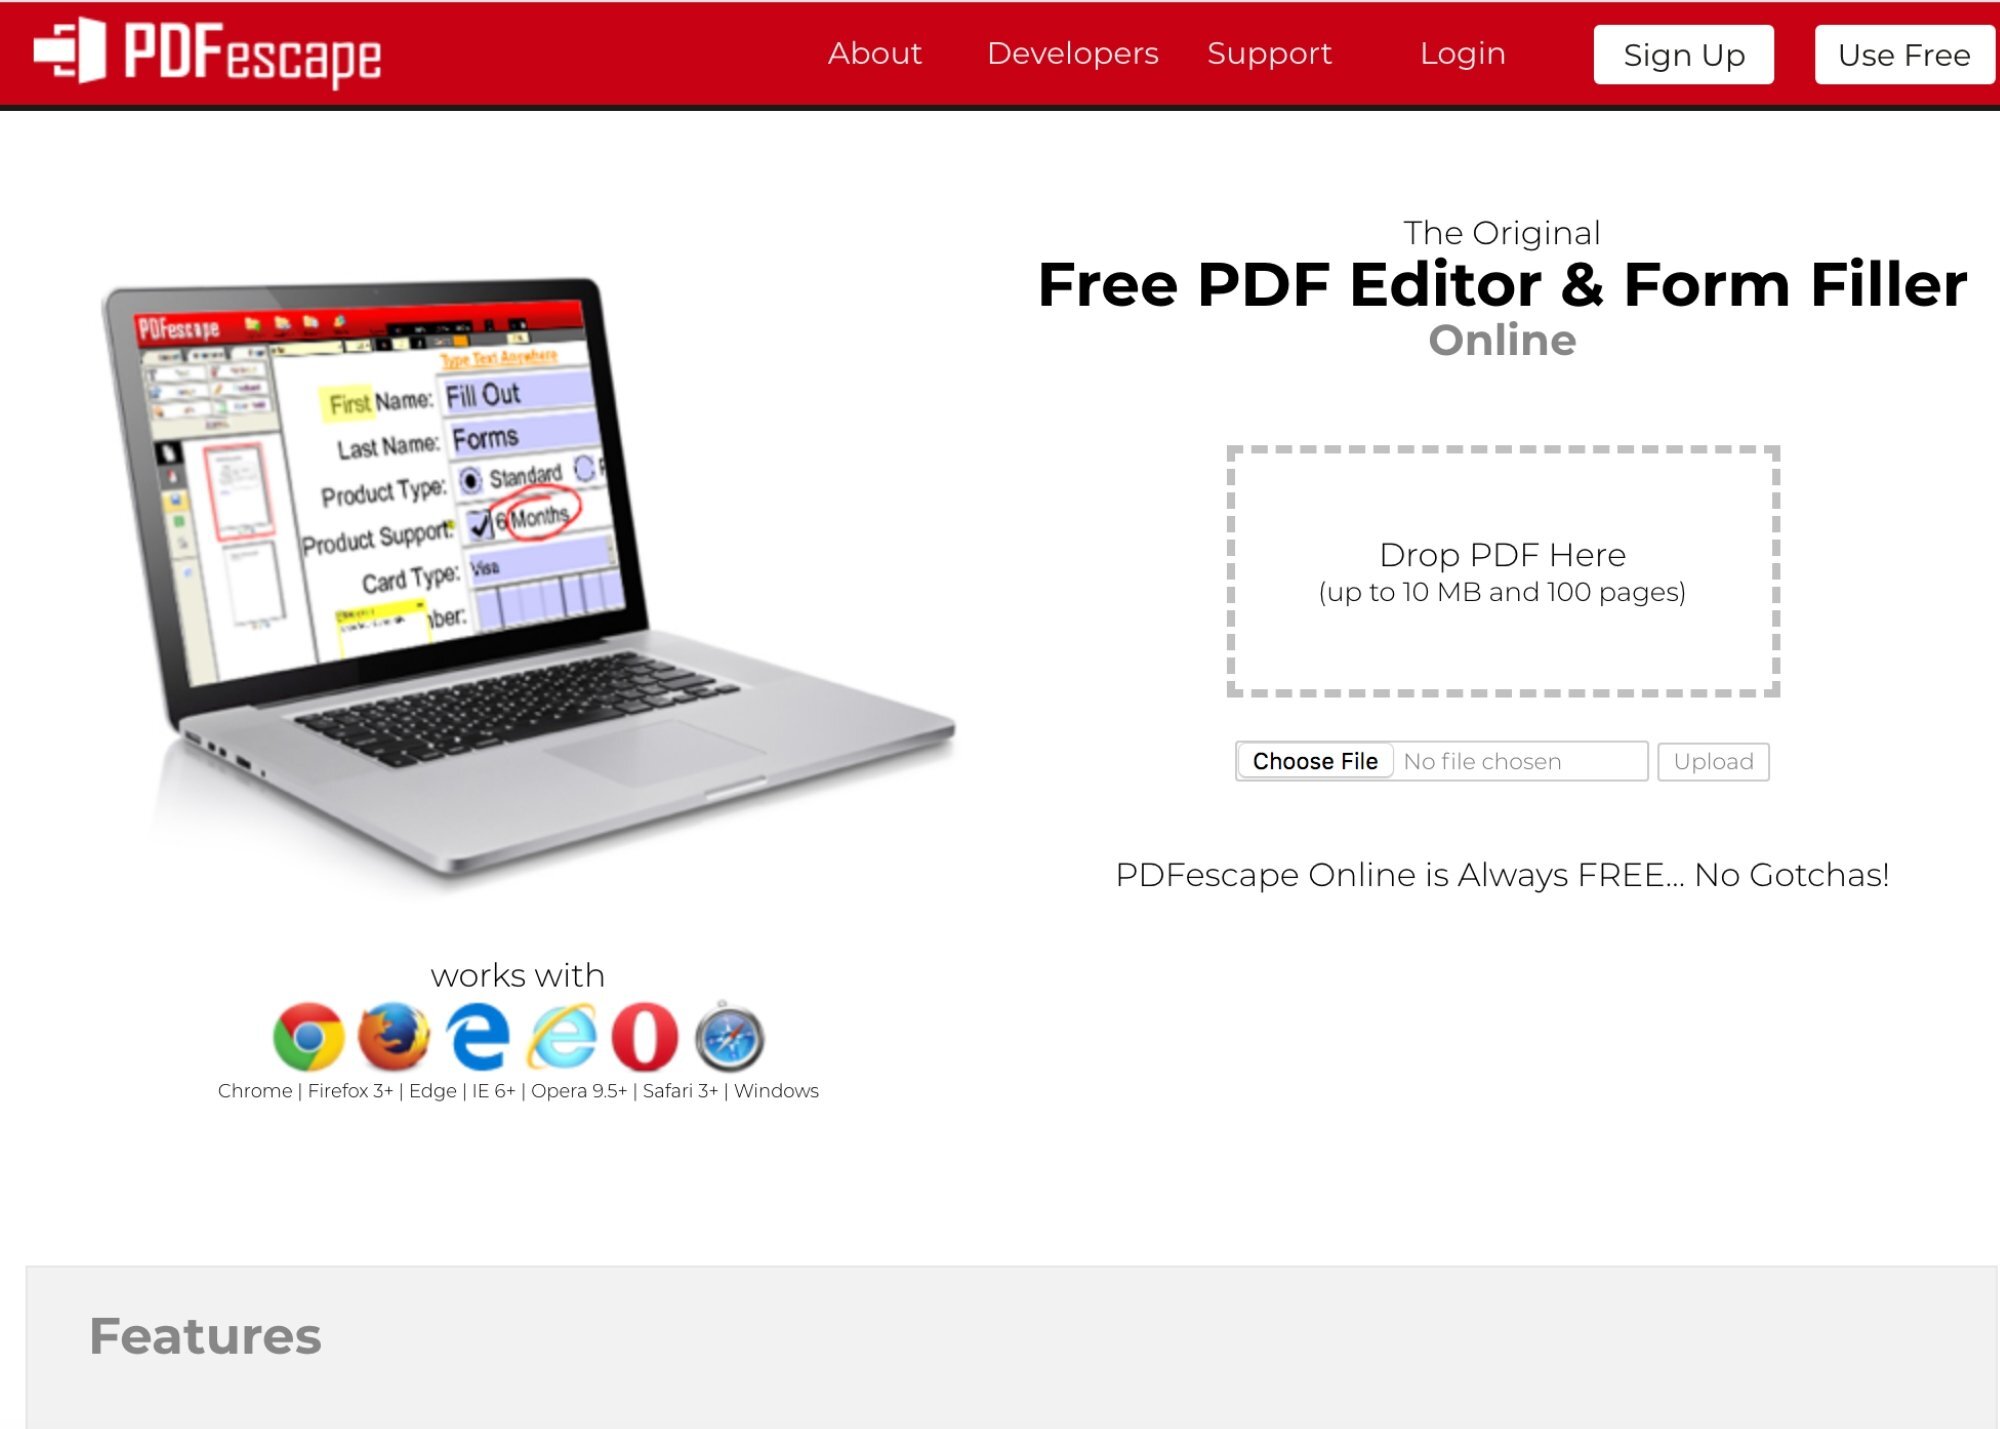
Step 1: Go to PDFEscape.com
You should see something like this…
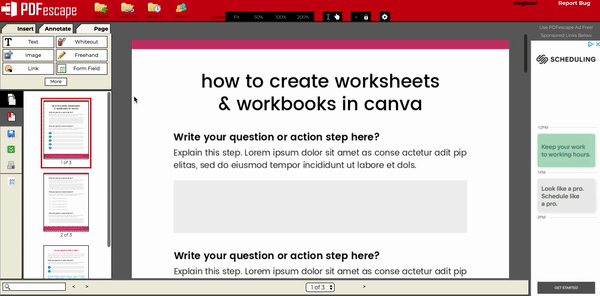
Step 2: Upload your file
First, you should see an upload area that says, “Drop PDF Here”.
Click this, then select the Worksheet you just exported to your desktop from Canva.
Once you’re in the editor, you’ll just need to scroll down to each of the worksheet pages you added work/form fields to.
Step 3: Add a Form Field
Click Form Field from the options on the upper left-hand side of your screen, and you should see a little pop-up (shown in the GIF below).
Make sure that Type is set to the option that says Text. Click the Select button.
Now you’ll just need to click the form field & drag the rectangle out by it’s corners to match the area where you want the form to include a text box.
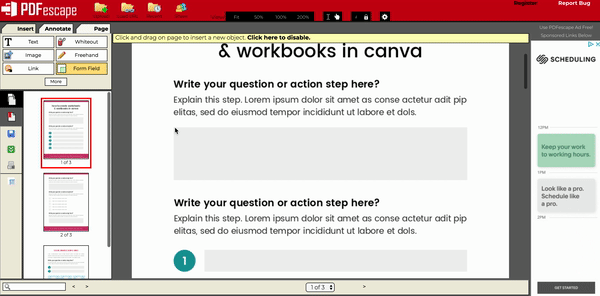
You can change the font & size at the top.
From there, you’ll want to:
Right-click on the rectangle shape
Click “Object Properties”
Check off, “Multi-line”
Now you can click OK, and that’s pretty much all there is to it!
Once you’ve filled out all your boxes & you’re ready for export, click the download button on the left-hand side of your screen (it’s the little green down arrow button)
Open it up just to test that it works, and you should have yourself a fillable PDF worksheet. :)
Final Thoughts on Canva Worksheets, Workbooks & Checklists
Wowzers…
…if you made it all the way down here— then I seriously salute you, my friend.
I hope this article was super helpful (and not too overwhelming…) and that you’re now feeling well-equipped to create an amazing lead magnet that your audience will love.
If you’re feeling confused about anything in this blog post, then go ahead and drop a comment below— I’d be more than happy to help ya out!


