How to Create a Drop Shadow in Canva (with just one-click!)
Disclaimer: Hey there, friend! This article includes affiliate links for Canva (a design tool I use, love & swear by) and I would love if you decided to use them. Affiliate links help creators like me to fund the free content that we provide on our blogs. Thank you for your endless support!
Alert the media! After a long awaited arrival, Canva has finally rolled out a feature that’s been requested by its users for years— the one-click Drop Shadow effect.
Until the February 2021 rollout, it’s been a very tedious process to try and achieve a realistic drop shadow effect in Canva.
This usually required complicated workarounds such as uploading shadow images to Canva in various dimensions and placing them behind elements. But now that madness is officially a thing of the past!
This feature, which is available for both the free version of Canva and Canva Pro, means that you can now easily add a drop shadow to any of your images and design elements (no Photoshop or fancy apps required). Please keep in mind that this feature is currently only designed for the desktop version of Canva.
If you’re ready to level up your Canva design skills and create stunning, realistic mockups for your digital products and opt-in freebies, then read along to learn how to easily add a drop shadow in Canva with this new time-saving feature.
Let’s get to it!
Try Canva Pro free for 30 Days
If you don’t have one already, make sure you sign up for a Canva account. You can create amazing designs with the free version, but I personally recommend opting for Canva Pro if you plan on batch creating graphics for your blog, social media account or business website.
Canva Pro is incredibly affordable and you get unlimited access to over a million elements, premium stock photos, fonts, graphics and other design features. The subscription cost is truly such a small price to pay for all that you get in return!
And if you click that little image below, you can take Canva Pro for a spin, completely free for 30 days!

Related: Canva Pro Review: Should you upgrade?
1. Create Your Design
Go to your Canva home page and click ‘Create a design’.
For this particular example, it doesn’t matter which dimensions you choose. You can either create a new post or select an existing graphic.
I’m using one of my digital product mockup templates for this post because that’s what I typically add drop shadow effects to.
Shameless Plugin: You can find tons of digital product mockups in my Instagram Engagement Template Bundle for Canva!
2. Add the Image You Want to Apply Your Drop Shadow to
You can now select (or upload) an image that you want to apply your drop shadow to. Here’s a few examples if you need some inspiration:
Digital product mockups
Tech mockups (i.e. laptop, iPad, iPhone)
Opt-in freebie mockups
eBook mockups
Physical product mockups (i.e. makeup container, t-shirt mockup)
For this example, I added an image of my Instagram content calendar freebie that I created using my Canva eBook and Worksheet Template Bundle.
Just click on the ‘Uploads’ tab or create a new folder to organize your images (Canva Pro users only).

3. Connect the Shadows Effect to Your Canva Account
Select the ‘Edit’ option located at the top of your Canva editor and head to the ‘Shadows’ section.
If you don’t see the ‘Shadows’ effect right away, it will be located under a section that says ‘You may also like’.
Select ‘See all’ under the Shadows section and connect the feature to your Canva account (this will only happen the first time you use the effect).
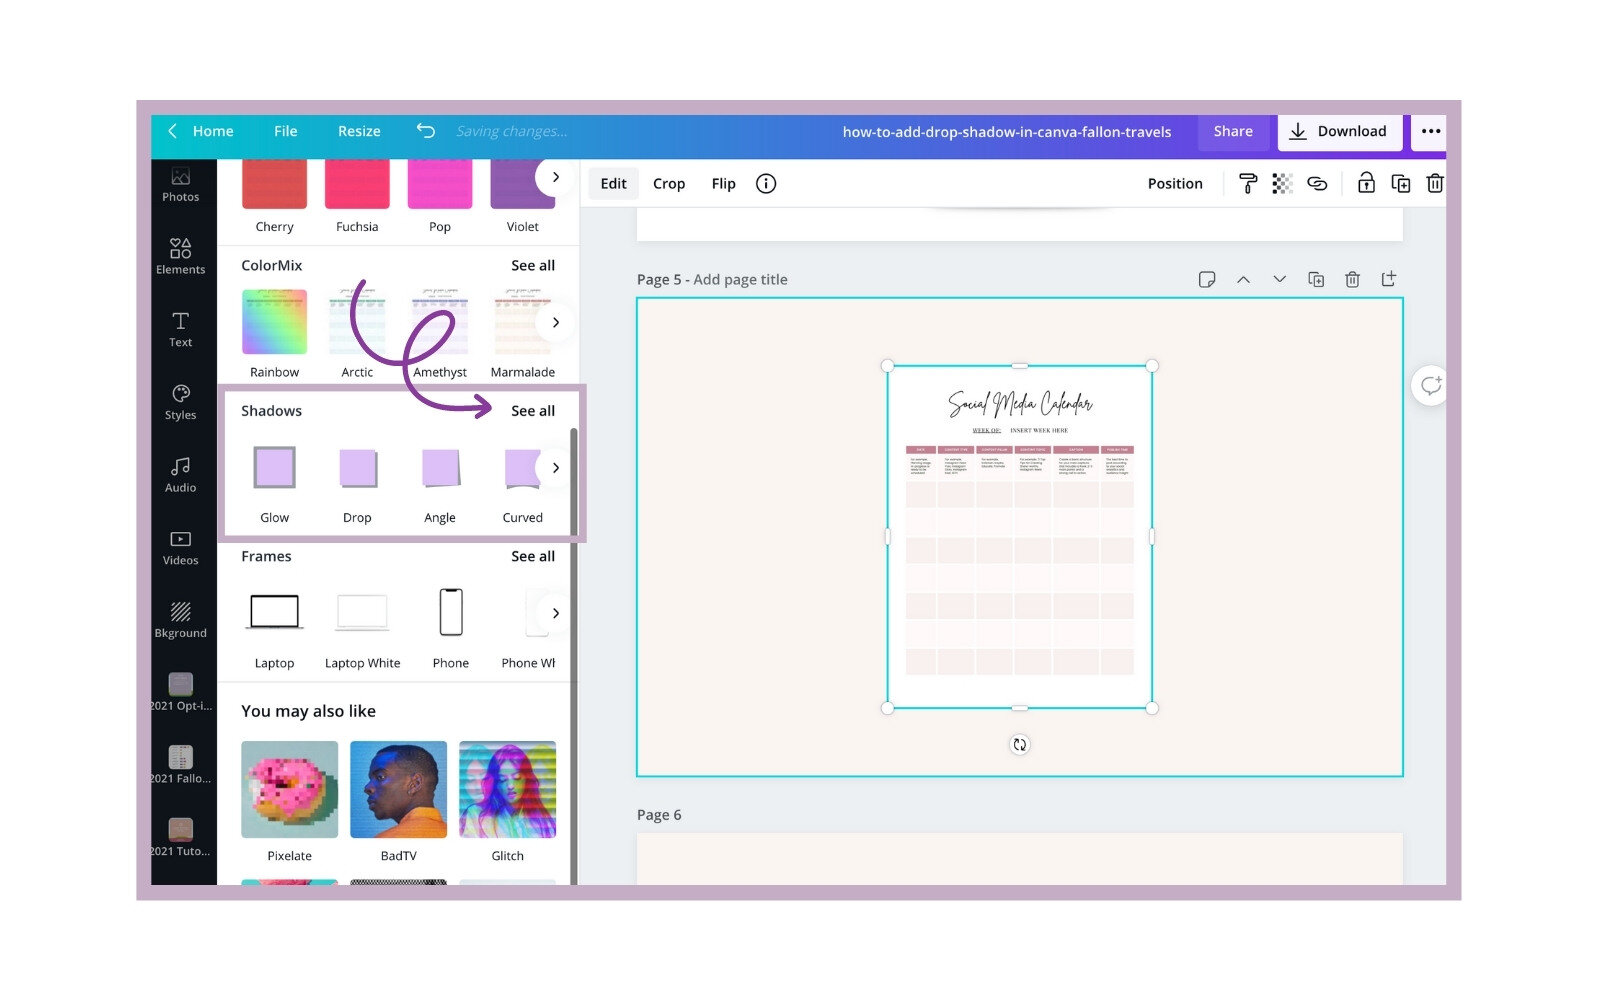
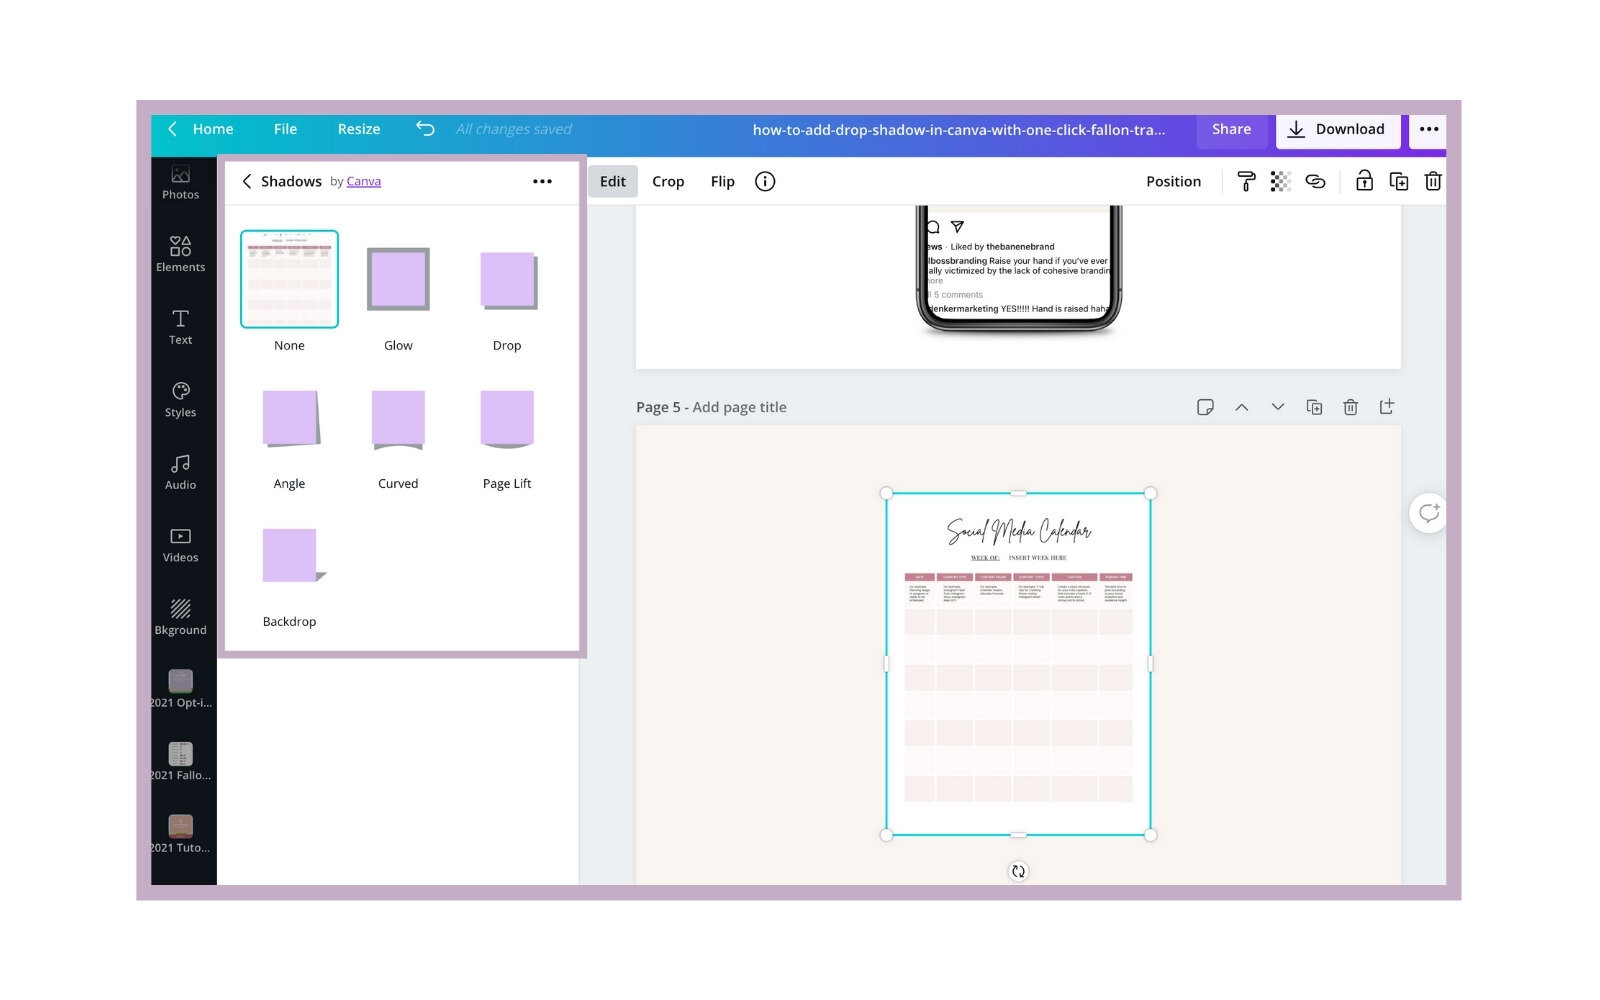
4. Select a Style for Your Drop Shadow
You will then be able to choose from the following drop shadow styles:
Glow
Drop (my favorite!)
Angle
Curved
Page Lift
Backdrop
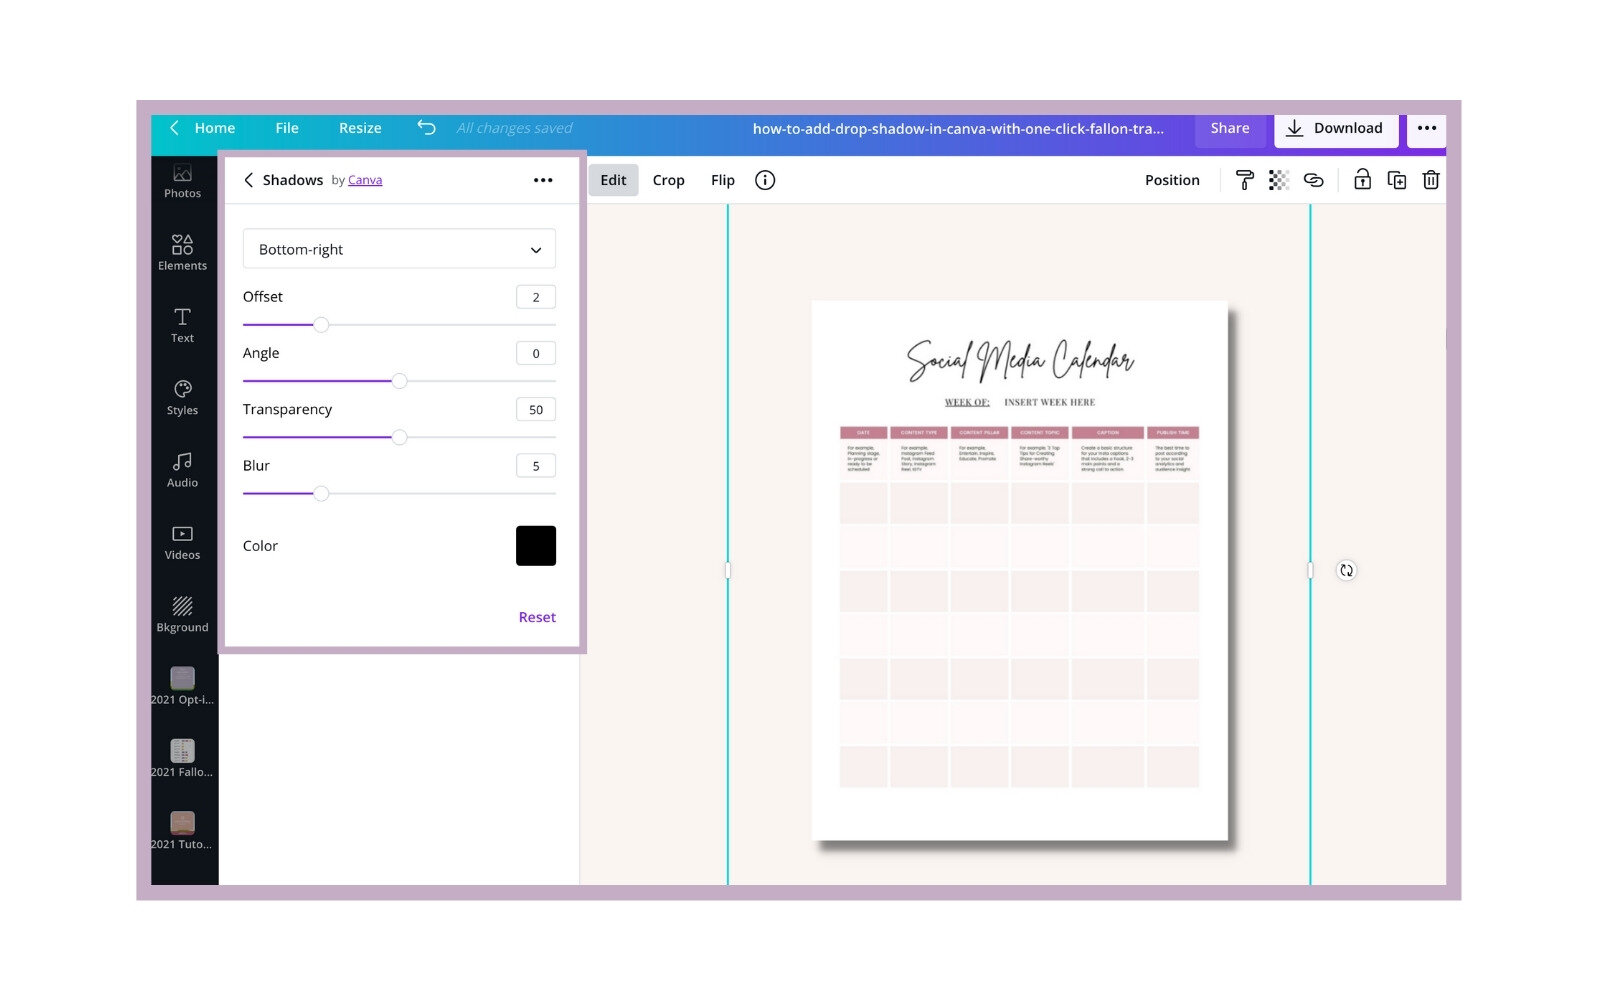
5. Make Adjustments to Your Drop Shadow
You can now make any adjustments necessary to create your ideal drop shadow! This may take some practice and playing around to see what settings work best for your specific images/style.
You’ll be able to change the following Shadow settings:
Placement of your shadow (this will have a dropdown box)
Offset
Angle
Transparency
Blur
Color
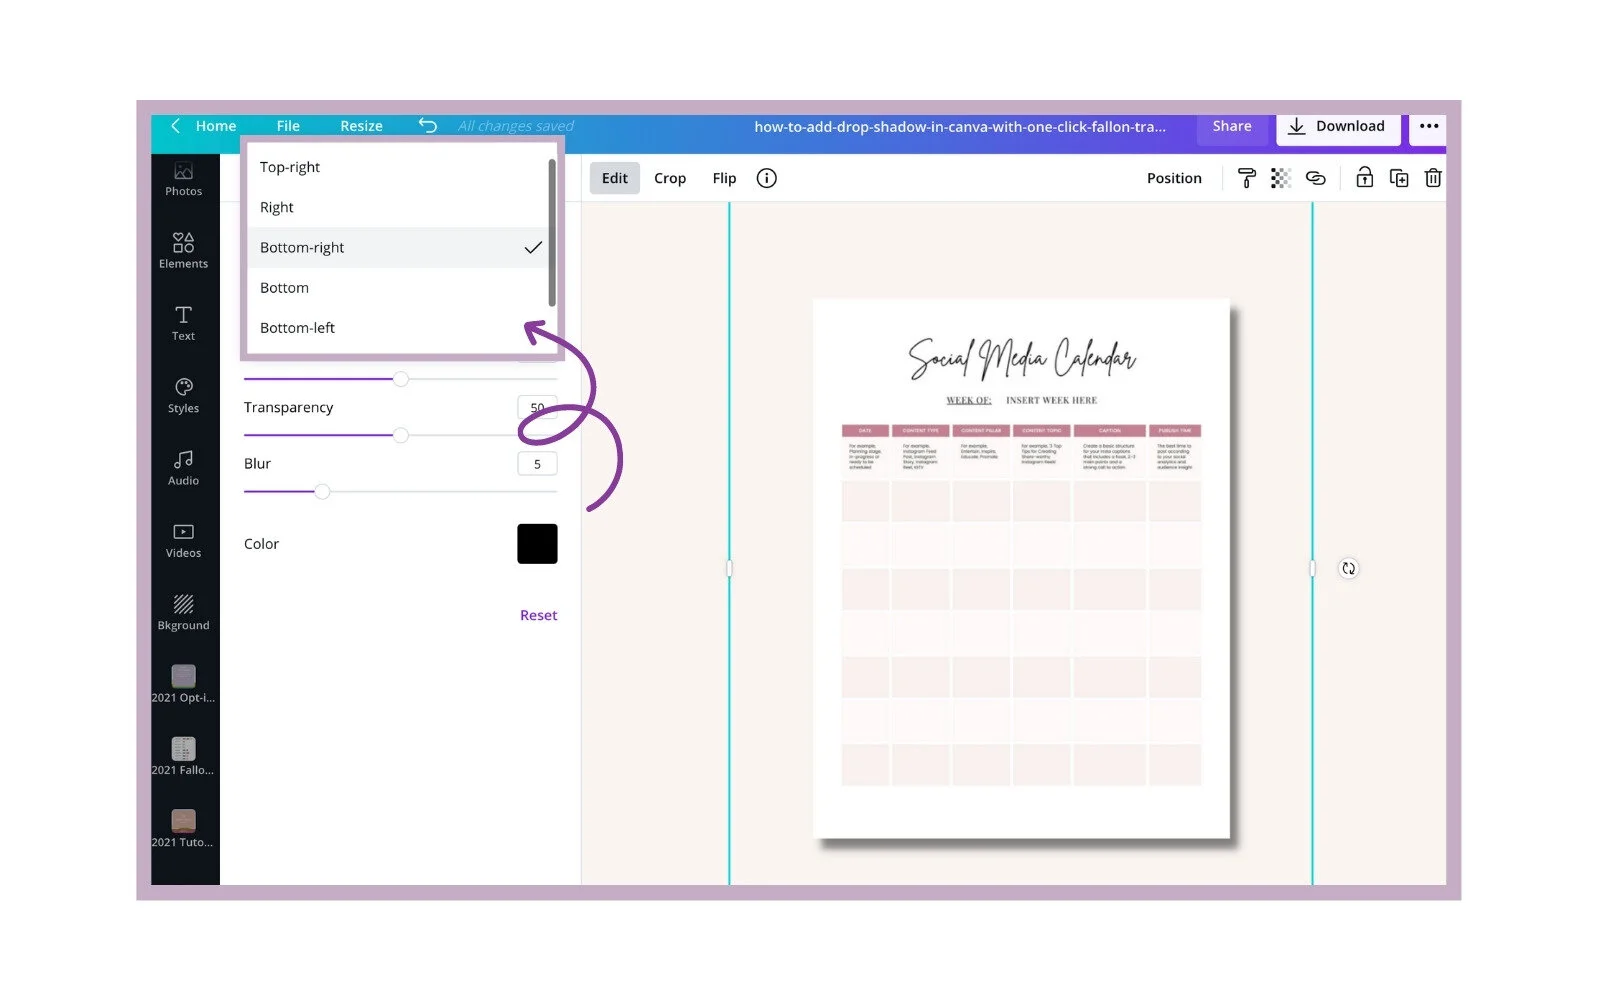
Once you click the dropdown to select a placement for your shadow, you’ll be able to choose from the following options:
Top-right
Right
Bottom-right (what I typically use for drop shadows)
Bottom
Bottom-left
And that’s it! You just made a realistic drop shadow in one-click with Canva. :)
If you enjoyed this, share the love!
I hope you found this guide to creating drop shadows in Canva helpful. If you did, feel free to save it for later by pinning any image in this article to one of your boards on Pinterest!
Are you as excited as I am about this new Canva feature? Let me know in the comments below!